conwyBlog articles by Jonathan Conway2026-02-18T00:00:00.000Zhttps://conwy.coJonathan Conwayjon@conwy.coAI concepts for developers2026-02-18T00:00:00.000Zai-concepts> Summary: Core concepts in the AI landscape include:
> - **Prompts** and **Commands** issued by humans to Assistants
> - **Assistants** that use LLM technology to provide useful output
> - **Models** (LLM) that Assistants query
> - **Skills** and **Tools** that augment Assistants with useful capabilities
> - **Commands** issued by humans to Assistants for immediate action
> - **Agents** and **Sub Agents** that complete tasks autonomously
> - **Plan mode** issued by humans to Assistants for immediate action
> Pull-quote: So I now seem to be able to lay it down as a general rule that whatever I perceive very clearly and distinctly is true.
>
> – DESCARTES • _Third Meditation_
I've seen questions of definition come up lately around AI.
What is an agent? What is the difference between skills and agents? How should I decide which to use when?
In this article, I will try to clarify these into "clear and distinct" concepts. To provide a clear definition of each, when they're used and how they relate to eachother.
I'll aim to do all this in an assistant-agnostic way, so you can use them with Claude Code, OpenAI Codex or any other assistant or framework.
## Assistant
An assistant is a piece of software that takes human input and uses LLM technology to provide a useful output, such as a reply, code changes, etc.
Assistants are typically implemented as mass market software applications by major AI firms such as OpenAI, Claude, Google and Microsoft.
Predominant assistants, at the time of writing, are:
-  [Claude Code](https://claude.com/product/claude-code)
-  [GitHub Copilot](http://copilot.microsoft.com)
-  [OpenAI Codex](http://openai.com)
-  [Google Antigravity](https://antigravity.google)
-  [Cursor](https://cursor.com)
Up-and-coming smaller players include:
-  [V0 by Vercel](https://v0.app)
-  [Devin](https://devin.ai)
-  [Roo Code](https://roocode.com)
-  [Lovable](https://lovable.dev/)
-  [OpenCode](https://opencode.ai/)
```mermaid--svg
%% @description Assistant and its relationship to human and model
flowchart
Human -->|chats with| Assistant
Assistant -->|queries| Model
Assistant -->|performs| Action
Action --- Response
Action --- Task
Action --- Coding
Action --- etc
Human["🤷 Human"]
Assistant["🤖 Assistant"]
Model["📀 Model"]
```
## Model
A model is, at core, a very big [vector database](https://en.wikipedia.org/wiki/Vector_database). This is a kind of database in which searches can be done semantically, by similarity. This structure and search interface, at a large scale, is what enables models to take human language as input and provide useful output.
Vector search algorithms and databases have been around since the early days of Google, but it's only more recently that the technology was generalised to widely available database systems and combined with deep learning algorithms to produce large language models (LLMs).
Predominant large language models at the time of writing, include:
- [GPT series](https://en.wikipedia.org/wiki/Generative_pre-trained_transformer) from OpenAI
- [Claude Opus series](https://en.wikipedia.org/wiki/Claude_(language_model)) from Anthropic
- [Gemeni](https://en.wikipedia.org/wiki/Gemini_(language_model)) from Google
Many assistants allow you to select which model you want them to use. For example, Claude Code allows you to select between various Opus series models, Sonnet and others. You can select the most appropriate model for your use case, based on factors such as performance, cost and specialisation.
```mermaid--svg
%% @description Predominant large language models
flowchart
Model["📀 Model"]
GPT -->|is a| Model
Opus -->|is a| Model
Gemeni -->|is a| Model
Assistant["🤖 Assistant"]
Model -->|is used by| Assistant
```
An extension of models is RAG (Retrieval Augmented Search), a software pattern by which assistants can look up additional information to supplement that found in models. This can allow assistants to incorporate more up-to-date or detailed information than is found in models, such as weather forecasts or stock prices. New models are published every few months or so, similar to software update cycles, whereas RAG can enable information to be looked up on demand, such as when the assistant is prompted.
```mermaid--svg
%% @description Model - RAG interaction
flowchart
Model["📀 Model"]
RAG["Retrieval Augmented Search (RAG)"]
Model -->|looks up data on-demand| RAG
Example1["Example: 🌤️ Weather forecast"]
Example2["Example: 📈 Stock prices"]
RAG --> Example1
RAG --> Example2
```
## Prompt
Prompts are texts written in human-language and submitted to assistants for processing, either by humans or agents.
```mermaid--svg
%% @description Human-assistant prompting
flowchart
Human["😎 Human"]
Prompt["💬 Prompt"]
Agent["🖥️ Agent"]
Assistant["🤖 Assistant"]
Human -->|engineers| Prompt
Prompt --> Assistant
```
```mermaid--svg
%% @description Agent-assistant prompting
flowchart
Developer["😎 Developer"]
Prompt["💬 Prompt"]
Agent["🖥️ Agent"]
Assistant["🤖 Assistant"]
Developer -->|engineers| Agent
Agent -->|generates| Prompt
Prompt --> Assistant
```
Good prompts are specific and carefully structured so as to generate useful results from assistants. Prompt engineering is the art and science of writing effective prompts.
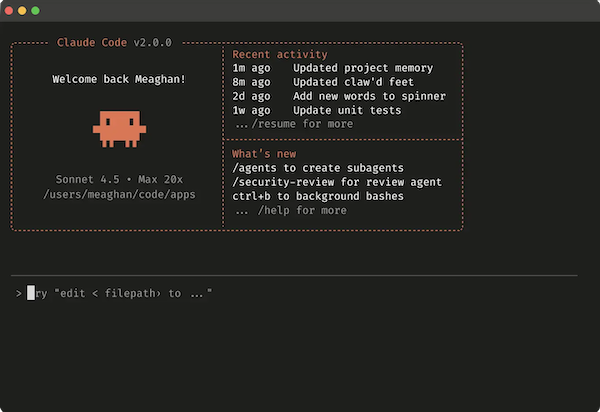
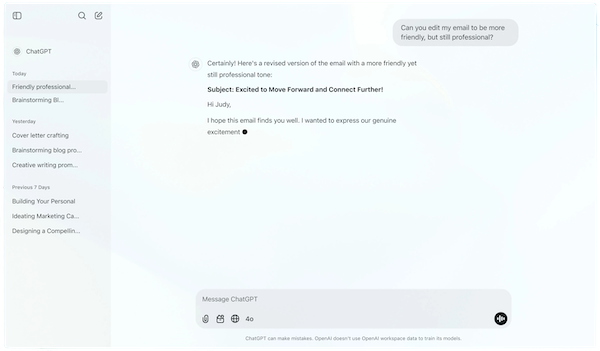
Prompts are typically written by humans (or re-used from shared prompt libraries) and submitted via a web interface, command line interface or IDE extension.
Prompt interfaces:
- Claude
- Web interface: https://claude.ai
- Command-line interface: `claude`
- Copilot
- Web interface: https://copilot.microsoft.com
- IDE extension: https://code.visualstudio.com/docs/copilot/overview (VS Code)
Prompt libraries:
- https://github.com/0xeb/TheBigPromptLibrary
- https://github.com/karpathy/LLM101n
Prompts can also be generated on-the-fly by software, including agents. For example, a customer support agent could receive support requests from customers and convert them into prompts which generate a suitable conversational reply from an assistant.
## Context
> Pull-quote: Context engineering is the ”…delicate art and science of filling the context window with just the right information for the next step.”
Context is information provided in addition to prompts to query a model for useful results. This includes information, rules, memory, and tools that shape how the model interprets the query.
Context information helps to narrow and focus the model search to get a more useful result. In a way, it's analogous to how `WHERE`/`AND` clauses add specificity to an SQL query, to get a more precise and correct result from a relational database search.
The total amount of information the system can process at once is called the "context window".
Context can include one or more of the following:
- System prompt
- User prompt
- Long-term memory
- Retrieval Augmented Generation (RAG)
- Output definitions
## System prompt
A prompt that defines the model’s role, boundaries, and behavior. This layer can include rules, examples, guardrails, and style requirements that persist across turns. It's like the instructions to an actor in a play, prior to handing them the script.
Example: You are a senior designer using the Lightning design system.
## User prompt
This is the immediate request — the short-lived, task-specific input that tells the model what to do right now.
Previous prompts can live in context in the sense that they can condition responses to future prompts. Previous prompts forming state or conversation history act as short-term memory, giving the model continuity across turns by including prior dialog, reasoning steps, and decisions.
## Long-term memory
Long-term memory is persistent and spans many sessions. It contains durable preferences, stable facts, project summaries, or information the system is designed to reintroduce later.
Examples of long-term memory are touched on in this article and include:
- Skills
- Agent definitions
- Documentation
## Retrieval Augmented Generation (RAG)
Discussed in a separate heading in this article, RAG involves models being connected to external data sources such as live data feeds or structured data in databases.
RAG can also be considered part of context, as it can make up part of the information provided to the model prior to prompts.
## Output definitions
Structured output definitions tell the model exactly how its response should be formatted — for example, requiring a JSON object, a table, or a specific schema.
Example:
```python
data_json = ,
,
]}
prompt = f"""
Translate the following python dictionary from JSON to an HTML \
table with column headers and title:
"""
response = get_completion(prompt)
print(response)
```
## Agent
An agent is a piece of software that take input (human and/or otherwise), runs autonomously and uses LLM technology to make decisions and take actions, likely to produce a useful outcome, such as customer support requests being actioned, code being written and deployed, etc.
Agents can run autonomously – that is, without direct human initiation. For example:
- In a continuous or periodic manner, such as hourly or daily
- In response to an event, such as a customer request or online order
Agents are typically implemented as customised software programs, written by software engineers in languages such as Python, Typescript, etc. They are structured as a loop, referred to as an "agent loop", where the application cycles continuously between taking input, making decisions and taking actions.
Agents can call APIs provided by assistants, such as Claude Agent SDK, to utilise LLM capabilities and perform certain actions.
```mermaid--svg
%% @description Agent with Trigger, Agent Loop and Assistant API
flowchart
Trigger["⚡️ Event, Period, etc."]
Trigger-->Agent
subgraph "🖥️ Agent"
Agent
Agent-->AgentLoop
AgentLoop["🖥️ Agent Loop"]
AgentLoop-->AgentLoop
end
Agent-->AssistantAPI
AssistantAPI["📚 Assistant API"]
```
## Sub Agent
A sub agent is an agent that is called by an assistant or another agent, to perform a more specialised role autonomously. Sub agent can be used to break down complex tasks into smaller, more manageable pieces, and to allow for more specialised agents to handle them in the background.
Sub agents run in a separate execution context from the main agent context. For this reason, assistants such as Claude Code may require context (such as skills, etc) to be defined for each sub-agent.
A key benefit of sub agents is that they allow context to reduced to ***only as much as the sub agent needs*** rather than the whole context. This helps us to keep context minimal, which is good for accuracy, performance and cost (by reducing token usage).
Sub agents can be implemented as customized software programs (possibly containerized), code libraries and/or configuration for assistants, such as in an agents folder. Sub agents might run as [separate instances of the same assistant as with Claude Code](https://code.claude.com/docs/en/sub-agents#manage-subagent-context).
Sub agents, being modular, can:
- Be re-used across multiple agents
- Be scaled independently for high demand, cost reduction, performance, etc.
- Be combined with other sub agents to collaborate in multi-agent workflows
For example, sub agent could be run in parallel as serverless functions, which could be scaled horizontally to a handle large number of requests, scaled elastically to minimise costs, etc.
Examples:
- https://github.com/VoltAgent/awesome-claude-code-subagents
```mermaid--svg
%% @description Agent and sub agents pattern
flowchart
Agent["🖥️ Agent"]
Agent-->SubAgent1["🖥️ Sub Agent 1"]
Agent-->SubAgent2["🖥️ Sub Agent 2"]
Agent-->SubAgent3["🖥️ Sub Agent 3"]
```
```mermaid--svg
%% @description Sub agent multi-agent pattern
flowchart LR
SubAgent1-->SubAgent2["🖥️ Sub Agent 1"]
SubAgent1-->SubAgent3["🖥️ Sub Agent 2"]
SubAgent2-->SubAgent3["🖥️ Sub Agent 3"]
SubAgent3-->SubAgent4["🖥️ Sub Agent 4"]
```
## Skill
A skill is a capability that an agent or assistant can be augmented with and applied to some relevant task.
A skills is typically made up of:
- Brief written description
- "When to use" written guidance
- Resources, if needed, such as code files, images, etc.
When it first loads up, an assistant can index its library of skills by description and written guidance. Subsequently, when a performing a task, the assistant can use the "when to use" guidance to determine which skill(s) are relevant and apply those that match. When a relevant skill is found, then its resources can be loaded.
For example, a skill for "designing a front end interface" might include:
- Description: "Create distinctive, production-grade, brand-aware frontend interfaces with high design quality."
- When to use: "Use this skill when the user asks to build web components or views in the frontend application."
- General guidance: "Use this skill to design the frontend interface, including layout, color scheme, typography, and overall visual aesthetics. Ensure that the design is distinctive, production-grade, and brand-aware."
- Packaged resources:
- PDF file containing branding guidelines, color palette, typography rules, etc.
An assistant will read the skill description and "When to use" instructions to determine when to apply the skill, such as when the task involves building a front end interface, such as a dashboard. If the skill matches, the assistant will then access the files inside the skill package in order to apply the skill and perform the task. In this example, it will access the PDF file and use the information to design the front end interface of the dashboard.
I have heard skills referred to as the "arms and legs" of an agent. Similarly to how humans arms and legs allow us to perform a wide variety of tasks, skills allow agents to perform a wide variety of tasks by augmenting them them with specific capabilities and functions. Just as arms and legs can be used for different purposes (e.g., walking, running, grasping objects), skills can be used for different purposes (e.g., summarizing text, generating code, answering questions).
A key benefit of skills is that they allow context to added ***on an as-needed basis*** rather than in every prompt. This helps us to keep context minimal, which is good for accuracy and performance and cost (by reducing token usage).
Skills, being modular, can:
- Be re-used across multiple agents and assistants
- Be shared across teams and the community, for example via private or public repositories of skills
- Can reduce the burden of loading everything into the main context file, instead loading their context only when matched, thus reducing token cost
Examples:
- https://github.com/anthropics/skills
- https://github.com/forrestchang/andrej-karpathy-skills
- https://skills.sh
```mermaid--svg
%% @description Skill utilised by agent to perform task
flowchart
Agent["🤖 Assistant"]
Agent-->Task1
Agent-->Task2
Agent-->Task3
Agent-->Task4
Agent-->Task5
subgraph "Tasks"
Task1["Task"]
Task2["⭐️ Task"]
Task3["Task"]
Task4["⭐️ Task"]
Task5["Task"]
end
Task2-->Skill1
Task4-->Skill2
subgraph "Skills"
Skill1["📂 Skill"]
Skill2["📂 Skill"]
end
```
```mermaid--svg
flowchart
subgraph "Skill"
subgraph "Package"
PDF["PDF"]
Images["Images"]
Videos["Videos"]
etc["etc"]
end
subgraph " "
Description["📝 Description"]
How["📝 How to Use"]
end
end
```
## Tool
Similar to a skill, a tool augments an assistant.
The difference between a skill and a tool is that a tool is integrated more directly into an assistant via purpose-built software.
For example, [MCPs (Model Context Protocol)](https://en.wikipedia.org/wiki/Model_Context_Protocol) are a category of AI tool, built by developers, allow assistants to connect to external data sources or perform actions via a web (HTTP) interface.
Comparison of skill vs tool:
Skill
Tool
Augments an agent with additional capabilities
Augments an agent with additional capabilities
Is implemented or applied by an end-user or application developer
Is implemented by software engineers at a product vendor, such as a cloud service, hosting provider, etc
May be written in a more human format, such as a SKILL.md file
Is typically written in a programming language (such as Typescript, Python, Java, etc) with a software interface (such as HTTP for MCPs)
## Command
A command is a specific instruction for an assistant to run immediately, typically provided by a human in real time.
Commands could be considered an AI equivalent of system commands, scripts, macros, etc.
They are typically signalled with a `/` (slash) prefix. For example: `/review` to perform a code review.
Examples:
- `/checks` - run checks such as linters, unit tests, etc.
- `/setup` - setup the development environment
- `/review` - perform code review
## Plan mode
This refers to the ability of an assistant to provide a plan for completing an action, rather than immediately performing the action. For example, to provide an implementation plan prior to implementing a code change or a design sketch prior to producing a full fledged design. When interacting with an assistant directly, plan mode allows the human the opportunity to review and perhaps request changes to the plan. When used in an agent, plan mode allows the agent to refine the assistant's output using the same (or another) assistant. This fits in to the "making decisions" part of the decide-act loop in agents.
## Plugins
Selected pieces of context – such as skills, commands, etc. – can be packaged together, published on a market place and consumed by other projects, either within an organization or publicly. These packages are referred to as plugins and are the AI equivalent of packages in open-source. [Claude Code plugins](https://claude.com/plugins) are one implementation.
## Hooks
Hooks are instructions for an agent that run at specific points in the lifecycle of an agent session.
Different from a skill (which is matched by its description) a hook is triggered when a specific lifecycle event occurs.
(In this respect, they are conceptually similar to hooks in [React](https://react.dev/reference/react/hooks) or [VueJS](https://vuejs.org/guide/essentials/lifecycle.html), which run at specific points in the component lifecycle.)
Examples of [Claude Code agent session events](https://code.claude.com/docs/en/hooks):
- SessionStart - When a session begins or resumes
- UserPromptSubmit - When you submit a prompt, before Claude processes it
- PreToolUse - Before a tool call executes. Can block it
- Notification - When Claude Code sends a notification
- Stop - When Claude finishes responding
- SessionEnd - When a session terminates
## Relationships between concepts
The following diagram roughly maps out how the concepts relate to eachother.
```mermaid--svg
%% @description Relationships between concepts
flowchart
Human["🤷 Human"] -->|sets up| Agent["🖥️ Agent"]
Assistant["🤖 Assistant"] -->|queries| Model["📀 Model"]
Assistant["🤖 Assistant"] -->|can run in| PlanMode["📐 Plan Mode"]
AssistantAPI["🤖 Assistant API"] -->|queries| Model["📀 Model"]
Agent["🖥️ Agent"] -->|calls| SubAgent["🖥️ Sub Agent"]
SubAgent["🖥️ Sub Agent"] -->|calls| SubAgent["🖥️ Sub Agent"]
Assistant["🤖 Assistant"] -->|uses| Skill["📂 Skill"]
Human["🤷 Human"] -->|issues| Command["⚡️ Command"]
Human["🤷 Human"] -->|writes| Prompt["⌨️ Prompt"]
Prompt["⌨️ Prompt"] -->|is evaluated by| Assistant["🤖 Assistant"]
Command["⚡️ Command"] -->|is executed by| Assistant["🤖 Assistant"]
Agent["🖥️ Agent"] -->|calls| AssistantAPI["☁ Assistant API"]
SubAgent["🖥️ Sub Agent"] -->|calls| AssistantAPI["☁ Assistant API"]
Plugin["🔌 Plugin"] -->|packages| Command
Plugin["🔌 Plugin"] -->|packages| Agent
Plugin["🔌 Plugin"] -->|packages| SubAgent
Plugin["🔌 Plugin"] -->|packages| Skill
Plugin["🔌 Plugin"] -->|shared between| Project1["🏢 Project"]
Plugin["🔌 Plugin"] -->|shared between| Project2["🏢 Project"]
```
🤖 Assistant-based:
- Humans issue prompts and commands to assistants
- Assistants query models and use the results to return useful outputs back to humans
- Assistants are augmented by skills, helping them complete tasks they would otherwise struggle with
🖥️ Agent-based:
- Humans set up agents in order to complete tasks autonomously
- Agents delegate work to sub agents
- Agents call assistant APIs for AI capabilities
- Assistants query models and use the results to return useful outputs back to agents
## When to use
Concept
Where to use
Assistant
Writing application and test code
Writing AI context files such as skills, commands and documentation
Model
Selecting an appropriate model for an assistant to use
Agent
Developing an AI solution that requires autonomous decision-making and action
Sub Agents
Developing AI solutions that require multiple agents working together
Skills
Helping an assistant become more capable, if it struggles to perform certain tasks correctly
Developing reusable capabilities that can be composed into larger AI solutions
Sharing capabilities across teams and/or the broader community
Commands
Providing specific instructions for an assistant to execute immediately
Triggering specific actions or workflows within an AI system
## Further reading
- [Agentic Coding • Missing Semester](https://missing.csail.mit.edu/2026/agentic-coding/)
- [ChatGPT Prompt Engineering for Developers](https://learn.deeplearning.ai/courses/chatgpt-prompt-eng)
- [Claude Code docs](https://code.claude.com/docs)
- [Claude Code tutorial (NetNinja)](https://www.youtube.com/playlist?list=PL4cUxeGkcC9g4YJeBqChhFJwKQ9TRiivY)
- [How I use Claude Code](https://boristane.com/blog/how-i-use-claude-code/)
- [OpenAI Codex tutorial (NetNinja)](https://www.youtube.com/watch?v=tIb_TzVNbDM)
- [A Guide to Which AI to Use in the Agentic Era (Ethan MOLLICK)](https://www.oneusefulthing.org/p/a-guide-to-which-ai-to-use-in-the)
- [AI as Exoskeleton](https://www.kasava.dev/blog/ai-as-exoskeleton)
- [From Weeks to Hours: Building My Website with Agentic AI Pair Programming • Sam SWERCZEK](https://www.samswerczek.com/blog/from-weeks-to-hours-building-my-website-with-agentic-ai-pair-programming)AI for developers2026-02-18T00:00:00.000Zai-for-developers> Summary: AI, when used by developers, can assist code writing with autocomplete, provide helpful information for diagnosing error messages and technical problems, generate code such as bash scripts and unit tests, summarise technical conversations and provide helpful summaries for code reviews.
Over the last couple of years, I've sprinkled AI usage through various typical software engineering activities.
The most common tools (and what I tend to use) have been [Copilot](https://github.com/settings/copilot) and [Copilot Chat](http://chatgpt.com), but some free tools such as [Llama Coder](https://marketplace.visualstudio.com/items?itemName=ex3ndr.llama-coder) are beginning to become more mainstream.
In this article I'll summarise the scenarios where I found AI useful.
- [Writing code faster with autocomplete](#writing-code-faster-with-autocomplete)
- [Getting help with error messages](#getting-help-with-error-messages)
- [Getting help with technical problems](#getting-help-with-technical-problems)
- [Writing bash scripts](#writing-bash-scripts)
- [Generating unit test code](#generating-unit-test-code)
- [Summarising conversations](#summarising-conversations)
- [Explaining code or others' pull requests](#explaining-code-or-others-pull-requests)
- [Code reviews](#code-reviews)
- [Generating alternative solutions](#generating-alternative-solutions)
- [General thoughts](#general-thoughts)
## Writing code faster with autocomplete
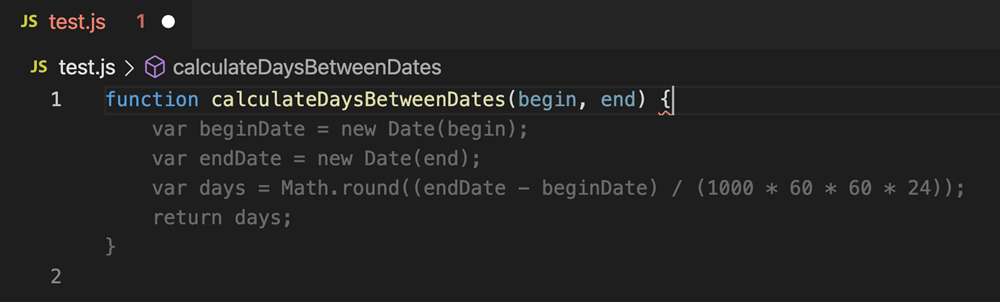
AI-powered autosuggest was a great help when I had to write a chunk of code that's necessarily verbose, but not unique to my problem.
A perfect example is given on Copilot extention homepage.
## Getting help with error messages
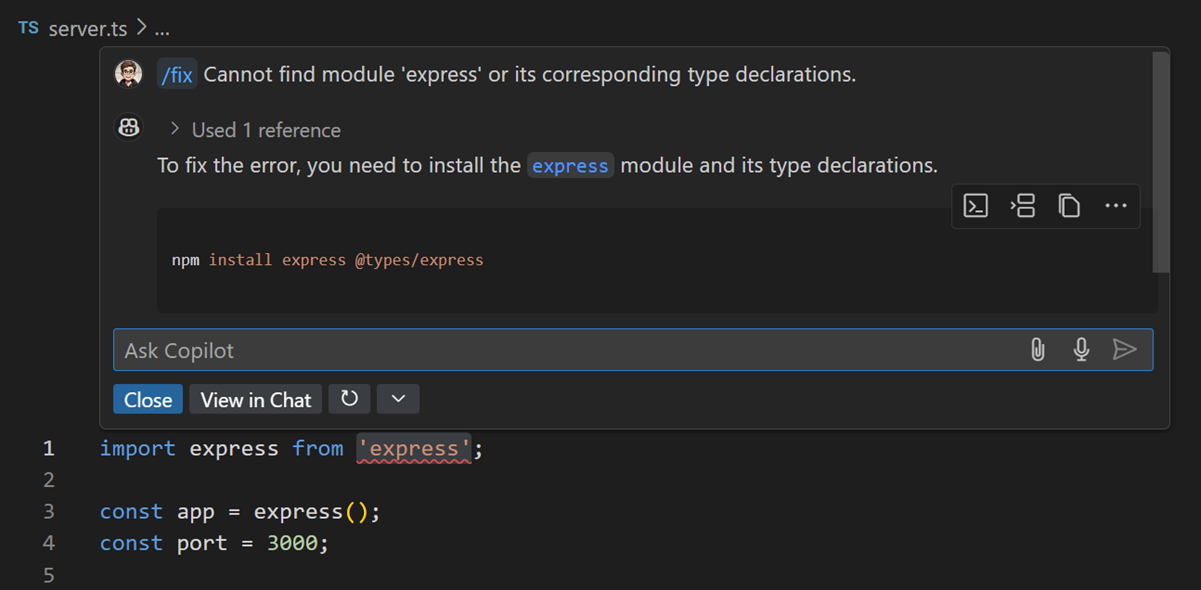
Pasting an error message into Copilot Chat, prefixed with `/fix`, can provide good guidance on the cause and fix for a given error.
When the responses given aren't suitable, follow-up prompts such as "can you suggest some other alternatives" can help.
## Getting help with technical problems
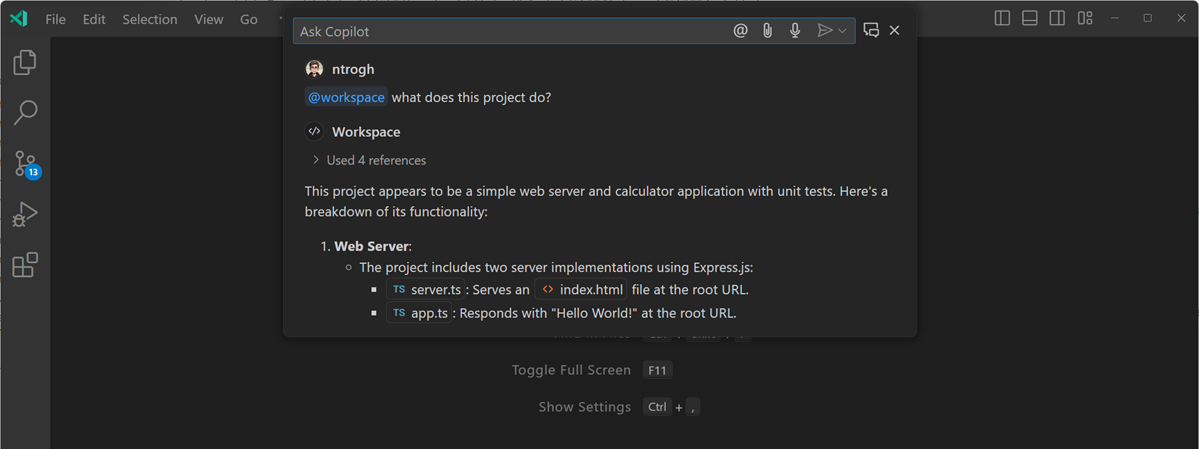
Similar to error messages, I found that expressing a technical problem in an AI-powered chat can yield some good ideas and solutions.
This worked even better when I followed up the initial question with clarifications and/or challenged the AI to think of additional ideas or alternatives.
## Writing bash scripts
Bash scripts can perform many kinds of general tasks. Once you have a script that does what you want, you can re-use it any number of times.
A specific need I had was to see all the authors who had edited a particular file in a Git repository. With the help of ChatGPT I was able to write a script that achieved what I wanted.
Here's the prompt I used:
> Copyable: Please write a bash script which finds and lists all the unique authors who have edited the given file in the current Git repository. The given file will be specified as the first parameter to the bash script.
I've published the resulting script as a GitHub Gist: [list_authors.sh](https://gist.github.com/jonathanconway/71d5413cce30f43d3182fdfdc46c4723).
The script takes as an argument the path to a file in that repo. It then uses `git log` on the current repository to find all the authors who have edited the file, `sort`s and `uniq`s them and outputs them to stdout.
Here's a sample of the output from running it on [a file in the NextJS repository](https://github.com/vercel/next.js/blob/fd0bc9466e42ec313ce92c58e2a5c2c157e63f54/packages/next/src/shared/lib/head.tsx):
```bash
$ list_authors packages/next/src/shared/lib/head.tsx
Authors who have edited 'packages/next/src/shared/lib/head.tsx':
Adam Stankiewicz
Filipe Medeiros
Gerald Monaco
JJ Kasper
...
```
## Generating unit test code
I sometimes use GitHub Copilot to generate unit tests for a particular code file I am working on.
This can be done by opening the file under test, pressing Cmd+I and asking Copilot to write a unit test for the current file.
I would use a prompt like: **"Please write a unit test for this file"**.
I use this is mainly to set up the scaffolding, such as `describe` and `it` blocks and basic assertions. Usually I need to tidy up a few things here and there, but the AI is surprisingly good at generating decent test code.
Another technique is to provide just the code for one function or code block and ask AI to generate test code for it, listing a few test cases.
Here's an example of a prompt I might use:
```
Copyable: Please write a Jest unit test for a Typescript function.
The unit test should have the following it blocks:
1. returns a list of dates between the two dates passed
2. returns an empty array if two identical dates are passed
3. throws an error if null is passed
Please write tests that satisfy the above it blocks.
Here is the Typescript function:
'''
function calculateDaysBetweenDates (begin, end) \
'''
```
## Summarising conversations
Some colleagues and I had a long back-and-forth about code reviews in a GitHub discussion.
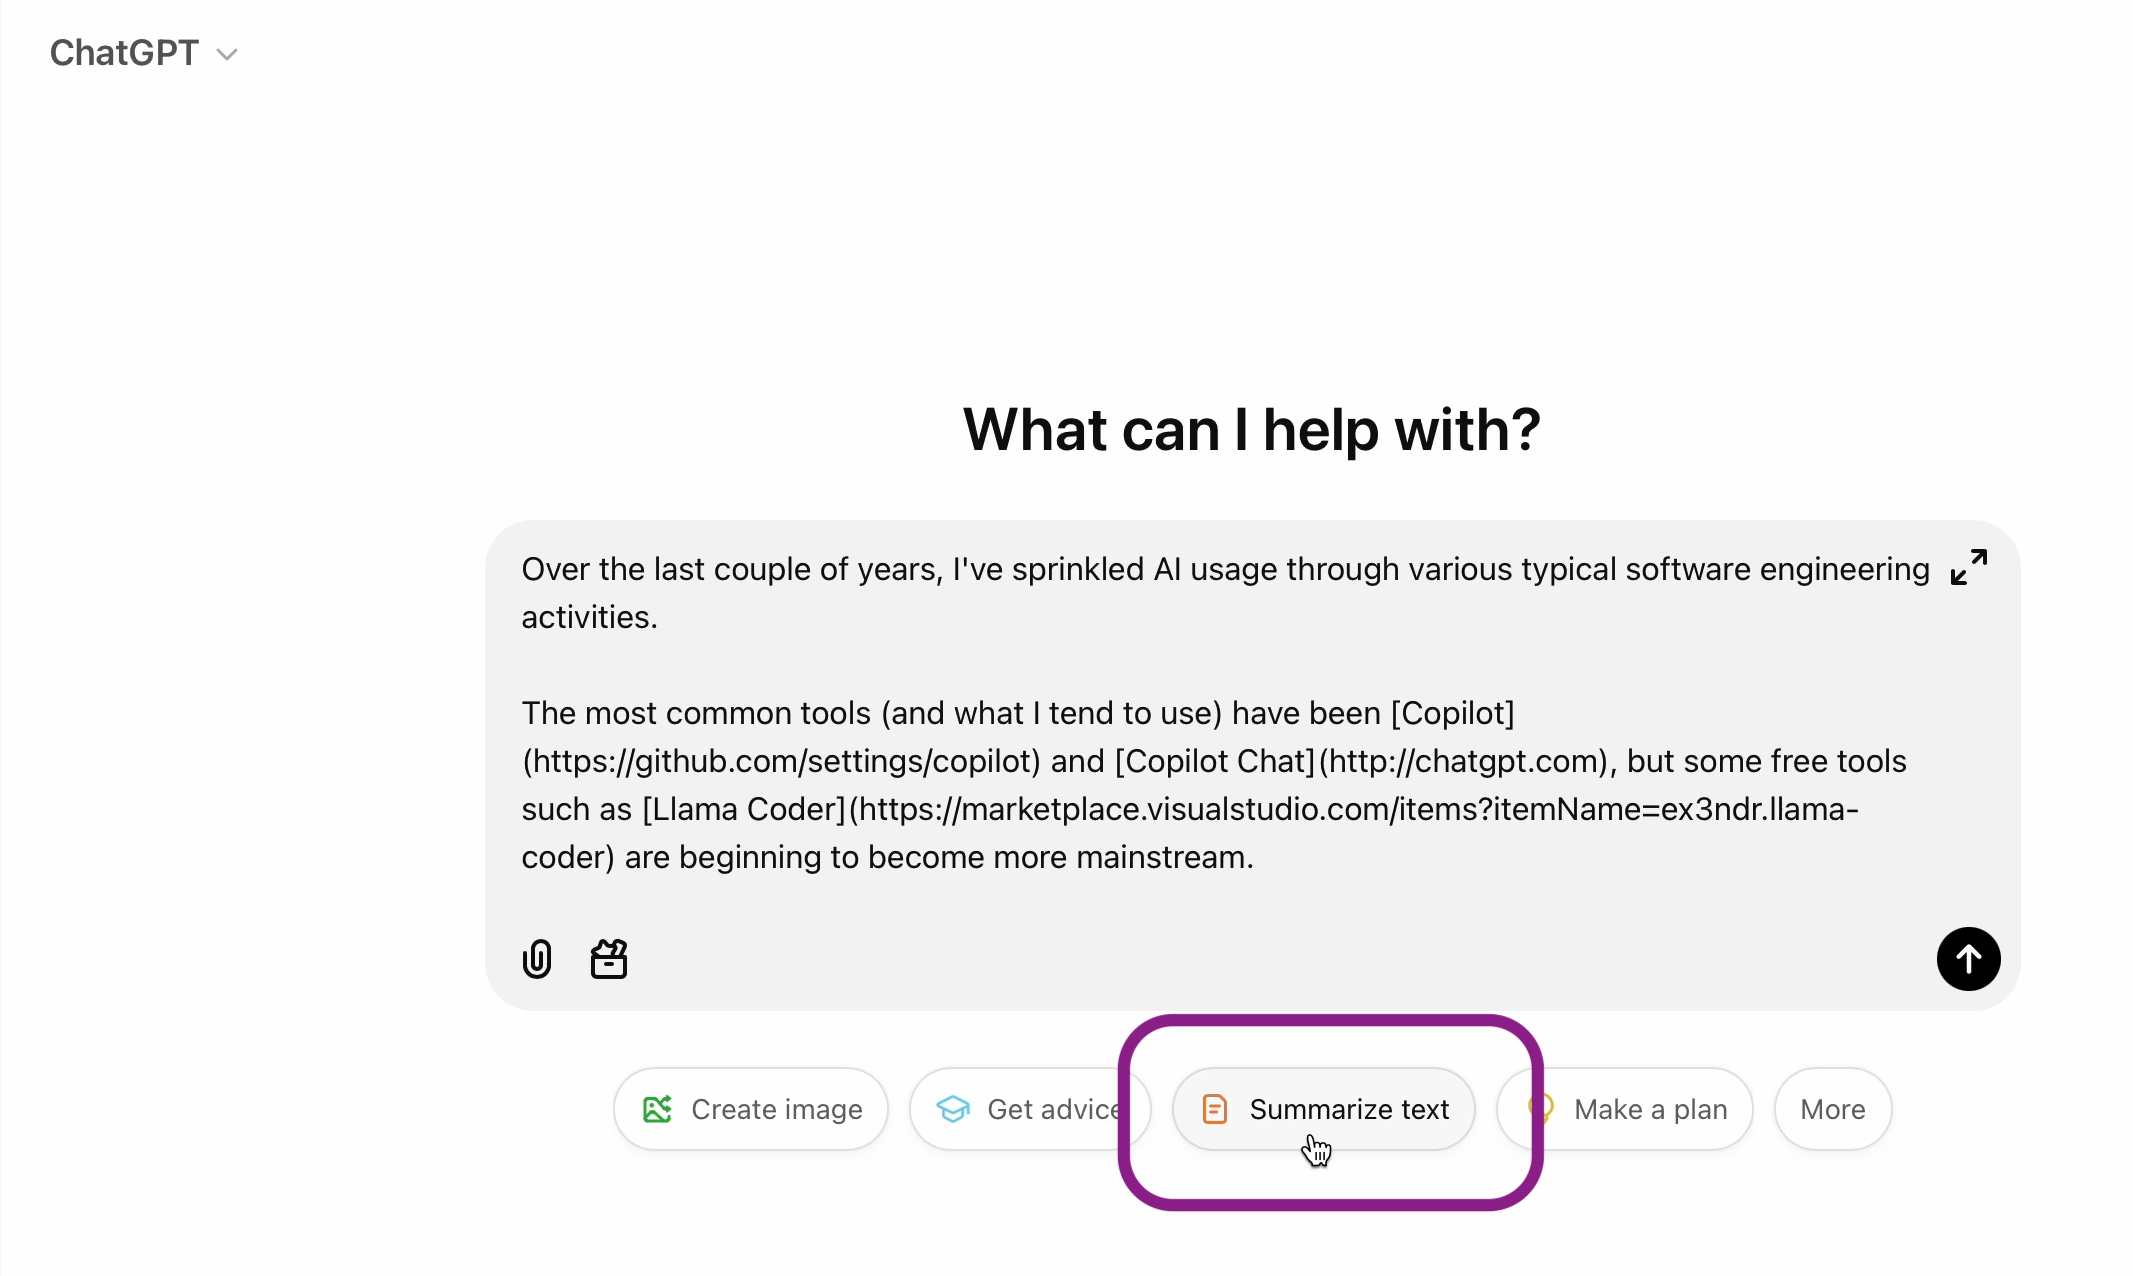
When it came time to summarise all these in a meeting, I found that AI-powered chat was a great way to summarise the discussion and get everyone's thoughts on what we had discussed.
It looks like ChatGPT now has a quick Summarise button for this purpose.
## Explaining code or others' pull requests
If there is any code in a solution I'm unfamiliar with, AI can help speed up my comprehension by explaining it in plain language.
However, I don't trust the AI to explain everything accurately. So I include in the prompt a request to provide sources, such as references to code files and line numbers, to back up its claims.
```md
Walk me through the `≪function | component | class | method | etc≫` named `≪name≫` in the file: `≪path/file≫`.
Explain how it works in simple but technical language.
Provide sources for all points in your explanation, such as specific line number(s).
```
```md
`≪https://github.com/org/repo≫`
What does this PR do?
What is its purpose?
How does it achieve it?
Break down the code changes and how they function.
How might I verify that this PR achieves the intended outcome?
Please explain the above to me, in simple but technical language.
Provide sources for all points in your explanation, such as specific filenames and line number(s).
```
## Code reviews
When reviewing pull requests I've been experimenting with various ways of asking AI help me.
One way I found useful was to have AI review and summarise the changes and overall quality.
Here are the steps I took for doing this with Copilot Chat:
1. Generate a diff between the pull request source and destination branches.
- `git checkout ` to checkout the branch
- `git diff | pbcopy` to run the diff and copy the output
2. Paste the whole diff into a new empty tab in VS Code
3. Press Cmd+I and prompt Copilot: **"Please review these code changes"**
Here's a sample of the kinds of results I tended to get (anonymised):
> The code changes introduce several new features and modifications to the healthcare application. Here are the key points:
>
> 1. Localization Updates:
> - Added new localization strings for transfer confirmations in `en-AU.json`.
>
> 2. Removed Mock Initialization:
> - Removed the conditional import of mock initialization in `layout.tsx`.
>
> 3. New Patient Transfer Form Submission Logic:
>
> - Created a new file `submit.ts` to handle the patient transfer form submission logic.
> - This includes creating a `Ward` object, making a patient transfer request, and handling different states of the transfer (success, delay, error, no-response)
>
> 4. Transfer Form Tests:
> - Updated `transfer-form.test.tsx` to reflect changes in patient name and ward number and added tests for the new patient transfer form submission logic.
>
> Overall, these changes enhance the patient transfer functionality by providing detailed feedback on the transfer status and improving the test coverage for various scenarios.
Not as good as a human reviewer, but not useless either.
And not bad given the tiny effort on my part!
## Generating alternative solutions
Producing alternative designs, comparing them, and selecting one is a tactic recommended by software design expert John Ousterhout.
> Pull-quote: “Even if you are certain that there is only one reasonable approach, consider a second design anyway, no matter how bad you think it will be. It will be instructive to think about the weaknesses of that design and contrast them with the features of other designs.”
>
> – John OUSTERHOUT • [_A Philosophy of Software Design_](/reading/a-philosophy-of-software-design)
Engineer time, of course, tends to be highly constrained.
Why not prompt AI to generate alternative implementations instead, so we can then compare their effectiveness?
```md
Please make code changes to implement the requirements given in the following ticket(s):
- `≪[TICKET-CODE](https://ticket-system/browse/TICKET-CODE)≫`
Downloaded PDF and DOC of the ticket can be found in this directory:
- `≪/path/to/ticket.pdf≫`
Implement the code changes in the current branch then commit.
Create an alternative and different solution than the one in the branch: `≪previously-tried-solution-branch≫`
The code changes should be:
- High quality
- Consistent with the coding style used in the rest of the code base
- Conformant with the relevant items in the checklist `≪/path/to/checklist.md≫`
- Production-ready
- Follow a different, alternative approach than the one in the branch: `≪previously-tried-solution-branch≫`
```
Upon selecting an approach, we can then fix any defects or oversights in the AI generated code. Or generate the solution ourselves from scratch, incorporating parts of the AI generated code as suitable.
I sometimes like to kick off multiple agents generating solutions at once. I keep them running in separate ephemeral terminal windows and separate repository folders using [Git worktree](https://git-scm.com/docs/git-worktree).
## General thoughts
### Code is valuable
I've heard the idea that code is no longer valuable, since AI can now write it.
I disagree. In fact, I think well written code is more valuable with the advent of AI. When working with code through an AI tool, we need the AI to be able to understand the code, reason about it, draw clear and distinct conclusions and make concise edits which we can easily review to identify mistakes. Well written, consistent code enables this.
Even better: if we can state our coding standards explicitly to the AI, using project-specific configuration (such as CLAUDE.md files in Claude Code) and AI "memory" features, then we can improve the effectiveness and quality of the code changes made by the AI.
### Psychological hurdle to AI adoption
From introspection (also some observation) the biggest hurdle holding back engineers from fully utilising AI tools is the emotional/psychological adaptation. The technology itself is not especially cognitively demanding. I'd argue the shift to functional programming or the Cloud were as hard or harder than AI. I think the important thing is a willingness to learn and adapt. This mental flexibility can be improved over time, with technique such as making a habit of continuous learning and exploring cognitive biases.
## Conclusion
While I feel AI might have been a little over-hyped, I think there's still merit in becoming familiar with it and using it where it fits.
It seems likely that AI adoption among software engineers will grow, so it will be advantageous to be familiar and conversant with the tooling.
## Further reading and viewing
- [_Pragmatic techniques to get the most out of GitHub Copilot_](https://www.youtube.com/watch?v=CwAzIpc4AnA) • Patrick CHANEZON, Burke HOLLAND, Brigit MURTAUGH, Isidor NIKOLIC, Allison WEINS, Martin WOODWARD
- [_Notes on using LLMs for code_](https://simonwillison.net/2024/Sep/20/using-llms-for-code/) • Simon WILSON
AI user interface patterns2026-02-18T00:00:00.000Zai-patterns> Summary: AI-enabled capabilities can be surfaced in user interfaces in a variety of ways, including inline suggestions, single and multi-agent chat, providing hints for filling in inputs and through controls that allow the user to nudge a preview until it matches what they want.
As AI capabilities become increasingly available to everyday development
teams, it might be useful to explore way to surface these capabilities to
end-users.
This article describes some user interface patterns for surfacing AI.
Using ***"treat it like a person"*** as a core principle, I provide patterns,
examples (including in-the-wild cases) and how they mimic humans.
## Principles
As the definition of "AI" is still somewhat in flux, I want to assume a
definition for the purposes of this article:
***The capability of software/machines to do things that are normally thought of a human, in a rational way.***
The fact AI mimics human thinking/behaviour suggests that we user interfaces should expose AI capabilities in a human way.
As Ethan Mollick puts it in the book _Co-Intelligence_ (bold mine):
> AI doesn’t act like software, but it does act like a human being. I’m not suggesting that AI systems are sentient like humans,
> or that they will ever be. Instead, I’m proposing a pragmatic approach: ***treat AI as if it were human*** because, in many ways,
> it behaves like one. This mindset, which echoes my “treat it like a person” principle of AI, can significantly improve your
> understanding of how and when to use AI in a practical, if not technical, sense.
The patterns I've encountered are:
- Inline suggestion
- Single-agent chat
- Multi-agent chat
- Prompting and nudging controls
Let's look at them in detail...
## Pattern: Inline suggestion
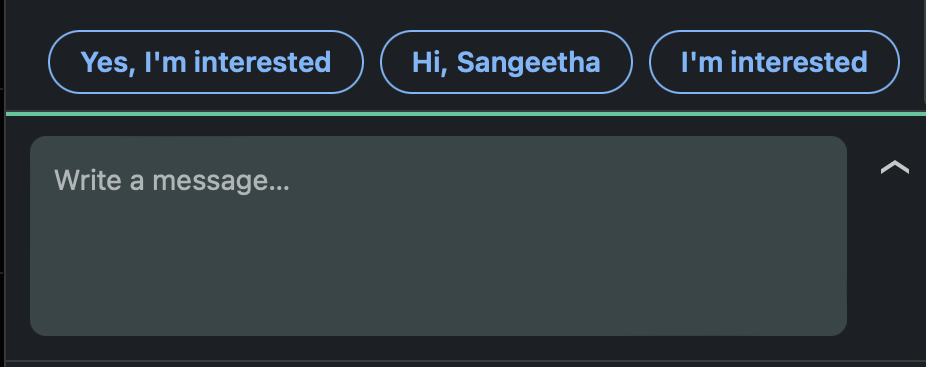
While performing a task, relevant ideas are displayed nearby in text or even imagery.
The user might be invited to provide input, such as selecting between variants or filling in a blank. (See [Fill-in-the-blanks pattern](#pattern-fill-in-the-blanks))
**Example:** As a product owner enters a story into a task tracking system, the AI suggests edge cases they didn't yet consider.

**In the wild:** Code assistance plug-ins in IDEs (such as [Genie AI](https://www.genieai.co/), [Amazon Q](https://aws.amazon.com/q/), [CodeGPT](https://codegpt.co/), [Codeium](https://codeium.com/) and [Llama Coder](https://github.com/ex3ndr/llama-coder)) and dedicated IDEs (such as [Cursor](http://cursor.com)). Email and text message completion, as seen in [Gmail](https://mail.google.com/), [LinkedIn messaging](http://linkedin.com/) and [Apple Messages](https://en.wikipedia.org/wiki/Messages_(Apple)).
.
**Mimics:** 🧍 Colleague, mentor, friend, etc. sitting nearby verbally offering a suggestion and/or physically pointing to a part of the screen.
## Pattern: Single-agent chat
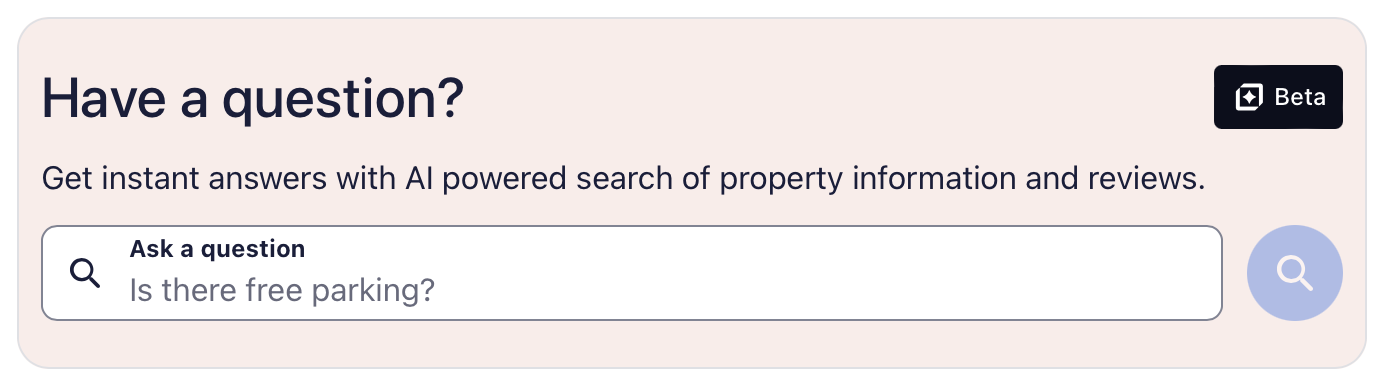
A specialised chat bot is available for back-and-forth discussion.
**Example:**: Customer on an e-commerce website starts entering a question about a product. A specialised chat-bot replies with a detailed response. An input box allows the customer to respond with a follow-up question.

**In the wild:** "Have a question?" feature on [Hotels](http://hotels.com/), "QnaBot" on [Amazon](http://amazon.com/).
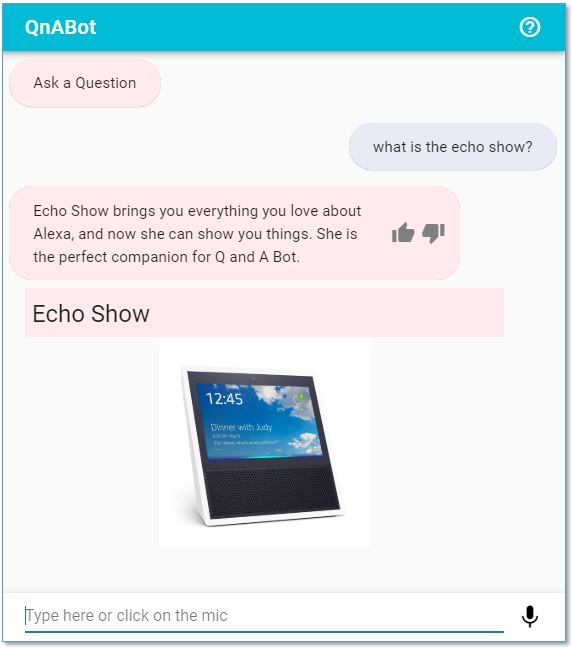
**Mimics:** 💬 Colleague, mentor, customer service, etc. communicating with the user via chat.
## Pattern: Multi-agent chat
Multiple chat bots appear in the same chat window. Each bot has a different persona and perspective, and only contributes where applicable.
By splitting AI responses among multiple bots, rather than just one, it's easier for the user to mentally divide the AI output into different "buckets".
Also, because this is analagous to real human-human team-work, it's intuitive for people.
Users can address individual bots by name, to ask for further assistance on a specific topic or aspect covered by just that bot.
**Example:** Financial advisor tool for recommending products to customers. Agents representing analysts and compliance each offer a perspective. The advisor uses these insights to prepare for a meeting with the client.

**In the wild:** Slack automation bots such as [Trello for Slack](https://trello.com/platforms/slack), [ThreadReaderApp](http://threadreaderapp.com) on Twitter and dedicated chat platforms such as [Symphony](http://threadreaderapp.com).
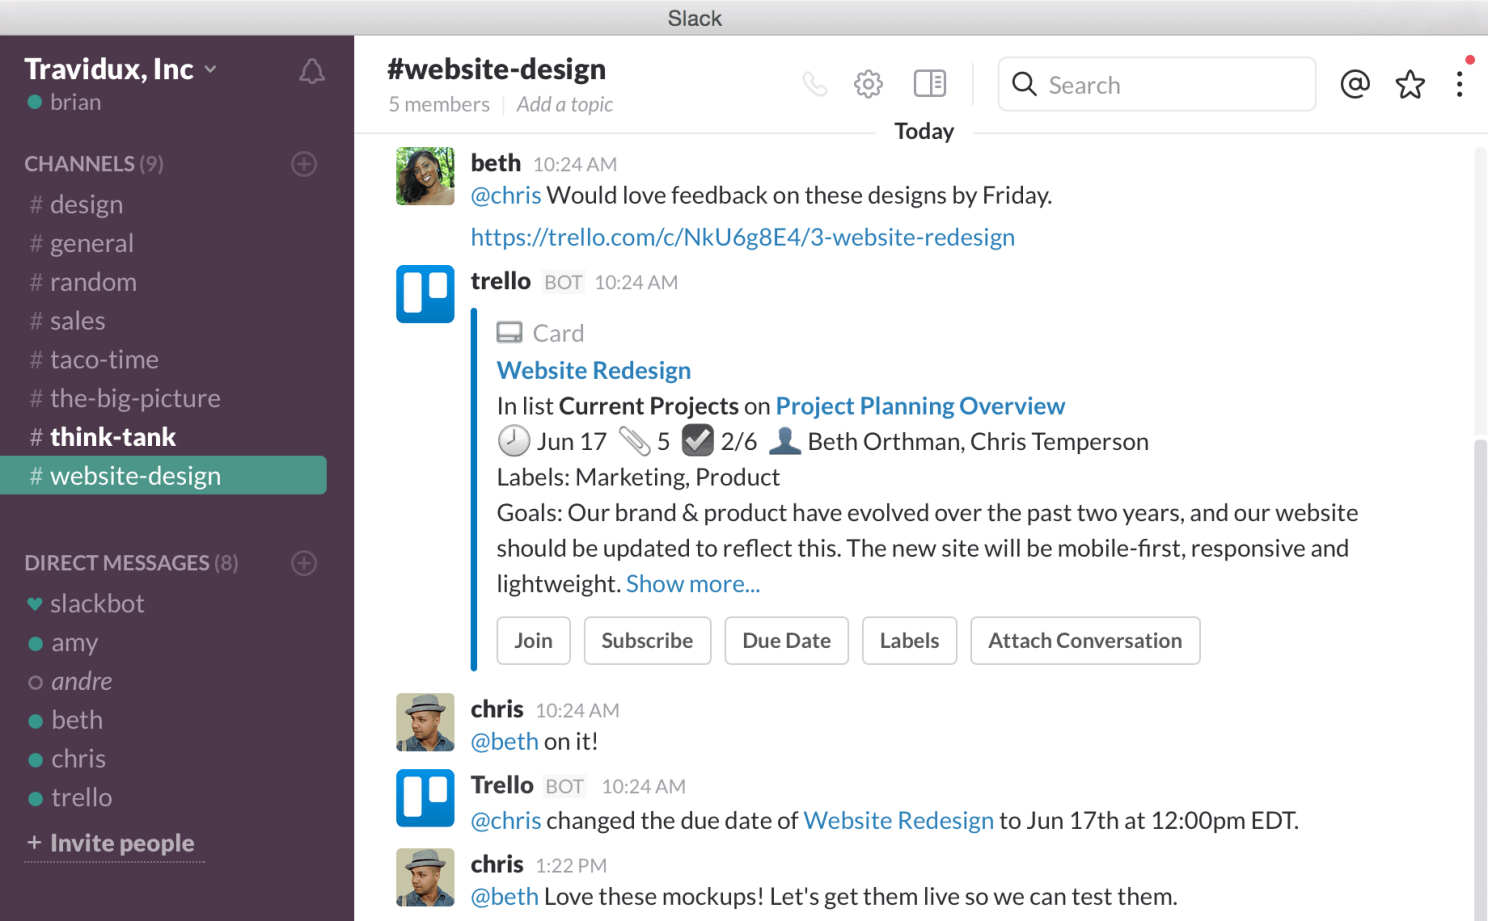
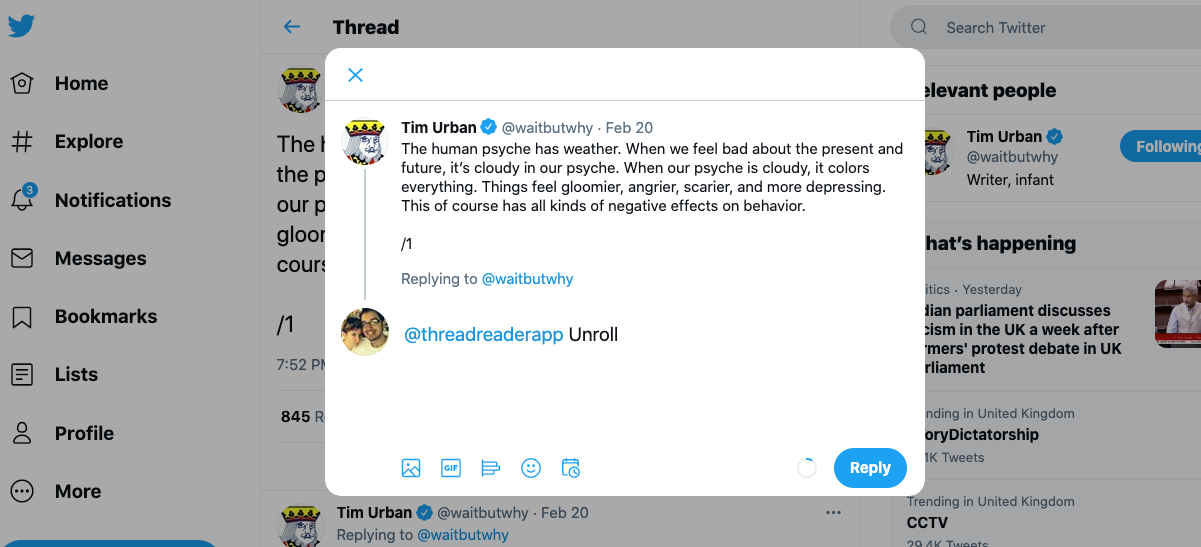
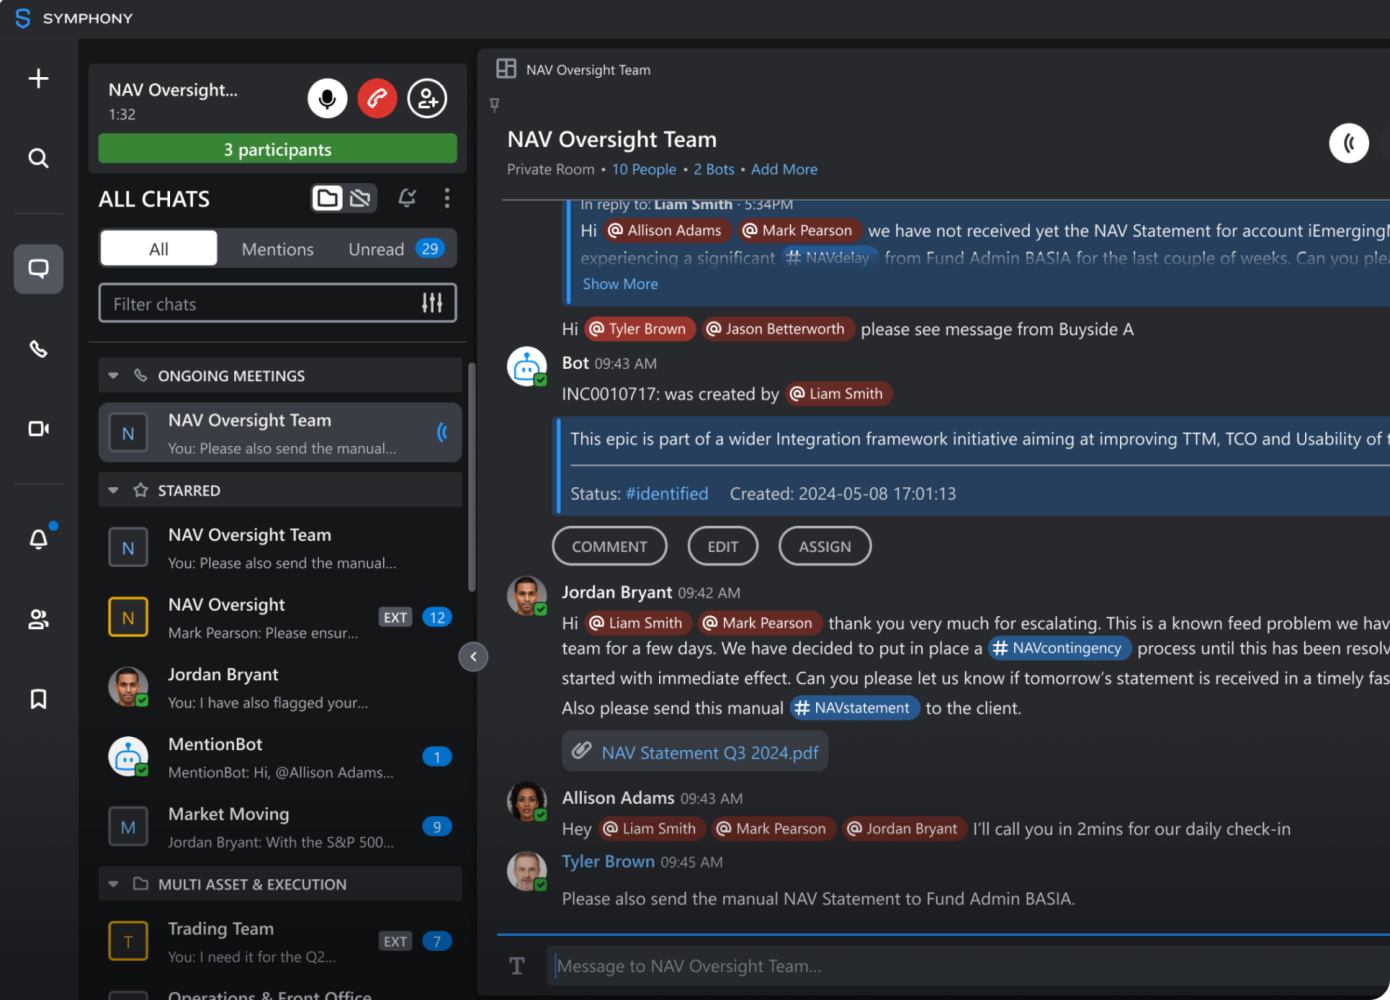
**Mimics:** 👭 Group of people working together, such as a team meeting.
## Pattern: Fill-in-the-blanks
A stencil is displayed, with some areas for user input and some ares for AI generated content.
As the user fills in the inputs, the AI uses contextual information to generate more of the content. User and AI both work together until the full output has been generated.
**Example:** Writing a CV for a job. You start to fill in work history items. The AI suggests additional bullet points, which you accept or refuse. The AI suggests shorter more focussed descriptions and word removal, which you accept or refuse.

**Mimics:** 📈 Collaborative white-boarding with colleagues (virtually or physically), collaborative card sorting exercises with a team.
## Pattern: Nudging controls
A "work in progress" is displayed in the center while command-buttons for "nudging" are displayed around the edges or off to the side. By clicking the buttons, you can ask the AI to change the work along some dimension.
**Example:** 3D image manipulation. We ask the AI to make the shape more or less rounded, more or less flat, etc.

**In the wild:** Dall-E image generator.
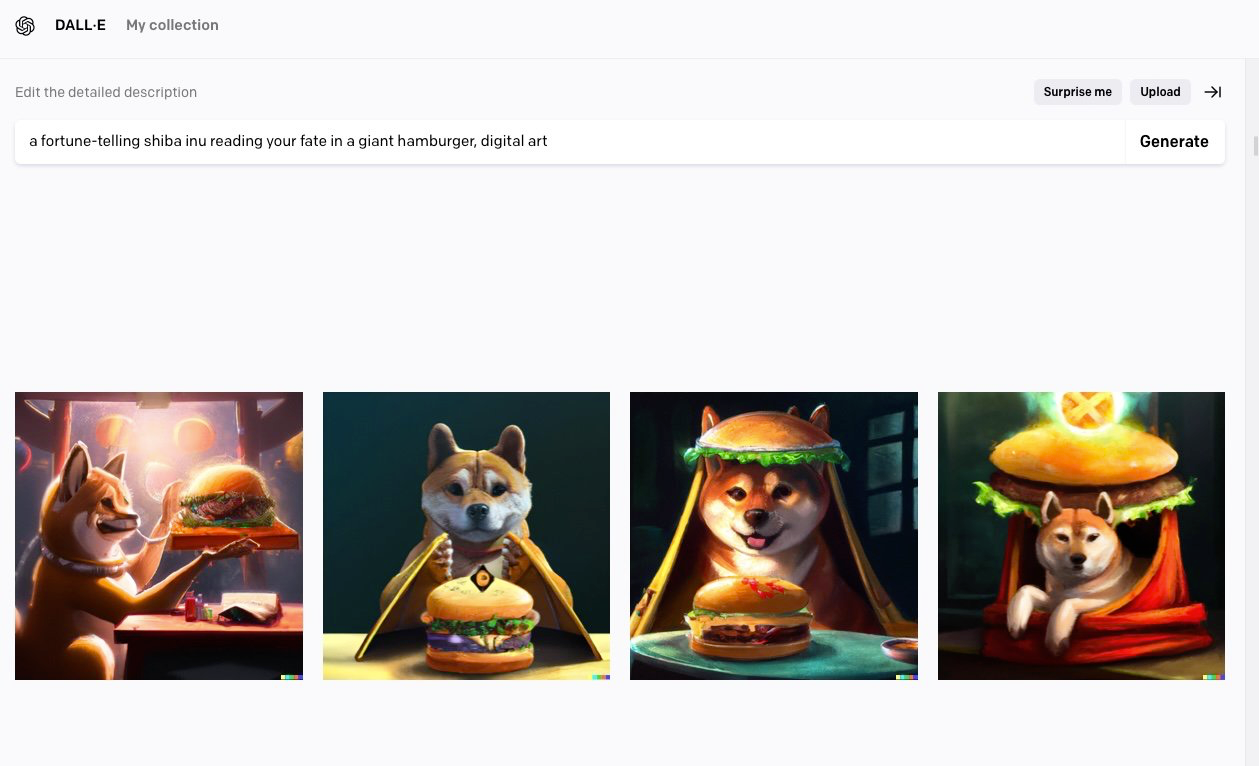
**Mimics:** 💺 Pairing with a designer, where the designer is tweaking this or that based on your input.
## Further reading
- [_Exploring Generative AI_](https://martinfowler.com/articles/exploring-gen-ai.html) • Birgitta BÖCKELER
- [_Artificial Intelligence: A Modern Approach_](https://aima.cs.berkeley.edu/) • Stuart RUSSELL, Peter NORVIG
- [_Co-Intelligence_](https://www.penguin.com.au/books/co-intelligence-9780753560778) • Ethan MOLLICK
- [_Living with AI Discombobulation_](https://youtu.be/lxpASbe5Uys) • Clay SHIRKYAI replacement theory – a critique2026-02-18T00:00:00.000Zai-replacement> Caveat: As always, I'm open to, and actively seeking, critiques. So please share your disagreements if you will. Here's an alternative opinion by Marc Brooker that seems well thought through.
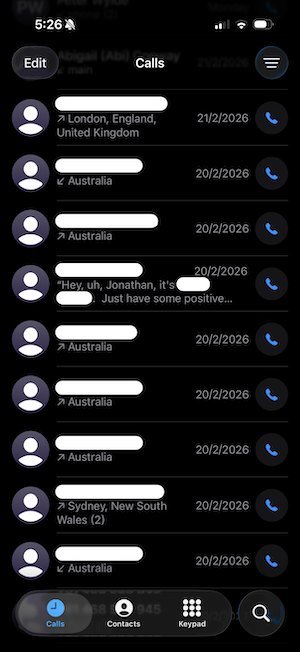
I recently [finished a contract](/work/anz) and updated my job seeker profile. I didn't mark myself as available or make any job applications – I simply updated my profile. Within days I had received many phone calls from internal and external recruiters and scheduled many job interviews.
In those job interviews, I deliberately avoided any mention of AI, to [avoid biasing](https://www.nngroup.com/articles/leading-questions/) the conversation. Surprise (or not) – practically no one I interviewed with ever brought AI up! No, apparently those who are actually hiring software developers still care about software development skills. Not only (or even primarily) AI prompting skills.
- If AI ***is already replacing*** engineers, I'm not seeing it yet. And we're already 2 months in to the new year!
- If AI is ***about to replace*** engineers, I suppose it must go in the "hasn't happened just yet" bucket, along with [nuclear apocalypse](https://thebulletin.org/doomsday-clock/), [US debt default](https://www.usdebtclock.org) and [widespread self-driving cars](https://en.wikipedia.org/wiki/Self-driving_car).
> Pull-quote: Surprise (or not) – practically no one I interviewed with ever brought AI up!
## What the numbers say about jobs
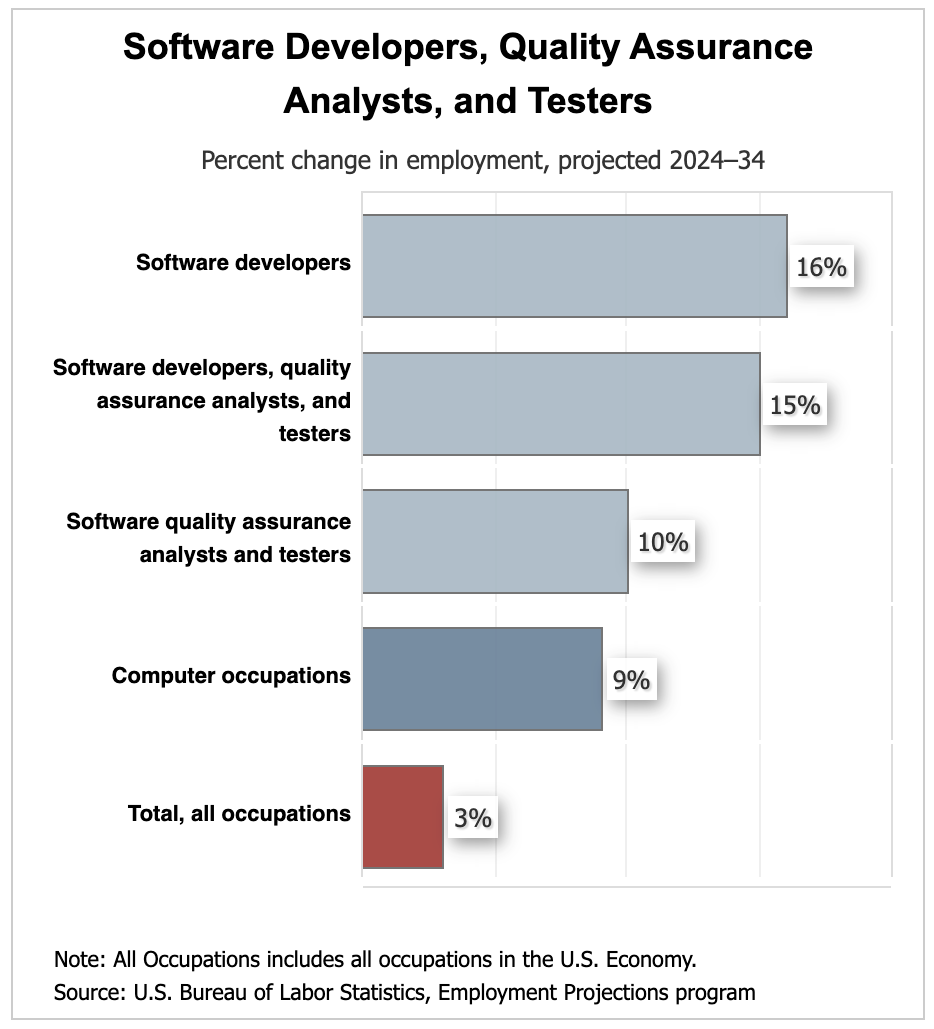
In the US, the [BLS projects 15% growth](https://www.bls.gov/ooh/Computer-and-Information-Technology/Software-developers.htm?utm_source=chatgpt.com) for software developers, considered "much faster than average". (ChatGPT helped me find that 🙂)
The story is similar in [Australia and India](https://en.wikipedia.org/wiki/Software_engineering_demographics#Relation_to_IT_demographics).
> Pull-quote: “The unemployment rate has been a little lower than expected and measures of labour underutilisation remain at low rates. Growth in the Wage Price Index has eased from its peak, but broader measures of wages growth continue to be strong and growth in unit labour costs remains high.”
>
> – [Media Release • 3 February 2026 • Monetary Policy Board • Reserve Bank of Australia](https://www.rba.gov.au/media-releases/2026/mr-26-03.html)
If statistics don't lie, software developers are at most being augmented rather than replaced.
Broadly, wages are steadily rising, at least in developed countries like [Australia](https://www.abs.gov.au/statistics/economy/price-indexes-and-inflation/wage-price-index-australia/latest-release) and [the US](https://www.bls.gov/news.release/empsit.t19.htm). This is likely driven up by the high demand for a diminishing supply of workers.
> Pull-quote: There is, in fact, enough work to go around.
Throughout the developed world (and also in some developing countries) the [human population is ageing](https://en.wikipedia.org/wiki/Population_ageing#Around_the_world). As pointed out by economist Charles Goodhart in [_The Great Demographic Reversal_](https://www.independent.org/tir/2021-fall/the-great-demographic-reversal/), the working age population is decreasing relative to the retiree population. This increases demand for labour and thus provides an incentive for governments and corporations to seek labour substitutes. AI is seen as a possible solution, and thus hyped up. The working person sees the hype, buys into it, and feels precarious. In reality, this is a mis-perception. There is, in fact, enough work to go around.
## What's actually happening
It's hard to get more specific statistics or other hard evidence to understand what's really happening.
But here are a few hunches, based on my own observations:
- 🧠 **Inertia.** Humans [resist change](https://en.wikipedia.org/wiki/Status_quo_bias). Most businesses are run by groups of humans. So, unsurprisingly, hiring strategies lag AI considerations simply because so many people have not mentally caught up yet.
- 💥 **Disruption.** It's true that some businesses are undergoing massive short-term change and laying off hundreds of workers. For example, some traditional banks are being disrupted by Fintech and even some tech firms are themselves being disrupted by other tech firms. There is nothing new or distinctly "AI-ish" about all this disruption. It is known as [creative destruction](https://en.wikipedia.org/wiki/Creative_destruction) and is baked in to the [capitalist mode of production](https://en.wikipedia.org/wiki/Capitalist_mode_of_production_(Marxist_theory)).
- 📈 **Growth dynamics.** Modern growth-based markets are not a straight-forward supply demand story. Supply can [create more demand](https://en.wikipedia.org/wiki/Jevons_paradox), as new industries and patterns of work are established and gain momentum.
- 🪖 **Switching costs / risks.** Businesses cannot, or are unwilling to, take the risk of immediately decommissioning legacy systems and switching to AI. As long as legacy systems stay in place, legacy engineers are needed to maintain them. For example, banks are still known to run their settlement systems on old versions of Java and Oracle.
- 🗑️ **Technical debt and concept drift.** While AI can initially add a lot of high quality value fast to a software project with pre-existing strong foundations, as with human developers, small mistakes can be made. These can accumulate over time, leading to an overall decline in quality or "tech debt". If there is a large amount of complex code containing subtle errors, it is not obvious that AI can tools can clean it instead of humans. AI models also have a somewhat similar issue of [concept drift](https://en.wikipedia.org/wiki/Concept_drift), where the model lags changes in the real world which invalidate its outputs.
- 🔧 **Complexity of AI.** Consumer-focussed AI tools like ChatGPT are simple enough for a child to use. But businesses-oriented AI tools, such as coding assistants (e.g. Claude Code), are more complex and require careful, structured, specific prompts and/or other context to be provided. The complexity level of using these AI tools is on a similar order to traditional software development, and in fact, could be considered a form of software engineering. There is now an emerging discipline known as "prompt engineering" with long books and multi-day courses. The Reductio ad absurdum is that if AI can do anything instantly, if prompted correctly, then every human on earth should just instantly become a prompt engineer and earn billions of dollars.
- 🤚 **Limitations of AI.** Coding might be automated, but coding is rarely the only task developers are hired for anyway. There are certain general tasks AI still cannot really do. To give a very mundane example: swiping a card at security gates, selecting an elevator floor, entering a meeting room and conversing with the attendees in a human way is not yet widely performed by talking humanoid robots at a reasonable price. Some businesses still require such manual, physical processes, and thus, still need to hire a real human to be perform them. Yes, this is still the case in 2026. If you question why this is the case, please refer back to my point on Inertia.
- 👉 **Accountability.** Humans can be made responsible and held accountable for achieving business outcomes. The carrot of recognition (promotions, wages, reputation, etc.), and the stick of firing, are used to incentivise employees to perform. AI does not work this way. With AI, you get what you choose and pay for, but with no built-in accountability if things go wrong. Nassim Taleb calls this "skin in the game" and it is integral to how much of the economy functions. The need for someone to hypothetically "point the finger at" is a key reason many (arguably, most) individuals are keeping their jobs, even in cases where AI might replace a lot of what they do.
> Pull-quote: The Reductio ad absurdum is that, if AI can do anything instantly (when prompted correctly) then every human on earth should just drop everything and immediately become a prompt engineer, earn billions of dollars and retire early.
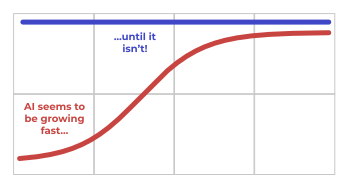
Taken together, these hunches would seem to predict a "short-term growth with long-term limits" scenario. Rather than a straightforward exponential growth curve, an S-curve with initial growth followed by tapering off as limits are realised might be more accurate. A [logistic function](https://en.wikipedia.org/wiki/Logistic_function), if you will (which I learned about from [studying calculus](https://conwy.co/articles/studying-calculus#growth-can-be-deceptive)).
## Why do people think AI is replacing them?
The narrative of AI replacing engineers is rampant.
Here are a few of my hunches on why this narrative persists:
- **Attention-grabbing.** Anyone with an interest in catching attention / eyeballs can find a use for emotional narratives like total replacement. Psychology has known for some time that, due to [loss aversion / threat bias](https://en.wikipedia.org/wiki/Attentional_bias), people focus on negative news and threats more than on positive new developments. So they focus on narratives of replacement over narratives of augmentation or progress.
- **Interested parties.** Executives with a mandate to minimise budgets, private equity firms and AI startups trying to raise capital for big expensive projects, AI engineers selling themselves to the above. All have an incentive to minimise costs. Since labour is typically the most expensive cost of doing business, it makes sense they turn opportunistically to replacement over augmentation.
- **Broad definitions of AI.** An AI engineer who is trying to provide a serious definition of AI might define it fairly narrowly as machine learning technology, using terms such as LLMs, neural nets and transformers. But the business and consumer tech worlds define it far more broadly – from self-service food ordering apps to smart watches. Do food ordering apps replace human waiters? Yes, possibly. But do they replace software engineers? It seems more likely that they generate demand for software engineers – someone has to implement and maintain those apps. The point is: defining AI too broadly makes it appear (to some) that it is displacing technologies and skill sets that, in fact, it is not.
- **Efforts to replace labour.** As discussed earlier, many economies are undergoing a contraction of the labour force. This naturally generates interest in any solution to bridge the gap between supply and demand for workers. AI is easy to sell as a solution for cash-strapped governments and corporations which cannot afford to massively invest in working-age life extension to keep the elderly in the workforce and have so far failed in attempts to incentivise people to reproduce. The story of AI replacing jobs is not about reducing the number of job openings, which are already in excess of suitable applicants, but rather, filling the empty jobs that no human seems to want to do!
## Conclusion
AI adoption might initially be on an exponential growth curve, but on further investigation, there may be limits to that growth.
- **Inertia:** humans resist big sudden changes.
- **Disruption:** change is to be expected anyway, independent of AI or replacement.
- **Switching costs and risks:** legacy sometimes makes better business sense.
- **Technical debt and concept drift:** coding errors accumulate, models drift from reality.
- **Complexity of AI:** AI itself can require human maintainers.
- **Limitations of AI:** AI cannot currently fill all available jobs, even if we all wanted it to.
None of the above is meant to suggest that we should ignore AI, hesitate in investigating and adopting AI where it fits or reactively try to stop AI. It seems premature to assume that AI will replace traditional software developers or development, and much less that it will eliminate altogether the demand for highly-skilled and appropriately compensated human labour.
## Further reading and watching
- [Blog: Don't Let AI Dull Your Software Engineering Edge • Andy WONG](https://www.awongcm.io/blog/2026/04/25/don-t-let-ai-dull-your-software-engineering-edge/)
- [Blog: The Eternal Promise: A History of Attempts to Eliminate Programmers • Ivan TURKOVIC](https://www.ivanturkovic.com/2026/01/22/history-software-simplification-cobol-ai-hype/)
- [Blog: Coding is NOT solved • Alex EWERLÖF](https://blog.alexewerlof.com/p/coding-is-not-solved)
- [Video: The software dev job market is picking up! • Maximilian SCHWARZMÜLLER](https://www.youtube.com/watch?v=7ov2M4ljccA)
- [Video: AI Is Not Improving Productivity • Daron ACEMOGLU](https://www.youtube.com/watch?v=UXK-LJ1VoDs)
Alternative opinion:
- [Blog: On the success of 'natural language programming' • Marc BROOKER](https://brooker.co.za/blog/2025/12/16/natural-language.html)
Avoid anonymous tuples2026-02-18T00:00:00.000Zavoid-tuplesI prefer to avoid anonymous tuples in code.
There are 2 main forms of these I see in Javascript/Typescript code:
1. Anonymous function parameters: `fn(param1, param2, ...)`
2. Anonymous function return values: `const [value1, value, ...] = fn()`
The reason I avoid them is that that they allow for call-sites where the identities of the values are not clear, making the code at those call-sites less readable.
Let's look at a couple of examples.
## Anonymous parameters to functions
Consider this example:
```ts
function getAccountTransactions(
username: string,
accountNumber: string,
skip: number,
limit: number,
includeFullDetails: boolean
)
```
When called, it may be unclear what each argument is for, without checking the source.
```ts
getAccountTransactions(username, accountNumber, 0, 100, false);
```
An alternative would be for the function to take a single parameter object with named fields.
```ts
function getAccountTransactions(: )
```
Now the call-site must explicitly specify the identity of each argument.
```ts
getAccountTransactions();
```
## Anonymous function return values
Consider a different example involving multiple return values:
```ts
/**
* Returns an array of booleans with one for each flag passed in.
* Each element is `true` if the flag is enabled, else `false`.
*/
function getFeatureFlags(flags: readonly string[]): readonly boolean[]
```
Similar to the previous example, it is possible to call the function in a less readable manner.
For example:
```ts
const featureFlags = getFeatureFlags([
"twoFactorAuth",
"jointAccount",
"globalAccount",
"multiCurrency",
]);
if (featureFlags[2])
```
Suppose we destructured the return values into named constants. Then the values might still be accidentally mis-ordered, causing the logic to break. This mistake would be easy to make and difficult to spot.
```ts
const [
twoFactorAuth,
globalAccount, // Whoops! 😬 The order of the return values is subtly wrong.
jointAccount,
multiCurrency,
] = getFeatureFlags([
"twoFactorAuth",
"jointAccount",
"globalAccount",
"multiCurrency",
]);
```
Changing the return value to an object with named fields eliminates the accidental mis-ordering risk.
```ts
/**
* Returns a dictionary of booleans with one field for each flag passed in.
* Each field value is `true` if the flag is enabled, else `false`.
*/
function getFeatureFlags(flags: readonly (keyof T)[]): Record
```
```ts
const = getFeatureFlags([
"twoFactorAuth",
"jointAccount",
"globalAccount",
"multiCurrency",
]);
```
Better pull requests2026-02-18T00:00:00.000Zbetter-pull-requestsPull requests are _the_ fundamental unit of change on many software projects. They allow code to be reviewed before going to Production and later serve as a handy reference when tracing the history of the code base. Thus, getting your pull requests reviewed and merged can be key to being productive as a contributor.
Previously I wrote some of my best tips on [code reviews](/articles/code-reviews) of others' pull requests.
In this article I'll share my learnings so far about what makes a good pull request.
## Cohesion over size
Though there are debates about pull request size, size may be less important than _shape_.
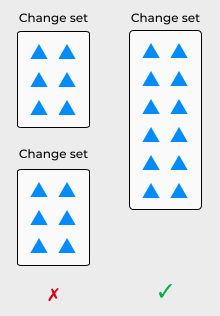
***What matters most is that a pull request is a coherent and cohesive change set.***
For example, a very large pull request might be relatively easy to review if the only change is to remove a single column from a very large CSV configuration file. Assuming the change is correct and desirable, and clearly explained and justified in the description, the diff itself can be conceptualised as one unit of change and cleanly reasoned about.
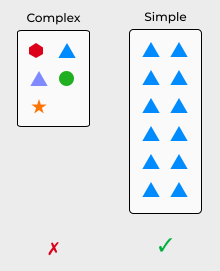
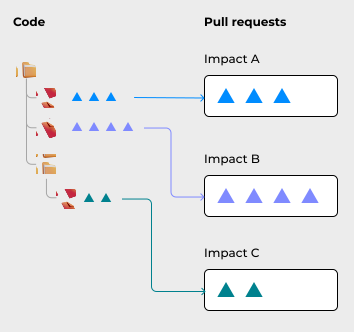
Conversely, a change that seems small in terms of number of lines could be difficult to review if those lines are unrelated or have many unrelated, unknown impacts. It might be better to split such a change into even smaller pull requests, with each pull request covering a separate impact space. This will make each pull request easier to reason about individually.
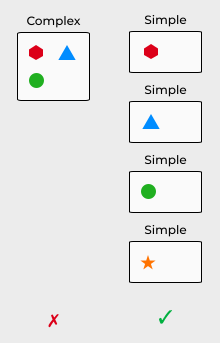
The concept of "unit of change" might be useful here. The reviewer should be able to mentally grasp and treat the change as a single cohesive unit. That way, it's easier to reason about and review.
(This idea draws on notions of [chunking](https://en.wikipedia.org/wiki/Chunking_(psychology)) in Psychology and [Single-responsibility principle (SRP)](https://en.wikipedia.org/wiki/Single-responsibility_principle) in programming.)
Applying the "unit of change" concept to pull requests:
***Keep related changes together in one pull request, so they can be reasoned about as a single unit.***
> Pull-quote: “Just as the Single Responsibility Principle states that a class should have only one responsibility, so should a Pull Request address only a single concern.”
>
> – Mark SEEMANN • [_10 tips for better Pull Requests_](https://blog.ploeh.dk/2015/01/15/10-tips-for-better-pull-requests/)
An additional advantage to cohesive pull requests is that they can be easily rolled back if there is a problem.
Sometimes it makes sense to split related changes across multiple pull requests. Some changes lend themselves to being decomposed into a sequence of smaller changes.
For example, removing a feature from an application might impact multiple unrelated areas of the application. In that case, it might make sense to remove the feature from each area one at a time, until it has been completely removed. At each stage of the removal, the whole application should build and function properly.
## Separating formatting from content
Have you ever been faced with a massive pull request – thousands of lines – only to discover on investigation that it was ***just a formatting change***?
For example, a change from tabs to white spaces or from TSV to CSV.
It's better to perform such a formatting change in a separate pull request if possible, clearly labelled as such. This will save reviewers a lot of time spent investigating the change.
> Pull-quote: “If you really need to address white space issues, move code around within files, change formatting, or do other stylistic changes to the code, please do so in an isolated pull request that does only that, and state so in your Pull Request comment.”
>
> – Mark SEEMANN • [_10 tips for better Pull Requests_](https://blog.ploeh.dk/2015/01/15/10-tips-for-better-pull-requests/)
Sometimes this separation isn't easy or even possible, however. For example, automated formatting tools might force formatting changes to be included in content changes. For these cases, you could add a brief [inline note](#inline-notes) to each block of changes, informing the reviewer that they are just formatting changes.

## Sub pull requests
In certain cases, we have a large but atomic change. The change has a broad impact, but it needs to be applied atomically or "all at once" and cannot be decomposed into a sequence of smaller changes.
For example, suppose we need to upgrade a core dependency, say NodeJS, which has multiple second-order dependencies. All of the dependencies need to be upgraded together. But it is impossible or unadvisable to upgrade each second-order dependency in a completely separate pull request.
In cases like these, the approach of "sub pull requests" can be useful.
***Merge small pull requests into a larger pull request, then merge that to main.***
This way we can get the best of both worlds:
- We can break our change into smaller pieces
- _And_ we can keep them together, for merging to the main branch atomically
```mermaid--svg
---
config:
theme: 'base'
---
%% @description Example of sub pull request pattern for package upgrades
gitGraph
commit
branch chore/upgrade-node
checkout chore/upgrade-node
commit
branch chore/upgrade-node-react
commit
checkout chore/upgrade-node
merge chore/upgrade-node-react
checkout chore/upgrade-node
branch chore/upgrade-node-mui
commit
checkout chore/upgrade-node
merge chore/upgrade-node-mui
checkout chore/upgrade-node
branch chore/upgrade-node-storybook
commit
checkout chore/upgrade-node
merge chore/upgrade-node-storybook
checkout main
merge chore/upgrade-node
```
For example:
- `chore/upgrade-node` → `main`
Then we create multiple smaller pull requests into the larger pull request branch.
For example:
- `chore/upgrade-node-react` → `chore/upgrade-node`
- `chore/upgrade-node-mui` → `chore/upgrade-node`
- `chore/upgrade-node-storybook` → `chore/upgrade-node`
Then we merge each of the sub pull requests into the larger pull request, followed by merging the larger pull request into the main branch.
1. `chore/upgrade-node-react` → `chore/upgrade-node`
2. `chore/upgrade-node-mui` → `chore/upgrade-node`
3. `chore/upgrade-node-storybook` → `chore/upgrade-node`
4. `chore/upgrade-node` → `main`
This approach gives us the best of both worlds. The team can reason about and review each piece of the code separately. And then, after all the changes are have been merged into the main pull request, that pull request can be merged once, atomically. And it can be rolled back with a single revert, if something goes wrong.
## Conventional naming
Depending on your project setup and team expectations, certain conventions might need to be followed.
These conventions might apply to:
- Title of the pull request
- Branch name
- Commit messages
- Tags on commits
- Tags on the pull request
Some teams use [conventional commits](https://www.conventionalcommits.org/), requiring commit messages to be prefixed with category such as `feat` (feature), `fix`, etc. Other teams use tools to generate `CHANGELOG` and manage [semantic versioning](https://semver.org/), such as [release-please](https://github.com/googleapis/release-please).
Automated build, release and deployment processes might expect the pull request title, commit messages and/or branch name to have a certain format. They might also detect certain tags being added to a pull request, to turn on or off CI features such as staging website generation or automated security check.
If you are a new joiner, it's best to ask the team as early as possible about these, ideally during onboarding.
## Structured description
Pull request descriptions are often under-utilised or over-utilised.
We don't want to go into unnecessary detail about a change, overwhelming the reader. We can safely omit topics that can be readily grasped by some experience with the code base or are already documented (for example, in the task ticket, Wiki pages, etc). A simple reference to the relevant task ticket could be included in the description for easy single click access.
On the other hand, we don't want to go to the other extreme and write a "lazy" description, omitting important context. This will just complicate the lives of our reviewers, who have to put in additional work to dig up the information they need to properly review the changes.
I think the right balance is:
***Include important details specific to the pull request and not documented elsewhere.***
The pull request description should _complement_ other available sources of information, filling in any critical gaps.
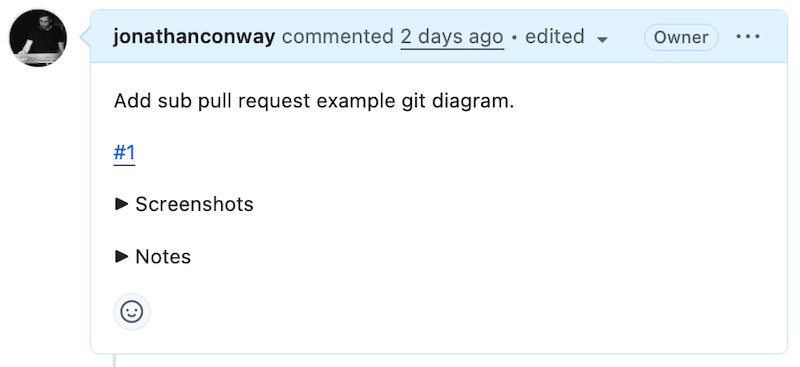
Some content to include in a description, if not already covered elsewhere:
- **Links.** To task ticket and other pull requests (such as parts of a sequence).
- **Summary.** Brief one-sentence summary of changes.
- **Technical details.** Technical details the reviewer should know about, which are not already documented somewhere.
- **Local setup instructions.** Whatever is needed to test the change. For example: shell commands, port numbers, environment variables, feature flags, etc.
- **Testing details.** Such as test steps and test data.
- **Impacts.** On behaviour, systems, processes or code.
- **Monitoring.** Guidance on monitoring the change when it goes into production. Such as where to find logs.
- **Screenshots.** Before and after screenshots or recordings, including various screen sizes as needed.
- **Diagrams.** Such as systems involved or impacted. In Mermaid format.
- **Notes.** Listing of all inline notes (self-comments) with links to each note.
For screen recordings, I prefer to avoid animated GIFs and instead use formats such as MP4, as these formats allow the viewer to manually scroll through the video. I use a compression tool, such as [HandBrake](/uses/hand-brake), to reduce the file size before uploading.
## Collapsible regions
Collapsible regions, supported in GitHub pull request markdown, can be a great way to present a high-level outline to the viewer, hiding lower-level details until/unless the reader is interested to dig deeper by clicking to expand the region.
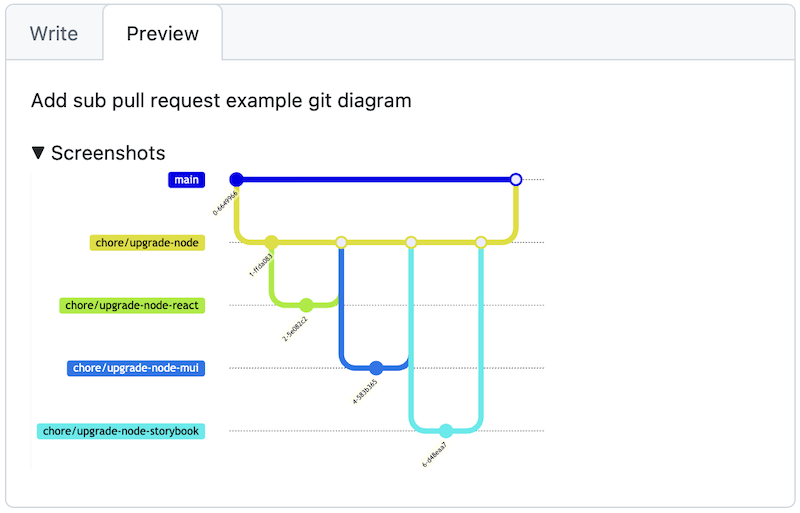
```md
Screenshots
```
This follows the UX principle of [progressive disclosure](https://www.nngroup.com/articles/progressive-disclosure/). We show the most important details to the viewer upfront and allow them to drill into finer details only if they want to.
## Description template
Many projects provide a [pull request template](https://docs.github.com/en/communities/using-templates-to-encourage-useful-issues-and-pull-requests/creating-a-pull-request-template-for-your-repository) in a standard `docs/pull_request_template.md` file. This can be a good place to begin, when forming your pull request description, as it typically provides guidance, such as a list of elements your description should contain and in what order.
Description templates often contain helpful information, such as checklists of verification steps, todo lists for authors and snippets of commonly used text.
> Pull-quote: “Our team implemented a similar approach by including a checklist of manual verification steps to perform as part of a change request. The checklist, in the form of a to-do list, is included in the GitHub pull request template for our repositories.”
>
> – Cloves CARNEIRO Jr., Tim SCHMELMER • [_Microservices from Day One_](/reading/a-philosophy-of-software-design) • Chapter 8, pp. 112
## Re-usable snippets
You may find it helpful to keep a handful of "snippets" – pieces of text that can be copied and pasted to quickly scaffold a pull request description. These can be kept as, say, Text (`.txt`) or Markdown (`.md`) files in a local folder.
For example, if your pull requests frequently include "feature flag" instructions, you can set up a reusable "feature flag" snippet. Whenever needed, you can copy and paste the "feature flag" snippet into the pull request and then easily adjust the feature flag keys.
## Inline notes
Some pull requests can benefit from additional notes about the code which would be inappropriate to include as comments in the code itself.
These might include open questions to code reviewers (which are to be replied to in a discussion thread), explanations of why a change was made or guidance on how to test a change.
These inline notes can be added as comments on specific lines of code or whole code files.
You can prefix the notes to make them easier for code reviewers to scan.
- `Note:` - additional context to help the reviewer understand the change.
- `Explanation:` - explanation of why the change is being made.
- `Warning:` - warning to the code reviewer of some risk or gotcha they might encounter.
- `Question:` - open question, to be answered or discussed in a reply or over team chat.
- `Testing:` - instructions on how to test a piece of code, perhaps including mock data.
- `Screenshot:` - inline screenshot of a single page, component, etc.
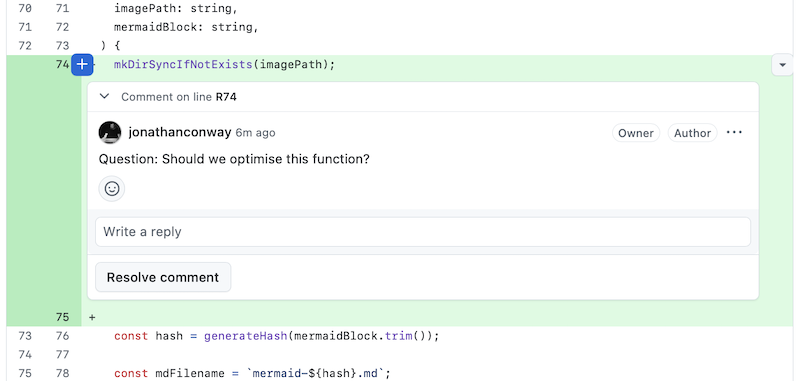
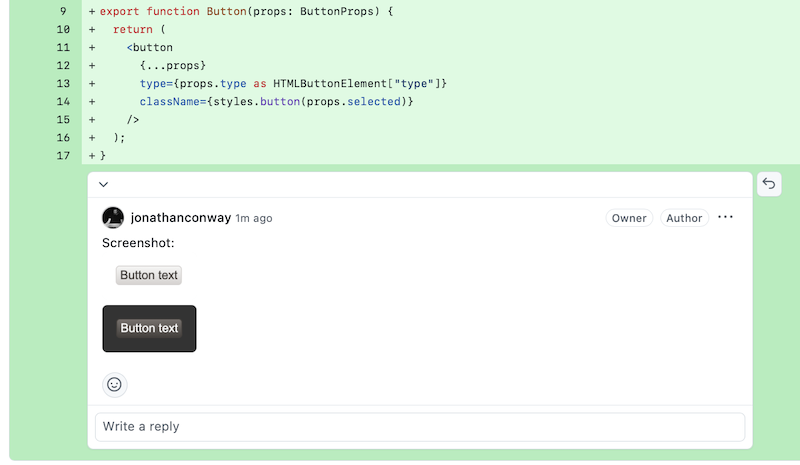
You might include testing instructions with small snippets of code, if it will save the reviewer's time, and assuming they cannot be expressed in an automated test.
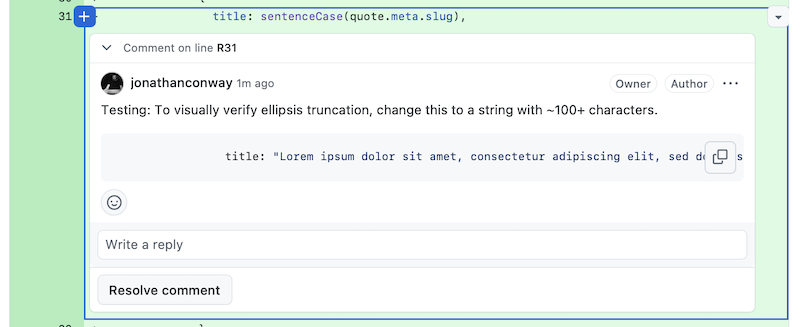
If there are multiple inline notes, you can collect them into a summarised list, along with links back to the source, in the description (perhaps in a collapsible region). This allows the reviewer to glance and scan them at a high level.

```md
Notes
- [Note 1](https://github.com/jonathanconway/conwy/pull/4/changes#r3840098965): Question: Should we optimise this function?
- [Note 2](https://github.com/jonathanconway/conwy/pull/4/changes#r3840102986): Explanation: Re-generated by content-anchors tool, following content update.
```
## Communication
It's important to choose the right channel to communicate your pull request.
Depending on the set up at your organisation, your team members might automatically be notified of your pull request as soon as it is opened. If not, you might need to manually add them as reviewers and/or ping them in the team chat (such as Slack).
It might be helpful to tag specific individuals if broadcasting a PR to a larger team through, say, the team chat channel. This way, you can involve the right people in code review while keeping the rest of the team in the loop.
## Responding to feedback
I find it best to take on any reasonable feedback and action it as quickly and effectively as possible, assuming good faith.
What if you want to indicate agreement? What if when there are multiple points of feedback and you need to keep track of them? For the above, I like to keep a checklist of feedback items for each of my open pull requests in a local text file.
Additionally, I usually leave a small indicator to show I've seen and approve the feedback, such as a thumbs-up emoji: 👍.
I also leave a comment with a checklist item for actioning. For example:
> ```typescript
> function sumNumbers()
> ```
> Reviewer: Let's add a unit test and some mock data for this.
> Me: 👍
>
> - [ ] add unit test for `sumNumbers`
> - [ ] add mock data for `sumNumbers`
I try to action each checklist item in its own separate commit, naming the commit after the item. This helps me to keep track of my progress.
For example:
```
fix: add unit test for sumNumbers
```
I keep the commit history prior to merging. And as I push each change, I check off the checklist items one by one. That way, the reviewers and the engineering manager can view my progress and the evolution of the solution. After actioning a raft of feedback items, pushing them all and ensuring the CI is green, I submit the pull request for another round of review.
> Me: 👍
>
> - [x] add unit test for `sumNumbers`
> - [x] add mock data for `sumNumbers`
I often find it helpful to perform another self review after actioning feedback and before submitting each round. This way, you can anticipate any follow up feedback and action it pre emptively. This may be helpful in situations where the quality of your work as an engineer is measured based on iteration count. (For example: [QuantumLight's Performance Management for Deliverables](https://quantumlightcapital.com/playbooks/performance-management/the-framework#deliverables) mentions "# of iterations to completion" as a KPI.)
## Extended discussions
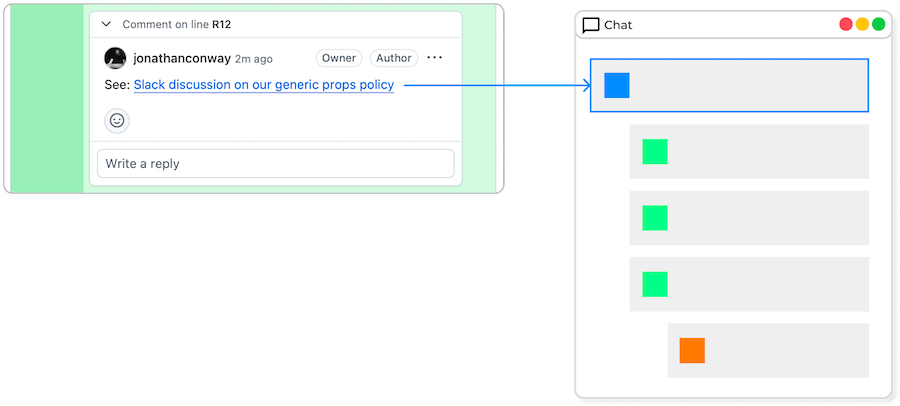
Discussions in code review can get pretty deep, especially during the early stages of a project or when discussing a complex issue. Too many nested comments in a pull request can be difficult for reviewers to keep track of and obscure the communication from the wider team.
For this reason you might want to take deeper discussions into a more appropriate forum, such as team chat (Slack or equivalent) or a call (Teams, Google Meet or equivalent). These more real-time and chat oriented spaces can smooth and speed up communication, enabling you to get your pull request merged sooner.
You should make sure to add links to such discussions to the pull request, either in the description or comments thread. These can serve as valuable references for future maintainers who view the pull request, perhaps via Git blame.
## Drafts
Submitting pull requests in draft mode can be a good way to "sketch" a change and get early feedback on the overall direction before going too deep. Draft pull requests are a great way to do solution design as a team, as they ground the design **in the code** rather than getting too abstract with diagrams or wordy descriptions.
Multiple drafts can be created to compare and contrast alternative designs. Producing alternative designs, comparing them, and selecting one is a tactic recommended by software design expert John Ousterhout.
> Pull-quote: “Even if you are certain that there is only one reasonable approach, consider a second design anyway, no matter how bad you think it will be. It will be instructive to think about the weaknesses of that design and contrast them with the features of other designs.”
>
> – John OUSTERHOUT • [_A Philosophy of Software Design_](/reading/a-philosophy-of-software-design)
Alternative drafts can be referenced in team documentation, such as ADRs.
## Further reading
- [Video: What is a Pull Request, and How Do I Write Great Pull Requests? • Matt STAUFFER](https://www.youtube.com/watch?v=_HedItVFr5M)
- [Blog: 10 tips for better Pull Requests • Mark SEEMANN](https://blog.ploeh.dk/2015/01/15/10-tips-for-better-pull-requests/)
- [Blog: On commenting and approving pull requests • Jake WORTH](https://www.jakeworth.com/posts/on-commenting-and-approving-pull-requests/)Streamlining code reviews2026-02-18T00:00:00.000Zcode-reviews> Summary: Code reviews can be made easier and more efficient by following a repeatable process. The process I found useful is: 1. context: gain a high level understanding of the context of the change, 2. scan: read all the code and mark out any immediate issues and questions and follow them up, 3. checklist: rigorously review the code against a code review checklist and leave prioritised comments.
For myself and others, I've found that code reviews can be a challenging part of being a software developer.
There may be many code changes to go through, many possible mistakes to be found and limited time to find and communicate them. Even before considering mistakes, the sheer amount and complexity of the code and changes can feel overwhelming – you don't know where to begin. It often feels like code review is chaotic and random, and it's down to luck whether or not it will be constructive.
In this article I want to share my code review process, which I've evolved over time, in response to the pressures mentioned above.
These are not necessarily based on hard evidence such as data and statistics, but more of a grab-bag of potentially useful ideas sampled from a range of different work environments, development stacks and teams, over many years.
Broadly, there are three practices I follow, in order, for each code review:
1. **_Context_** – gain a high level understanding of the context surrounding the change, by checking the description, commit messages, task and any other documentation, and/or by asking the author
2. **_Scan_** – scan all of the code in the change, observe any questions or issues that come to mind, try to answer them on my own, otherwise leave a comment
3. **_Checklist_** – make a final pass of all the code, this time against a checklist, and call out minor and major issues
Let me go into a bit more detail on how I perform each of these.
## Context
It's difficult to meaningfully assess a code change without understanding its **_context_**.
Context includes: what problem or requirement the code change intends to solve and how it fits into the broader context of the system.
Without context, the code may either look superficially correct, leading you to approve it too quickly, or it may look very odd, generating innumerable questions to the author. Conversely, when you **_do_** understand the intention and context, a code change becomes much easier to understand and more intelligible.
So I've found it useful to learn more about the context if I'm unclear.
Here are some methods I use to learn more about the context:
- Read descriptive notes and commit messages for the change, if any.
- Look up the task associated with the code change and read description and comments there.
- Look up code files related to the change and examine the code there.
- Look up the **_history_** of the files associated with the change, look up the tasks associated with that history, read the descriptions and comments.
- Search internal information sources (chat channels, wiki, etc.) using keywords found in the code.
- Ask the author of the change directly for context.
- Look up the authors of the files associated with the change in version control history and ask them directly for context.
While the above might seem time-consuming, I've found it possible to fairly quickly improve my knowledge, even within minutes, by just picking a few of the relevant methods and applying them.
For example, if I already work closely with the author involved, a simple message asking for context often gets a quick reply. Or if the code changes are attached to tasks, e.g. via task codes, it's usually possible to access the task with just a couple of clicks, and then read it within a few minutes.
I believe this "context hunting" is usually worth the effort. It's not only about understanding the code change you're looking at. The benefits of contextual knowledge compound over time. Initially you might spend, say, 10 minutes reading and digesting contextual information, but eventually the time spend can approach 0, as you develop a systematic understanding of the whole system. That systematic understanding is highly valuable in all kinds of ways, not only for code review. It can help you to succeed in your own projects within the organisation and even help you to make the case for new projects and initiatives.
## Scan
After gaining context, the next step is to scan the code, getting a "big picture" view of how it hangs together.
I'll often check out the change locally, open some of the files in my IDE, and use the navigation tools in the IDE to figure out what sequence of calls are being made, what data are being passed, etc. If it's a complex network of calls, I might spend a few minutes sketching an [execution flowchart](/articles/visualising-execution-flows).
I also survey the content of new code added, looking at key variables, control-flow structures (conditionals, switches, loops, etc), and getting an overall grasp of what the code does.
At this point I may already have questions or issues for the author, and if so, I won't hesistate to leave a few comments.
My comments will usually be in the following form:
```
[Priority]: (Message)
```
This helps the author to understand my intent and prioritise which comments to reply to.
For example, if it's a minor issue, which shouldn't necessarily block merging, I'll write something like this:
```
[Minor]: `.forEach(expandSection)` might be more concise here.
```
But if it's a question, I'll write:
```
[Question]: Should this section be hidden for users without permissions?
```
And if it's a major issue, I'll write:
```
[Major]: Should include an authorization check here.
```
There are some other systems for prefixing review comments. David Garcia has a [two-part tagging system](https://blog.techdocs.studio/p/a-tagging-system-for-documentation-review-comments) comprising severity ("blocker", "improvement", "optional") and category ("clarity", "bug", "organization", "style", "consistency").
## Checklist
> Pull-quote: “Substantial parts of what software designers, financial managers, firefighters, police officers, lawyers, and most certainly clinicians do are now too complex for them to carry out reliably from memory alone.”
>
> – Atul GAWANDE • _[The Checklist Manifesto](https://en.wikipedia.org/wiki/The_Checklist_Manifesto)_
By this point I'll have a pretty solid understanding of the change.
Now it's a good time to run through a code review checklist and see if I missed anything significant.
Because I broadly understand the change as a whole, even with a large checklist of 50 items, it's possible to quickly scan the checklist and pick out only the items that apply to the code.
For example, suppose one of the items in my checklist is:
- Query keys should be appropriately unique
After scanning the change, I will already know whether or not the change includes any query keys at all. If it does not, then I can immediately skip this step.
On the other hand, if the change **_does_** contain enums, then I will know to check the following item in my checklist:
- Enum values should match keys
Where does this checklist come from?
I usually build a unique checklist for each project I work on. As initial inputs to the checklist, I analyse the codebase I'm working on and read any technical documentation, such as coding standards.
Subsequently I will add new items to the checklist, based on comments others leave on my change submissions, technical discussions with team members and general observations.
Additionally, I've built up a pool of coding standards and best practices over my time as a developer. Some of these you can find documented in my article, [Towards zero bugs](/articles/towards-zero-bugs). I plan to publish a comprehensive list of them in a future blog post.
This checklist isn't only useful for reviewing others' work – I use it on my own changes as well. By anticipating feedback and addressing it earlier, my code will already be of higher quality by the time it reaches the screens of others. This reduces the review workload on other engineers and improves my reputation within the team.
## Maximising developer experience
Part of being a good team mate is to maximise others' developer experience and this is certainly applicable to code reviews.
I think it's best to balance commendation with criticism. This helps build a positive relationship with contributors and have more influence.
> Pull-quote: “When someone asks you to review a document or pull request or conference talk, do call out the sections that you think are great, but pay them the respect of being (kindly!) honest about their work. Giving constructive and critical feedback isn’t easy. It takes effort to tease out exactly what isn’t working and find the words to explain why it’s not as good as it can be. It’s a more difficult conversation. But you won’t help your colleague if you hide the truth.”
>
> – Tanya REILLY • [_The Staff Engineer's Path_](/reading/the-staff-engineers-path) • Chapter 8. Good Influence at Scale, pp. 367
Also I try to minimise iterations. Ideally all relevant feedback should be collected together and delivered in one go, rather than sprinkling small pieces of feedback over many hours and forcing the contributor to repetitively go back and make changes. When reviewing a significant sized pull request, I try to keep a list of my comments in a local Markdown file and then post them all at once when I'm done. GitHub's [Pull request reviews](https://docs.github.com/en/pull-requests/reference/pull-request-reviews) feature helps with this.
## Ownership
If you want to act as a steward of the code base, often referred to as "ownership", you will want to take responsibility for changes you approve and suggestions you make. Your feedback will need to be consistent over time and not self-contradictory. Mistakes in feedback are understandable, but should be acknowledged and corrected going forward. I find [code review checklists](/checklists?checklist-meta.checklistTags-tag=software-development) a great tool for maintaining awareness and consistency in feedback and self-correcting biases.
If you approve a pull request without any feedback, it can be good to leave a brief comment, just to let the contributor know that you did your due diligence. It can be a simple one sentence, high level summary of what checks you made.
## Additional ideas and thoughts
Sometimes I automate parts of this process with AI, depending on the situation. I try to avoid overly relying on AI, as I think it's important to maintain direct knowledge of the code base.
Obviously there isn't always enough time to follow these processes religiously. If it's a high-impact change, e.g. significant production changes, I'll try to ask for more time to review it and provide regular progress updates in a chat thread, just like a larger development task. If additional time is not granted, I'll still make a "best effort", demonstrated by comments, feedback where necessary, testing, etc. At least I can show that I tried.
Sometimes a big, scary change-set isn't actually such a heavy burden as it initially appears. If much of the change-set can be mentally reduced to a common pattern, then I can describe the pattern in a brief written sentence (or read and understand the developer's description in the PR notes), check and ensure it is appropriate to the situation, ensure it's being applied consistently and correctly and ensure it's not being applied where it shouldn't. This might not require reading every individual line of code.
The book [_Software Engineering at Google_](/reading/software-engineering-at-google) has some useful guidance under the section "Types of Code Reviews". They categorise code reviews into four types, each with a preferred treatment:
- Greenfield reviews and new feature development
- Behavioural changes, improvements, and optimizations
- Bug fixes and rollbacks
- Refactorings and large-scale changes
Categorising a code review, similar to above, one can focus effort and skip unnecessary processes.
## Conclusion
Code reviews are an integral part of modern software engineering.
At a team level, they're a great way to maximise code quality and ensure a shared understanding and knowledge of the code and systems.
At an individual level, they're useful for understanding as much of the code as possible, both at a high level and a detailed level. This improves the quality of my own work and increases the likelihood of success in my current work and new initiatives within the organisation.
Having a normalised process for performing code reviews helps make them easier and more fun. It also improves the quality of the feedback and, long-term, the code base.
## Further reading
These books inspired this article:
- [Book: Software Engineering at Google • Titus WINTERS, Tom MANSHRECK, Hyrum WRIGHT](https://www.kobo.com/au/en/ebook/software-engineering-at-google)
- [Book: The Staff Engineer's Path • Tanya REILLY](/reading/the-staff-engineers-path)
Related resources you might find helpful:
- [Blog: A tagging system for documentation review comments • David GARCIA](https://blog.techdocs.studio/p/a-tagging-system-for-documentation-review-comments)
- [Post: The Code Review Pyramid • Gunnar MORLING](https://www.linkedin.com/feed/update/urn:li:activity:7083099045279232000)
- [Video: How to Do Code Reviews Like a Human • Michael LYNCH](https://www.youtube.com/watch?v=0t4_MfHgb_A)Code sketches2026-02-18T00:00:00.000Zcode-sketchesHave you ever posted a code sample in a discussion thread and wanted to focus the reader on some important parts? You want to emphasise the important parts while "blurring out" the other parts?
For example, maybe you want the reader to focus on usage of a particular variable or a particular branch of a conditional.
Here I find "code sketches" can be useful. We take a piece of code, keep its structural elements, keep relevant details and obscure irrelevant details (using some "filler" such as ellipses).
## Example
For example, take this code:
```cs
public void CalculateOrderCutOffTime(string orderId, string timeZoneId)
else if (OrderType == OrderType.HomeDelivery)
if (FulfilmentMode == FulfilmentMode.Standard)
else if (orderedDateInLocalTime.DayOfWeek == DayOfWeek.Saturday && !orderedBeforeMidday)
else
}
else if (FulfilmentMode == FulfilmentMode.Priority)
else if (FulfilmentMode == FulfilmentMode.Express)
else
}
}
```
Suppose we want the reader to focus on the logic involving `FulfilmentMode.Priority`.
```cs
else if (FulfilmentMode == FulfilmentMode.Priority)
```
We can "blur out" out the other less relevant code using ellipses in code comments: `/* ... */`.
```cs
var orderedDateInLocalTime = /* ... */;
var orderedBeforeMidnight = /* ... */;
if (OrderType == OrderType.Pickup)
else if (OrderType == OrderType.HomeDelivery)
else if (orderedDateInLocalTime.DayOfWeek == DayOfWeek.Saturday && !orderedBeforeMidnight)
else
}
else if (FulfilmentMode == FulfilmentMode.Priority)
else if (FulfilmentMode == FulfilmentMode.Express)
}
```
And voilà! We have a "code sketch"!
It replicates exactly the key structural elements of the original code – namely, the nested `if` statements.
But it abstracts away the non-structural details that would otherwise confuse or distract the reader – using ellipses `/* ... */`.
This allows the reader to focus on one part of the code, while still seeing how that part fits into the whole.
I've found code sketches like this useful over the years in many conversational contexts, such as:
- Chat threads (Slack, etc)
- Ticket comments (Jira, etc)
- Code review discussion threads (GitHub pull requests, etc)
- Code comments
- Documentation (Confluence, etc.)Combinatorial testing2026-02-18T00:00:00.000Zcombinatorial-testing> Summary: Combinators (from functional programming) can be used to generate data-driven tests that cover many combinations of inputs, without having to spell out every possible combination in code.
Have you recently tried to unit test a function which has many combinations of possible inputs and expected outputs?
An increasingly common way of writing such a test is to utilize a data-driven test. The problem with data-driven tests is that they can quickly grow to be large and unwieldy.
In this article, I want to introduce a technique for generating data-driven tests without having to spell out every individual combination of inputs/outputs in code.
But first, a quick refresher on data-driven tests...
## Limitations of data-driven tests
You may be familiar with [data-driven testing](https://en.wikipedia.org/wiki/Data-driven_testing). Basically you write a table of combinations of inputs and outputs in which each test case is inputted as "row" of data. Data-driven testing is now supported by many popular test frameworks (Jest, JUnit, NUnit to name a few).
One problem with data-driven testing is: sometimes we have so many combinations to cover that a comprehensive data-driven test would be very lengthy and difficult to read or maintain.
Imagine, for example, trying to write a data-driven unit test for a function which returns the **number of days in a given month**.
The function takes two parameters: `year` and `month` and returns one `day` value. It has to deal with a range of values for each parameter. Multiplying all values that need to be tested by two parameters yields a large number of combinations.
```ts
it.each([
,
,
,
,
// and so on and so on ... 😓
]);
```
That number of combinations, though easy for a computer to process, is not easy for us to wrap our human minds around!
Perhaps the solution is to express the combinations in a more concise manner – as grouped ranges of values – rather than spelling out every single combination.
Combinator function to the rescue!
## What is a combinator?
In the world of functional programming, the term "combinator" informally refers to a pattern...
> "where complex structures are built by defining a small set of very simple 'primitives', and a set of 'combinators' for combining them into more complicated structures"
> – _Combinator Pattern_ • [wiki.haskell.org/Combinator_pattern](https://wiki.haskell.org/Combinator_pattern)
The combinator I present in this article is more specific. It takes as input an object whose properties each have a value that is an array. Then it combines each value of each array. All of the objects generated by this means are then returned to the caller.
For example, suppose we provide an input object having a single property, "color", whose value is an array containing elements "red" and "blue":
```ts
```
The combinator will return us an array having the following objects:
1. an object having a "color" property whose value is "red" and
2. an object having a "color" property whose value is "blue"
```ts
[
,
,
];
```
Suppose we provide an additional property in our input object, "brightness", whose value is an array containing elements 100 and 200:
```ts
```
The combinator will return us an array having every specified combination of "color" and "brightness":
1. an object having a "color" property whose value is "red" and a property "brightness" whose value is 100 and
2. an object having a "color" property whose value is "red" and a property "brightness" whose value is 200 and
3. an object having a "color" property whose value is "blue" and a property "brightness" whose value is 100 and
4. an object having a "color" property whose value is "blue" and a property "brightness" whose value is 200
Like this:
```ts
[
,
,
,
,
];
```
Providing a definition object as input, we can get a large set of results as output.
Here's a high-level diagram:

combinate ..> Definition~T~
class combinate~T~
combinate ..> Array~T~ : returns
Array~T~ ..> T
class Array~T~
class T
`} */}
Let's apply this combinator to a slightly more "real world" example.
## An example: days in a month
For historical reasons, determining the number of days in a month in the Western calendar is complicated.
The following short rhyme tries to summarize the rules in a memorable way:
> Thirty days have September,
>
> April, June and November.
>
> All the rest have thirty-one,
>
> except February alone, which has
>
> twenty-eight days each year
>
> and twenty-nine days each leap-year
Suppose we wanted to unit-test a function, `getDaysInMonth`, which takes `month` and `year` as input and returns a number of `days`.
We could simply input every possible date into the unit test and assert on the month of each. As mentioned above, that could involve quite a lot of fiddling in Excel and would result in a very long and not very human-readable test file.
Instead, let's try to tackle this problem with a combinator.
Starting with the first two lines of the rhyme:
> Thirty days have September,
>
> April, June and November.
We can express this "thirty days" combination set programmatically, like this:
```ts
const thirtyDays = combinate();
```
The result can easily be passed into a data-driven test in Jest:
```ts
it.each(thirtyDays)(
"$month in $year should have $expectedDays days",
() =>
);
```
On running the unit test, the following test cases will be generated and executed:
```ts
✓ april in 2020 should have 30 days (3 ms)
✓ june in 2020 should have 30 days
✓ september in 2020 should have 30 days
✓ november in 2020 should have 30 days
✓ april in 2021 should have 30 days
✓ june in 2021 should have 30 days (1 ms)
✓ september in 2021 should have 30 days
✓ november in 2021 should have 30 days (1 ms)
✓ april in 2022 should have 30 days
✓ june in 2022 should have 30 days
✓ september in 2022 should have 30 days
✓ november in 2022 should have 30 days
✓ april in 2023 should have 30 days
✓ june in 2023 should have 30 days
✓ september in 2023 should have 30 days
✓ november in 2023 should have 30 days
```
Notice how we can use a small amount of code (in this example, 5 lines for the `combinate` call) to generate a much larger set of test cases (16). This gives our test code more leverage.
Covering the remaining lines of the rhyme:
> All the rest have thirty-one,
```ts
const thirtyOneDays = combinate();
```
The following data will be generated:
```ts
✓ january in 2020 should have 31 days (2 ms)
✓ march in 2020 should have 31 days (1 ms)
✓ may in 2020 should have 31 days (1 ms)
✓ july in 2020 should have 31 days (1 ms)
✓ august in 2020 should have 31 days
✓ october in 2020 should have 31 days
... etc ...
```
> except February alone, which has
> twenty-eight days each year
```ts
const februaryDays = combinate();
```
```ts
✓ february in 2023 should have 28 days (2 ms)
```
> and twenty-nine days each leap-year
```ts
const februaryLeapYearDays = combinate();
```
```ts
✓ february in 2024 should have 29 days (2 ms)
```
Finally, putting it all together, here is the complete unit test:
```ts
describe("getDaysInMonth", () => );
const thirtyOneDays = combinate();
const twentyEightDays = combinate();
const twentyNineDays = combinate();
it.each([
...thirtyDays,
...thirtyOneDays,
...twentyEightDays,
...twentyNineDays,
])(
"$month in $year should have $expectedDays days",
() =>
);
});
```
Notice that we can assign meaningful names to each of the variables, increasing the readability of the test code.
I'm sure you would agree that this test code, using a combinator, is more concise and readable than a large table of numbers and strings!
In closing, I encourage you to use combinatorial testing to shorten and sweeten your data-driven tests, thus testing your software thoroughly and making it maximally robust.
## Introducing combinator-util
If you'd like to add a little combinatorial goodness to our unit tests, please check out this re-usable, open-source NPM package:
[https://github.com/jonathanconway/combinator](https://github.com/jonathanconway/combinator)
Contributions welcome!
## Further reading
These books inspired this article:
- [_Introduction to Mathematical Thinking_](https://www.amazon.com/Introduction-Mathematical-Thinking-Keith-Devlin) by Keith Devlin
Dependency updates2026-02-18T00:00:00.000Zdependency-updatesIt's best practice to keep an eye on dependency updates, especially where security fixes are needed. This can help us to avoid [software supply chain vulnerabilities](https://owasp.org/Top10/2025/A03_2025-Software_Supply_Chain_Failures/), which often feature in the OWASP Top 10.
Many organisations use an automated pipeline tool, such as [Dependabot](https://github.com/dependabot), to continuously scan for updates and generate pull requests into repos.
I recommend following a consistent process around reviewing and merging these generated pull requests. Especially in continuously deployed or mission-critical applications, we don't want to just merge anything and everything. If an upgrade explicitly addresses a known vulnerability, we should prioritise it. At the same time, we should perform appropriate tests to ensure the upgrade doesn't cause breakage generally.
To address the above, I came up with a checklist around dependency updates.
## Dependency updates checklist
Here is the link to the checklist:
## Further reading
- [Blog: Hardening npm dependency security • Alex O'CALLAGHAN](https://alexocallaghan.com/hardening-npm-dependency-security)How I built my designerly CV2026-02-18T00:00:00.000Zdesignerly-cvAs a Front End Engineer – a weird yet oddly common cross between software engineer and designer – I made three self-discoveries early on:
1. I am often looking for work
2. I care about aesthetics
3. I can hack almost anything
Thus, necessity proved the mother of invention, and I found myself striving to produce a CV worthy of my profession.
## Selecting a word processor
This might seem like a problem of the 90s, but even now in an age of free browser-based apps, I still found it a non-trivial question.
My requirements:
- Free & open-source (I'm well off enough, but just allergic to subscriptions to big tech firms)
- Minimal dependency on web connectivity (I want to be able to edit my CV at short notice with limited Internet connectivity)
- Able to save as a regular file in the file system and share easily (say, as an email attachment, in a LinkedIn message, etc.)
- Able to export to common formats – both PDF and Word (in case a recruiter needs to edit in their logo)
- Compatible with Mac and Windows (I sometimes work on a Windows box)
With a very small learning curve [LibreOffice](https://www.libreoffice.org) ticked all the boxes nicely.
## Layout design
Before jumping into the word processor, I first developed a very simple pen & paper sketch, followed by a simple block diagram in [Draw.io](https://www.drawio.com/). This allowed me to experiment and tweak the design at a high level until I reached something I was comfortable with.
I ended up with a vertically stacked set of blocks for the jobs, with each block having a two-column layout with duties on the left and details (such as start/finish dates, tech and testimonials) on the right.
The design also includes a big header with some upfront features such as the tech I mainly focus on and my formal education. And an end section with side projects and short courses.

## Implementation
Tables are supposed to be anathema to web developers, aren't they? Well, this design is intended for a static document format (Word, PDF) or printed paper. It is not intended for the browser. Those who prefer or need to use a browser are welcome to peruse my [Work section on conwy.co](http://conwy.co/work) or my [LinkedIn profile](http://linkedin.com/in/jonathanconway).
It was quite easy to use the native Table, Paragraph, Bullets and Style & Formatting facilities of LibreOffice, which play nicely with Word and PDF. Margins, padding and bullet style are all fully configurable, so I was get a close to perfect design.
To be sure, as I was building the CV, I frequently exported to PDF and Word to check the results.

## Dancing with content
Content writing for static documents is surprisingly different than for web, especially when working with a carefully crafted layout. You can't rely on the user's scroll bar so much, so text needs to be carefully crafted to fit inside the container.
I found myself going back and forth between Sublime Text and LibreOffice – the former to craft source material, the latter to edit it down to fit within the "real estate" of a formal document.
A few tricks in no particular order:
- Shortening month names (~~Jan~~ → Jan, etc)
- Abbreviating date intervals (~~year~~ → yr, etc)
- Reducing font size on whole lines (like testimonial author and date)
- Combining multiple details onto one line (like start/finish dates, period, industry)
- Removing unnecessary verbosity and non-essential grammar (trading off minor grammatical correctness for visual appeal)

## Finishing touches
For a finishing touch, I wanted to use a nice fancy font for headings.
After some exploration I settled on [Sweden Sans](https://sharingsweden.se/the-sweden-brand/brand-visual-identity/typography), kindly made available in the public domain by the generous tax payers of one of the most liveable countries on Earth.
Web developers have it easy when it comes to interesting non-standard fonts. We just package the WOFF/TTF/ODF with our website and link to it. Or better yet, use [Google Fonts](https://fonts.google.com/) and just grab a link there.
A quirk of word processors like LibreOffice, when exporting an editable format like Word/DOCX, is that you cannot rely on the end-user having installed all the required fonts.
But there's a hack! You can [embed fonts](https://support.microsoft.com/en-au/office/benefits-of-embedding-custom-fonts-cb3982aa-ea76-4323-b008-86670f222dbc) in Word files. And it turns out [LibreOffice fully supports font embedding](https://help.libreoffice.org/latest/en-US/text/shared/01/prop_font_embed.html). Simply go to File → Properties → Font tab and check Embed fonts in the document. This worked nicely, both for exported Word/DOCX and, of course, PDF files.

## Download my template
In the spirit of Christmas I thought I'd share my CV, accompanied by a re-usable template.
- My CV • [Download: conwy-cv.zip](/downloads/articles/designerly-cv/conwy-cv.zip)
- Designerly CV Template Package • [Download: conwy-designerly-cv-template-package.zip](/downloads/articles/designerly-cv/conwy-designerly-cv-template-package.zip)
Diagramming React code2026-02-18T00:00:00.000Zdiagramming-react> Summary: React components can be diagramming in a UML-like format, depicting Components, Component calls (with props and render props), Functions and Types or Interfaces.
After working on a [Typescript diagram format](/articles/diagramming-ts) I wanted to focus on a React equivalent.
Diagrams can be useful for various purposes:
- Designing a solution at a high-level before writing any code
- Understanding an existing code-base by diagramming it
- Quickly sketching ideas to compare different designs or work out a refactoring strategy
In this article I'll describe a UML-influenced diagramming format for React.
## Overview
The format consistent of the following elements:
- **Component** - rectangle with title and list of props
- **Component call** - caller to callee connected with solid-arrow-terminated line
- **Component call with props** - caller to props and props to callee connected with solid-arrow-terminated line
- **Component render props** - render prop rectangle connected to component with dot-terminated line
- **Function** - rectangle with title and list of parameters
- **Type or interface** - rectangle with title and list of props
## Component
A component is depicted with a depicted with a rectangle with `<>` descriptor and title at the top and, optionally, props underneath.

## Component call
A component can render another component – here this is referred to as a "component call".
A component call is depicted with a line from the caller component rectangle to the callee component rectangle, terminating in a filled arrow symbol.

## Component call with props
A component can pass props to another component – here this is referred to as a "component call with props".
A component call with props is depicted with a line from the caller component rectangle to a props rectangle and another line from the props rectangle to the callee component rectangle, terminating in a filled arrow symbol.
The props are depicted in a props rectangle, in which each prop has its own rectangle. This allows any individual prop to be linked to a type, function or component rectangle.

## Component render props
Render props are props for which we pass a React component, a function which renders a component or a React node.
A render prop is depicted with a line from the prop box to a Component or Function rectangle, terminating in a dot symbol.

## Function
Same as in the [Typescript diagram format](/articles/diagramming-ts), a function is depicted with a rectangle with `<>` descriptor and title at the top and, optionally, parameters underneath.

## Type or interface
Same as in the [Typescript diagram format](/articles/diagramming-ts), a type or interface is depicted with a rectangle with `<>` or `<>` descriptor and title at the top and, optionally, fields underneath.

A **composition relationship** between types or an inheritance relationship between interfaces is depicted with a line from the composer/inheritor to the composed/inherited type/interface, terminating in an empty arrow symbol.

A **reference relationship** between two components, functions, types or interfaces is depicted with a line from the referencer to the referenced, terminating in an arrow symbol.

## Example: contacts list
Here's an example of a React diagram depicting components that make up a contacts list.
- ContactsList component
- ContactsList -> ContactListItem component call with render props
- ContactsListItem component
- ContactPhone component
- ContactEmail component
- Contact interface
- getContacts function

## Downloads
To make it easier to use this format, I've implemented them in the following formats, with downloadable templates:
- Mermaid • [Download: diagramming-react.mermaid.md](/downloads/articles/diagramming-react/diagramming-react.mermaid.md)
- Draw.io • [Download: diagramming-react.drawio](/downloads/articles/diagramming-react/diagramming-react.drawio)
- Figma • [Download: diagramming-react.fig](/downloads/articles/diagramming-react/diagramming-react.fig)
Diagramming Typescript2026-02-18T00:00:00.000Zdiagramming-ts> Summary: Typescript structures can be diagramming in a UML-like format, depicting Interfaces and Types (including inheritance and composition), Enums and Functions (including parameters and return types) as rectangles, with suitable connecting lines.
As the practice of front end development grows and evolves, front end developers find themselves working with increasingly complex problem domains, requirements and code-bases. This necessitates increasing usage of solution design and planning tools, such as [wireframes](https://en.wikipedia.org/wiki/Website_wireframe), [component diagrams](https://reactjs.org/docs/thinking-in-react.html#step-1-break-the-ui-into-a-component-hierarchy), [user stories](https://www.martinfowler.com/bliki/UserStory.html), etc.
In recent work on large, complex Typescript code-bases I've found myself doing a significant amount of upfront solution design, planning modifications or additions to the code by way of high-level diagrams.
In this article I want to share a 'tweaked' form of UML that I've been using in solution designs on Typescript code-bases.
But let's first review the utility of diagrams and UML.
## Why diagrams?
To motivate this article, I want to review uses and benefits of diagrams.
Diagrams have the following features, distinct from either code or documentation:
- ***Partial.*** Diagrams can "sketch" some parts of code while omitting others
- ***High-level.*** Diagrams can depict high-level components while omitting low-level implementation details
- ***Spatial.*** Diagrams are in 2D space, enabling us to better visualise the parts and how they connect to eachother
By virtue of these features, diagrams offer certain unique uses and benefits at different stages of the software lifecycle.
- Solution design
- Planning complex changes
- Documentation
### Solution design
Solution design helps us to conceive our solutions before implementing them. We can begin to assemble the pieces of the solution and envisage how they will interact with eachother in advance of writing any code. This helps us to clarify our work, avoid costly mistakes and rework and come up with better time estimates. The benefits are multiplied when solution design is shared between multiple team members and improved based on their feedback.
Diagramming is an excellent way to both develop and communicate a solution design. Diagrams, which don't need to be compiled, can be built partially, creating a kind of "code sketch" that communicates software design at a high level while omitting details. Diagrams are laid out spatially, allowing us to organise our thinking outside the constraints of the file system or compiler.
> ### Aside: Multi-stakeholder solution design
>
> In some organisations multiple stakeholders may need to approve a solution – from product owners to designers to security specialists. In these cases it's even more beneficial to develop solution designs and share them with the stakeholders. The stakeholders can then have an opportunity to identify issues and risks before implementation commences. They can co-design the solution with developers, shaping it in beneficial ways before implementation begins.
> ### Aside: Agile solution design
>
> There is a culture in some development teams of avoiding solution design, thinking it is unnecessary and even to be avoided, since it is part of undesirable "big upfront planning" or "waterfall" methodology. The idea is that "agile" is a new and better way of working and, as such, developers should begin coding as soon as possible with minimal planning and preparation ("MVP").
>
> My thinking goes against this, but addressing it in-depth is beyond the scope of this article. But to summarise: if you carefully review the agile literature, it is very rare for it to discourage planning, big picture thinking, solution design or architecture.
>
> In fact, some of the most popular agile practitioners, such as Bob Martin and Martin Fowler, have written lengthy books on both architecture and UML. Thus it is apparent that agile is broadly compatible with solution design and planning.
### Planning complex changes
As our software grows in multiple directions (code size and complexity, users, features, etc.) the complexity of making changes increases. Any change, from renaming a field to adding cross-cutting functionality such as monitoring, can involve changes to many components across the code-base. We may need to envisage the impacts of these changes and carefully plan them out, paying regard to constraints such as time, system resources, performance, etc.
This is where diagramming can come in handy. As we analyse the code directly, we can also begin to sketch out a partial model of the code, focussing on just the components that will need to be changed. We can then add our changes to this model and use annotations, dashed rectangles or whitespace to mark our which parts are changing.
### Documentation
Diagrams can form a useful part of documentation. They can be added to wiki pages, task trackers and pull requests, to help developers and other team members understand the structure of the code.
We can create a diagram only depicts once slice of the code-base, and omit implementation detail. This helps when documenting a cross-cutting aspect of the code-base.
For example, we might have one page in the wiki dedicated to the topic of 'SMS verification'. That page could detail the systems and processes involved in sending an SMS verification message. It could include a diagram depicting only the parts of our code involved in SMS verification and how they connect to eachother, omitting parts that aren't directly involved in SMS verification.
## Background on UML
UML is a widely used diagramming language for depicting object-oriented code structures. Normally used with strongly-typed, class-based programming languages, such as Java and C#, it focuses on representing the public interfaces of classes, interfaces and other structures, inheritance relationships between classes (generalisation, realisation, etc.) and relationships between objects generated by classes (association, aggregation, composition).
The UML standard covers a range of diagrams, most of which can be readily applied to Typescript and/or front end projects with practically no tweaking.
Notice, however, that UML "class diagrams" (as the name suggests) are focussed on depicting classes and objects. Most Typescript code-bases (especially front end) are much more focussed on functions and types. This is in good part due to the functional style of programming that predominates in front end languages (Javascript), frameworks (React), libraries (Redux) and tooling.
This presents a challenge: there is a dissonance between the class focussed world of UML and the function and type focussed world of Typescript. It seems like we need to tweak UML in order to use it effectively in a Typescript context.
Happily, as we will see, this is all quite doable. In fact, "Typescript UML" can be realised as a subset of UML without significantly altering the language.
## Applying UML to Typescript
The first thing to note is that with Typescript we need to model functions and types – structures which aren't traditionally supported by UML.
UML already allows for extensibility, via the "stereotype" pattern, annotations and on connector lines. We can carefully apply use these features to depict important Typescript structures such as types and functions, while preserving the overall idioms of UML, to keep the diagrams clean, consistent and (if needed) broadly accessible to non-Typescript developers.
## Interfaces, types and enums
Interfaces and enums, which are also present in class-based languages, translate immediately over to UML.
class BaseUser
BaseUser ..> UserType
*/}

```typescript
enum UserType
interface BaseUser
```
Types can get a little more tricky. A type might simply be declared equivalent to another structure – such as an interface or another type. Or it might also be a composition of other structures, such as a conditional type or mapped type.
How can we accurately represent our types diagrammatically without overburdening our diagrams with code-like detail?
My approach here is to simply lay out all the types involved and depict their relationships to eachother without necessarily including logical constraints or finer-grained details such as mapped properties. Where such details are crucial, they can be placed in a nearby 'note' element (already a feature of standard UML) and/or, as in the case of mapped properties, simply included in the type's first compartment.
class BaseUser
BaseUser ..> UserType
class Pilot
Pilot --|> BaseUser
class Crew
Crew --|> BaseUser
class User
User --|> Pilot
User --|> Crew
class UserAccountInfo
UserAccountInfo --|> BaseUser: (pick)
*/}

```typescript
type PilotLicenceNumber = string;
type Pilot = BaseUser & ;
type Crew = BaseUser & ;
type User = Pilot | Crew;
type UserAccountInfo = Pick;
```
I'm not sure if this is ideal, but it seems a reasonably pragmatic approach. Note that UML allows us to depict the code partially, not necessarily exhaustively.
We can also depict ***associations*** between different interfaces/types in the same way as regular UML class diagrams. In this example, we depict a `Flight` interface which aggregates `Crew` and `Pilot` members, along with the cardinality of the relationship.
class Crew
class Flight
Flight "0" o--> "n" Crew : crews
Flight "0" o--> "n" Pilot : pilots
*/}

```typescript
interface Flight
```
## Functions
As the name suggests, UML "class diagrams" are normally oriented toward depicting classes, which are treated as the main building blocks of class-based programs.
Typescript programs however, especially on the front end, tend to more heavily emphasise functions. Functions are treated as "first class citizens", meaning that they make up important structural elements of the program, and are not merely an implementation detail.
Nevertheless, we can take UML's "box with two compartments and a title bar" and re-purpose it for diagramming Typescript functions.
The public interface of a Typescript function primarily consists of its parameters and return type. We can repurpose the first compartment of our box to depict the parameters passed in to the function. Since a function has no publicly accessible "instance" members, there's no need to represent them at all. The lower compartment can contain private variables held in scope of the function, which, as with private members of a class, aren't accessible from outside.
isValidUser ..> User : user
isValidUser ..> isValidPilotLicenceNumber : (calls)
class isValidPilotLicenceNumber
isValidPilotLicenceNumber ..> PilotLicenceNumber : licenceNumber
*/}

```typescript
function isValidUser(user: User): boolean
function isValidPilotLicenceNumber(licenceNumber: PilotLicenceNumber): boolean
```
This leaves one important problem – how do we represent the return type of a function?
## Return types of functions
Since a Typescript function only has one return type, we might want to represent it as one structure. That type could have one or more members (if it is an inline type, interface or class). It could also have relationships to other types (e.g. an interface that realises another interface). It could even be another function.
We could designate an additional, third, compartment in which to place information about the return type. There are two downsides to this, however. Firstly, introducing a third compartment increases the learning curve for someone who is more accustomed to seeing only two compartments in a UML box diagram. They must figure out what the third compartment signifies and then remember that it signifies the return type and that they should look there for the return type. Secondly, there is the awkward problem of representing a return type which isn't simply a collection of members. How do we represent a return type that itself has a relationship with another type? Or a return type that is itself a function? If we simply list a single name in the third compartment as though it is a member, this creates confusion as to whether we are naming the return type itself or a member of the return type. For the above reasons it seems inconvenient to house our return type in the third compartment – or any compartment – of a Function box.
A better way is to put the return type in a separate box altogether. We can actually do this, in much the same way as we would represent a type of a function parameter. The relationship can easily be clarified with a connector, which points from the function box to the return type box with a 'returns' label.
fetchFlightDetails ..> Flight : (returns)
class Flight
*/}

```typescript
async function fetchFlightDetails(id: string): Flight
```
## Framework-specific functions
We can do a similar re-purposing to support framework-specific building blocks which are functions – for example, React **components** and custom **hooks**.
UML includes a "stereotype" pattern – a double-angle-bracketed name that sits above the title. This can be used to label our functions – e.g. `<>`, `<>` for React-specific functions. These, along with the aforementioned ways of depicting functions and types, can be used to diagram the components of a React application.
useFlightDetails ..> Flight : (returns)
useFlightDetails ..> fetchFlightDetails : (calls)
class FlightDetails
FlightDetails ..> useFlightDetails : (calls)
FlightDetails "1" *--> "1..m" PilotDetails : (renders)
FlightDetails "1" *--> "1..m" CrewDetails : (renders)
class PilotDetails
PilotDetails ..> Pilot
class CrewDetails
CrewDetails ..> Crew
*/}

```typescript
function useFlightDetails(: ):
function FlightDetails(: ): React.Node
function PilotDetails(: ): React.Node
function CrewDetails(: ): React.Node
```
Note: As React components typically take a single 'props' object as a parameter, I opted to just inline that object's members in the first compartment of the `<>` box. This very small inconsistency probably won't be too confusing to anyone who has a basic understanding of React.
## Putting it all together
For your reference, here is one big UML diagram comprising all the pieces discussed in this article:
class BaseUser
BaseUser ..> UserType
class string
class PilotLicenceNumber
PilotLicenceNumber --|> string
class Pilot
Pilot --|> BaseUser
Pilot ..> PilotLicenceNumber : licenceNumber
Pilot ..> UserType : type
class Crew
Crew --|> BaseUser
Crew ..> UserType : type
class User
User --|> Pilot
User --|> Crew
class Flight
Flight "0" o--> "n" Crew : crews
Flight "0" o--> "n" Pilot : pilots
class isValidUser
isValidUser ..> User
isValidUser ..> isValidPilotLicenceNumber : (calls)
class isValidPilotLicenceNumber
isValidPilotLicenceNumber ..> PilotLicenceNumber : licenceNumber
class fetchFlightDetails
fetchFlightDetails ..> Flight : (returns)
class useFlightDetails
useFlightDetails ..> Flight : (returns)
useFlightDetails ..> fetchFlightDetails : (calls)
class FlightDetails
FlightDetails ..> useFlightDetails : (calls)
FlightDetails "1" *--> "1..m" PilotDetails : (renders)
FlightDetails "1" *--> "1..m" CrewDetails : (renders)
class PilotDetails
PilotDetails ..> Pilot
class CrewDetails
CrewDetails ..> Crew
*/}

With all these parts in one diagram, including connective lines, we can perhaps see more clearly one of the main benefits of diagramming: being able to zoom out and see how all the parts connect together to form the whole.
We can, for example, easily see which components depend on the core types `Pilot` and `Crew`. During initial solution design, this diagram might help us to estimate and prioritise the work. Or during a complex change, it might help to visualise the impact, were we to modify one or both of these types.
This kind of "birds-eye view" wouldn't be possible with just code alone, which appears in a hierarchy of folders and files. Even if we expanded every folder, we still wouldn't see all the connections between the structures contained in the files. Diagrams give us a more powerful visualisation of our code.
## Future directions
Many UML-code and code-UML converters already exist, supporting class-based programming languages such as Java and C#. It would be great to see such tools implemented for Typescript. [tplant](https://github.com/bafolts/tplant) looks like a promising start, though it appears to only support the code-UML direction.
It would be interesting to see if subsets of UML emerge, focussed on representing functional and/or Javascript/Typescript structures.
State-charts have already been recommended for diagramming Redux state machines. Perhaps it would be better for developers to standardise on UML state diagram notation.
## Further reading
These books may serve as a handy guide and reference on UML:
- [_UML Distilled_](https://www.martinfowler.com/books/uml.html) • Martin FOWLER
- [_The Unified Modelling Language User Guide_](https://www.amazon.com/Unified-Modeling-Language-User-Guide/dp/0321267974) • Grady BOOCH
- [_Modelling with UML - Language, Concepts, Methods_](https://www.abbeys.com.au/book/modeling-with-uml-language-concepts-methods-book-9783319816357.do) • Bernhard RUMPE
Ephemeral windows2026-02-18T00:00:00.000Zephemeral-windowsHow do you optimise your window layout when working?
It's a simple question, but opens up many options. I find it especially relevant in this new era of AI agents, where we have to manage many concurrent processes over varying lengths of time.
After experimenting with various window configurations, I've settled on this pattern:
***Ephemeral windows***
I keep multiple small windows open, each focussed a single task or theme, and only for as long as needed (hence, "ephemeral"). Whenever two or more windows are related, I group them spatially.
> Aside: This is inspired by the [Unix philosophy](https://en.wikipedia.org/wiki/Unix_philosophy): "do one thing and do it well".
## Window sizing, positioning and titling
I size each window to be fairly small and keep them in quadrants of the display.
* 4 inner corners of the screen
* 4 outer corners of the screen
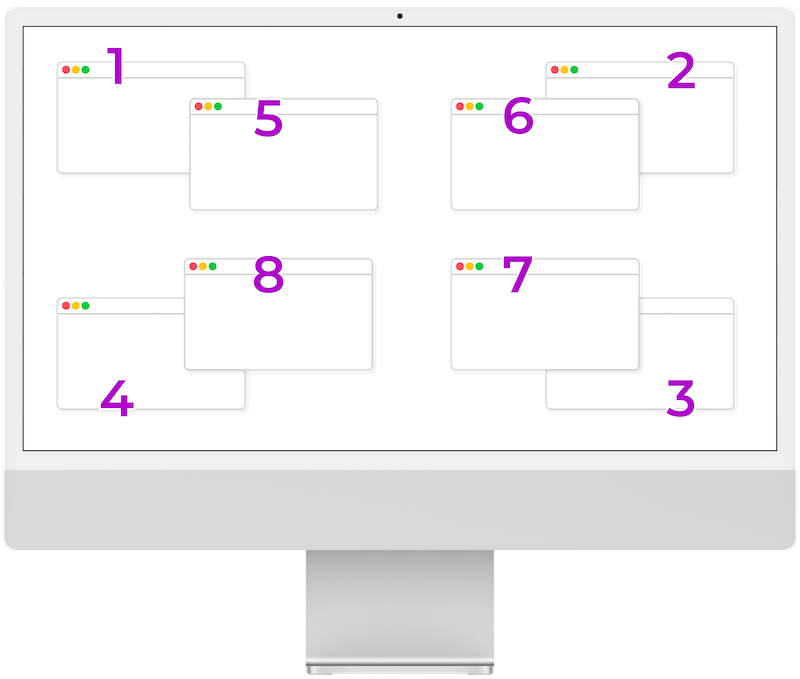
Whenever I need to focus on one specific window for a while, I double click its title bar to expand the window. After I'm done, I double click the title bar again to contract it back to its previous size.
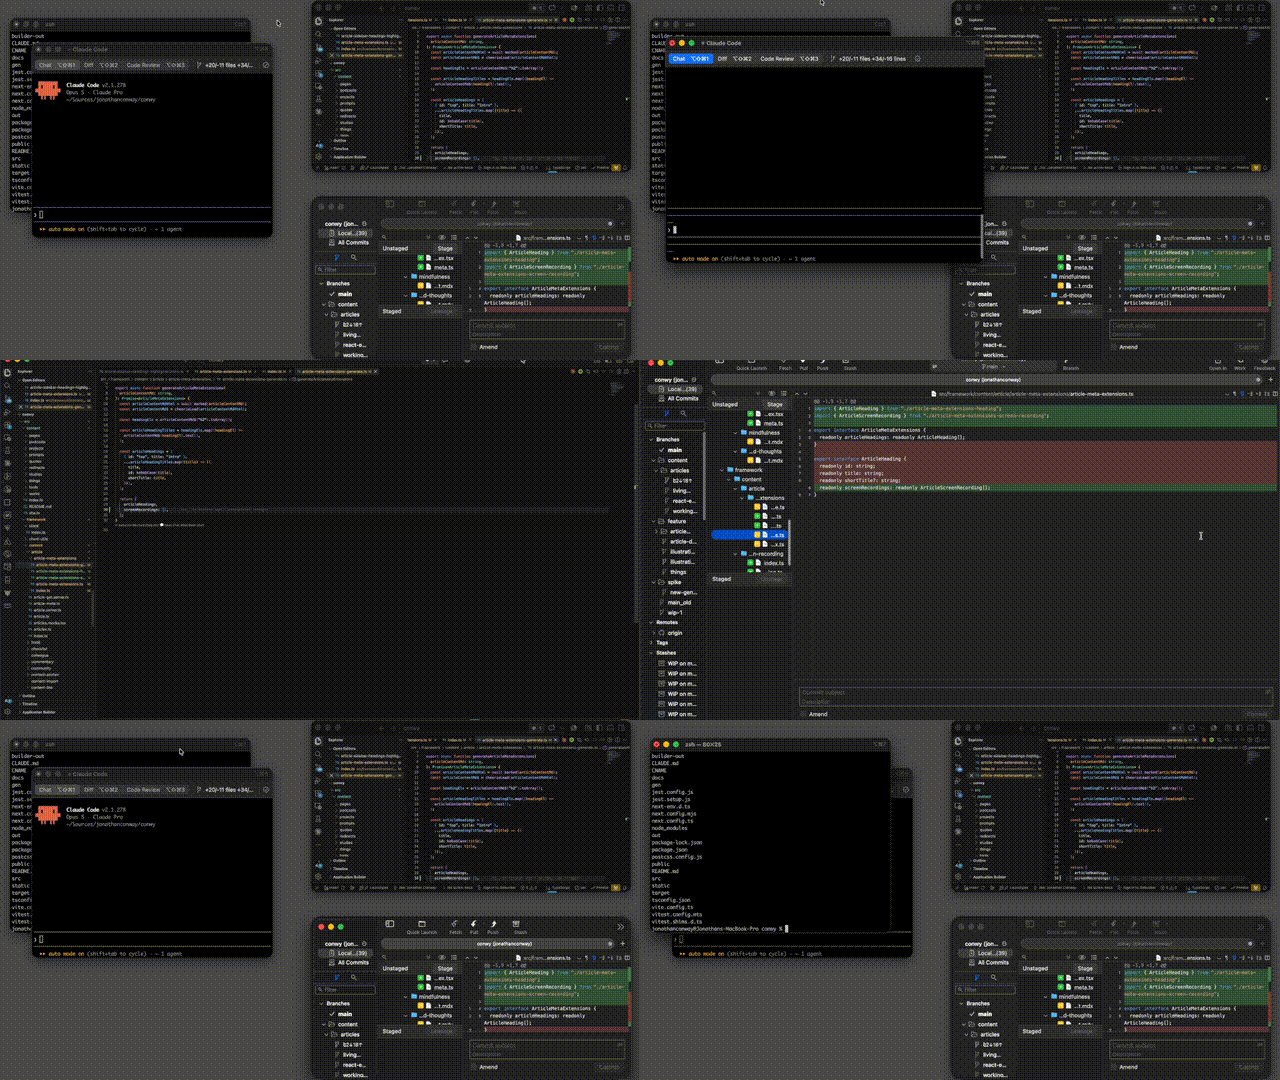
Some apps have a "Rename Title" feature. For example, [iTerm2 has "Edit Window Title"](https://iterm2.com/python-api/menu_ids.html). Occasionally I use this feature when I have many Terminal windows open, to help me to quickly locate whichever one I need.
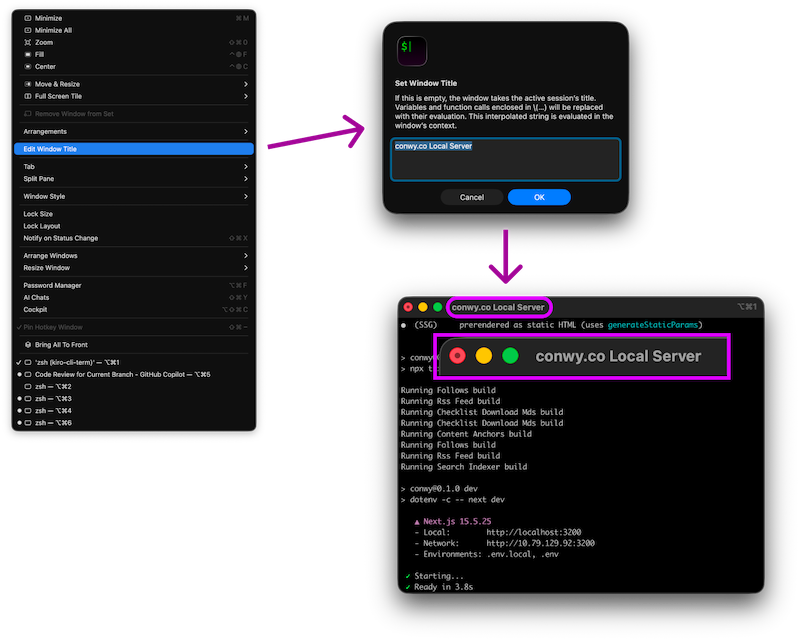
## Examples and details
Here are some common examples:
❓ ***Need a long-running Agent workflow?***
👉 Open a new iTerm2 window and run Claude.
❓ ***Need to edit some code in a particular module?***
👉 Open a new VS Code, IDEA, etc. window
❓ ***Need to do some design work?***
👉 Open a new Figma window.
This works nicely with my workflows, which I find tend to be somewhat unpredictable and widely varying in time scale.
- **Long-running:** For example, an AI agent doing a significant piece of research might be sitting there on its own for up to 15 minutes. Or a local server might be running in the background for several hours.
- **Medium-running:** For example, a code code review with an AI app, perhaps paired with a VS Code instance with the same code base open and a Git client for me to quickly review the AI's changes, might only be open for 5-10 minutes.
- **Short-running:** For example, a quick Chrome instance just to check the day's calendar in the morning might be open for only 2 minutes.
## Managing cognitive load
For deep and focussed work, such as a complex Git operation like a merge, I find it helpful to keep the work in its own terminal window. This helps me mentally separate the work from other items. This can be particularly useful when context switching during an interruption, such as responding to an unrelated question from a team member. After the interruption I can return to the more focussed work by simply switching to the related window, with all my context still there.
## AI efficiency
I find the ephemeral window technique fits well with efficient AI use.
**Assistant and model optimisation:** I can use different assistants and models for different tasks. For example, Codex with a simpler model for code review but Claude with a more sophisticated model for an in-depth research or planning task.
**Phase optimisation:** I can keep different phases (e.g. research, plan, implement) in separate windows.
For example:
- One AI assistant ***researching*** a task in one window
- A second AI assistant ***planning*** a second task in a second window
- A third AI assistant ***implementing*** a third task in a third window
This is great for token efficiency. Having AI agent focussed on a specific phase minimises the context window of each agent, reducing token usage.
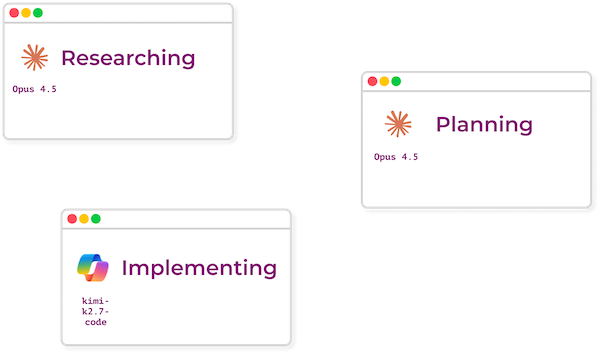
**Grouping assistants with related apps:** I can also group each AI assistant window with related windows.
For example:
- Grouping an AI ***researching*** window with the related files in a Finder window
- Grouping an AI ***planning*** window with the associated Jira task in a browser window
- Grouping an AI ***implementing*** window with a view of the changes it's making in a Fork (Git client) window
## Micro services and micro front ends
I find this setup also works well in a micro front end or micro services context, where I often have each work item touching multiple separate repositories or folder structures.
For example, it's not uncommon that one piece of work might straddle:
- Two micro services. For example: PaymentsService, AccountsService
- Two micro front ends: For example: PaymentsUI, AccountsUI
Depending on the nature of the work, I can group the windows however makes sense.
- Put the micro services windows in one group and the micro front end windows in another group
- Put the Payments related windows in one group and the Accounts related windows in another group
## Alternatives considered
Before settling on ephemeral windows, I did experiment with various alternatives:
- [Terminals with split panes](https://iterm2.com/documentation/2.1/documentation-one-page.html)
- [MacOS workspaces ](https://support.apple.com/en-au/guide/mac-help/mh14112/mac)
- [IDE-integrated terminals](https://code.visualstudio.com/docs/terminal/basics)
Each of the above seemed to have cons that outweighed the pros, at least for my own workflows.
***Terminals with split panes*** are great for viewing at-a-glance closely related concurrent processes.
⛔️ But they don't cater for non-Terminal work, such as IDE or in-browser tools. And they waste screen real estate if one pane completes while others are still running.
***MacOS workspaces*** allow for any type of window, grouped together into a single screen full. Screen real estate efficiency isn't an issue as we have the whole screen to work with.
⛔️ But switching between them gets clunky. Also, weird issues happen when trying to create a new window for an already running application, such as a new terminal or browser window – the new window shows up in the wrong workspace and it's tricky to move it to a different workspace.
***IDE-integrated terminals*** are great if all my work can be done in either an IDE and terminal. I can quickly switch between terminal instances and IDE with keyboard shortcuts. And terminal instances can be very flexibly arranged, with tabbing, vertical or horizontal stacking, etc.
⛔️ Unfortunately this doesn't work so well with browser, design tools or other windows. Sure, there are IDE plugins, but they tend to have narrower feature sets and lousy support.
## Conclusion
I find this setup of lots of small, ephemeral windows easier to manage than trying to force everything into just one window or app, such as a Terminal with split panes or an IDE.
You might recall a phase in the early 2010s, when it was fashionable to do everything in the IDE. And another phase later in the 2010s, when it was fashionable to do everything in the Terminal. In a funny way, working with agents and heterogeneous tools, it feels like I've come full circle, back to the old school 90s world of GUIs and windowing.
## Further reading
- [Blog: Commanding Your Claude Code Army • Peter STEINBERGER](https://steipete.me/posts/2025/commanding-your-claude-code-army)
Escaping JSON2026-02-18T00:00:00.000Zescaping-jsonIt's not uncommon to encounter encoded JSON strings, embedded in content such as log output, NoSQL database query results and SQL database query results with nested JSON fields.
This JSON has escape sequences (for example: `\"` for double quotes) and also tends to be compressed into one stream of text, with no indentation. This makes it difficult to read and analyse.
JSON like this can be quickly unescaped and formatted nicely, but you need to have the right tools at hand. I did some searching, AI prompting, exploration and trial & error and settled on a couple of practical solutions.
## Example
One recent case I encountered was viewing structured logging output in [DynaTrace](https://www.dynatrace.com/), generated by a .NET Core service via the [Microsoft logging extensions](https://learn.microsoft.com/en-us/dotnet/core/extensions/logging/overview?tabs=command-line), passing a whole object as a parameter, serialised to JSON.
For example, we have a logging statement like this:
```csharp
_logger.LogDebug(
"Response has customer profile; orders.",
JsonSerializer.Serialize(customerProfile),
customerOrders.Count
);
```
Producing output like this in a log entry:
customer profile; orders.",
"State": customer profile; orders.",
"CustomerProfile": "",
"OrderCount": 3,
}
...
}
`}
Notice the `Message` field containing JSON content with escape sequences:
```
```
## Sublime Text and extensions
For now I've settled on [Sublime Text](https://www.sublimetext.com) with [SublimeStringEncode](https://github.com/colinta/SublimeStringEncode), [SublimePrettyJson](https://github.com/dzhibas/SublimePrettyJson) extensions.
I use `StringEncode: JSON Unescape` to unescape then `Pretty JSON: Format JSON` to automatically add spacing and `Set Syntax: JSON` to add syntax highlighting.
This tactic is fast, reliable and private (keeps data locally). Being integrated into Sublime Text makes it easy to fit into my existing folder / file structure.
## Command line
A command line alternative is `jq`.
For example, I can copy and paste the whole string and pipe it to `jq`:
```bash
echo '""' | jq -r '.' | jq '.'
```
Or I can copy it to the clipboard, read (using e.g. `pbpaste` on MacOS) and echo out.
```bash
pbpaste | jq -r '.' | jq '.'
```
The output is neatly indented:
```json
```
## Web tools and browser extensions
I tried searching for Chrome extensions that could format any piece of JSON, but was unable to find one.
AI to the rescue! Using Claude Code, I vibe coded a simple extension that seem to do the job well: [json-selection-formatter](https://github.com/jonathanconway/json-selection-formatter).
> Aside: Browser extensions might not be suitable for sensitive data that needs to be kept private and/or corporate environments where browser extensions are blocked.
## Closing remarks
Hopefully major logging tools will future provide this kind of unpacking out of the box.
eTIBs2026-02-18T00:00:00.000Zetibs> Disclaimer: The information and the links provided here are for general information only and should not be taken as constituting professional advice. You should always seek professional advice and do your own research when making any financial decisions.
> Summary: eTIBs, bought directly and held to maturity, can help to protect you against medium-to-long-term inflation in Australia, sitting between cash (short-term) and equities or other risk assets (long-term).
There is much general discussion about inflation. Recent years have seen higher-than-average inflation rates on basic goods and services such as food and housing, both in Australia and abroad. In my own search for inflation protection, I stumbled upon an interesting solution available to retail investors like me.
**Australian eTIBs** or [Exchange-traded Treasury Indexed Bonds](https://www.australiangovernmentbonds.gov.au/government-bonds-explained/exchange-traded-treasury-indexed-bonds-etibs-explained) are government bonds issued by the Australian Government (specifically, the [Treasury](https://treasury.gov.au)). These bonds function similarly to [US TIPS](https://www.investopedia.com/terms/t/tips.asp) or [UK Indexed Gilts](https://www.dmo.gov.uk/data/gilt-market/index-linked-gilts/), with inflation-adjusted coupon payments and principal upon maturity. They are denominated in Australian Dollars (AUD) and indexed according to [Australian CPI](https://www.abs.gov.au/statistics/economy/price-indexes-and-inflation/consumer-price-index-australia).
These are very safe government bonds and are available for purchase to all Australians (anyone with access to the ASX, in fact) in amounts that are affordable for individual investors. If you want to protect a fixed sum (or sums) of money from inflation, over a fixed period of time, eTIBs may be a good solution for you.
The mechanics of these bonds are explained in various online resources, including an [Australian Government bonds course](https://www.asx.com.au/investors/investment-tools-and-resources/online-courses/australian-government-bonds-course) on the ASX website. I thought I'd describe them here, in my own words, both for my own understanding and hopefully yours too!
## eTIBs and units
At the time of writing, there are [6 eTIBs in circulation](https://www.australiangovernmentbonds.gov.au/how-invest/available-eagbs#available-exchange-traded-treasury-indexed-bonds-etibs):
- [GSIU27](https://www.australiangovernmentbonds.gov.au/sites/default/files/2018-12/term-sheet-2027-tib.pdf)
- [GSIQ30](https://www.australiangovernmentbonds.gov.au/sites/default/files/2018-12/3009-term-sheet-september-2030-treasury-indexed-bond.pdf)
- [GSIU32](https://www.australiangovernmentbonds.gov.au/sites/default/files/2021-08/3211%20Term%20Sheet%20-%20Nov%202032%20Treasury%20Indexed%20Bond.pdf)
- [GSIO35](https://www.australiangovernmentbonds.gov.au/sites/default/files/2019-01/3508_Term_Sheet_-_August_2035_Treasury_Indexed_Bond.pdf)
- [GSIO40](https://www.australiangovernmentbonds.gov.au/sites/default/files/2018-12/4008-term-sheet-august-2040-treasury-indexed-bond.pdf)
- [GSIC50](https://www.australiangovernmentbonds.gov.au/sites/default/files/2018-12/5002-term-sheet-february-2050-treasury-indexed-bond.pdf)
eTIBs are bought and sold in **units**, with each unit constituting an original face value of $100.
> Aside: Example: if you buy 5 eTIB units, then you have bought a total **original** face value of $500.
eTIBs are bought and sold on the [ASX (Australian Stock Exchange)](https://asx.com.au). Anyone with access to the ASX can buy and sell them. As with regular stocks and bonds, this can be done through a low-fee online broker, such as [SelfWealth](http://selfwealth.com.au) or [Interactive Brokers](https://www.interactivebrokers.com.au). You can find short training videos to help with this, such as [How to Buy and Sell Shares from Selfwealth Tutorials](https://www.youtube.com/watch?v=fljsc6MyElM).
## Coupons and principal on maturity
An eTIB unit, bought and held for its full duration, provides the following income:
- Multiple coupon (interest) payments
- One maturity payment
The **coupon payments** are made quarterly (that is, every 3 months). They continue for the time that you hold the bond, up until its maturity. The amount of each coupon payment is a percentage of the adjusted face value divided by 4 (since there are 4 quarters per year). Each bond pays its own specific coupon rate (percentage).
The **maturity payment** is made once, on the date the bond matures. Each bond has a maturity date. For example, [GSIC50](https://www.asx.com.au/content/dam/asx/markets/trade-our-cash-market/term-sheets/tib/AGB_Term_Sheet_GSIC50.pdf) will mature on the 21st of February, 2050. The amount of the maturity payment is the whole adjusted face value.
The coupon rates and maturity dates are outlined in the **term sheet** for each bond (and broadcasted widely). The term sheets can be found in the list of [Available exchange-traded Treasury Indexed Bonds](https://www.australiangovernmentbonds.gov.au/how-invest/available-eagbs#available-exchange-traded-treasury-indexed-bonds-etibs) on the [Australian Government Bonds](https://www.australiangovernmentbonds.gov.au) website.
These payments are made into your personal bank account registered with [CHESS](https://en.wikipedia.org/wiki/Clearing_House_Electronic_Subregister_System) at the time of the payment, typically your broker's account. I can personally verify that the payments are indeed made and that I have received exactly the expected amounts into my bank account.
> Aside:
> - **Coupon payments:** multiple, quarterly, a percentage of adjusted face value
> - **Maturity payment:** single, on maturity, the whole adjusted face value
## Face value adjustment
Each eTIB has two face values:
- An **original** face value of $100
- An **adjusted** face value of $100 + an inflation adjustment
The original face value is fixed and never changes for the life of the bond. It represents the minimum value of the bond. No matter which direction the inflation rate goes – either up or down – you are guaranteed to receive coupons and principal repayment on maturity of at least $100 original face value per unit.
The adjusted face value, in contrast, changes each quarter, according to the increase or decrease in inflation (CPI) over the prior quarter.
For example, suppose we bought one unit of an eTIB with an adjusted face value of $110 in the first quarter of the year. By the end of that quarter, inflation had increased by 2%. Then the adjusted face value would be $110 + 2%, which is $112.20.
***It is the adjusted face value*** (not the original face value) that is the basis of the coupon and maturity payments. This value provides the inflation protection, as it increases according to CPI over the lifetime of the bond.
The current adjusted face values for all eTIBs can be found on the [Bonds - prices](https://www.asx.com.au/markets/trade-our-cash-market/equity-market-prices/bonds) page under the Exchange-Traded Treasury Indexed Bonds tab on the ASX website.
## Face value vs price
eTIBs are bought and sold at market prices. Depending on supply and demand, each eTIB will be available for a different price per unit at a different time.
Unit prices vary over time, but tend to hover around the $100 mark. There are certain patterns: typically shorter maturing eTIBs are priced above $100, while longer maturing eTIBs are priced below $100. (There is some theory as to why bonds are priced in this way, linking it to factors such as [economic forecasting](https://www.aofm.gov.au/publications/research/estimation-term-premium-within-australian-treasury-bonds) and [investor habit-formation](https://ideas.repec.org/h/eee/finchp/2-13.html).)
To determine how much inflation protection you received, for a given sum of money invested into eTIBs over a given time period, you would need to take into account the price you paid. For example, if you pay a price of $110 for an eTIB, and it subsequently matured with an adjusted face value of $150, then you would have received $150 - $110, which is $40, of inflation protection in that maturity payment. You would also have received additional protection in the form of any coupon payments you received for quarters when the adjustment was positive.
> Aside: **Important:** All of the above assumes you held the bond to maturity, never sold, and collected all coupon payments from the purchase date onwards as well as the maturity payment at the end.
## What's the catch?
There are various risks and downsides to eTIBs that you should be aware of.
Here are a few I've identified:
- High price at purchase
- Price volatility while holding
- Re-investment risk when rolling over
- Inflation decreases
- Sovereign credit risk
- Policy change
- Currency devaluation
- Individual inflation
- Tax
- Maturity gaps
### High price at purchase
There is a risk that you will not find a bond that is priced such as to give you a positive overall return.
In this case, you might find yourself having to pay a penalty for inflation protection: the difference between the price you pay upfront and total return of the bond (coupon + maturity payments). If this penalty turns out to be higher than the inflation protection provided by bond, you will realise a negative total real return.
For example, if today you bought an eTIB priced at $150 maturing in 5 years with an interest rate of 1% and an adjusted face value of $120, then you would be "locking in" a negative real return on that eTIB. It wouldn't matter how high (or low) inflation was over the coming years. You would be guaranteed to make a loss. Including interest payments, you would get back approximately $126.12, which is still less than you invested, in today's dollars. No amount of inflation adjustment make up the difference in price and adjusted face value plus coupons.
Of course, it is impossible to forecast future inflation with total certainty. If you want the certainty of some amount of money being protected, even if it's less than you invested up-front in real terms, then you might still choose to go ahead with the purchase. But you should be aware of what the cost you'll be paying for that safety.
### Price volatility while holding
If you want safe inflation protection, you should plan to **hold eTIBs to maturity without ever selling**.
If you sell, you may get a lower price than you originally paid, which undermines or eliminates the inflation protection. eTIBs work best when purchased and held for their entire duration. When the bond matures, you will receive the full maturity payment automatically.
Price histories of all eTIBs can be found on the ASX website.
- [GSIU27](https://www.asx.com.au/markets/company/GSIU27)
- [GSIQ30](https://www.asx.com.au/markets/company/GSIQ30)
- [GSIU32](https://www.asx.com.au/markets/company/GSIU32)
- [GSIO35](https://www.asx.com.au/markets/company/GSIO35)
- [GSIO40](https://www.asx.com.au/markets/company/GSIO40)
- [GSIC50](https://www.asx.com.au/markets/company/GSIC50)
### Re-investment risk when rolling over
What if you plan to "roll over" your eTIB, on maturity, into a new eTIB in a latter period?
For example:
1. You, in the year 2026, buy GSIU27, which matures in the year 2027.
2. You, in the year 2027, receive the maturity payment of GSIU27. Say, a total of $1,000.
3. You then invest that $1,000 into GSIQ30, which matures in the year 2030.
The problem here is that, for reasons covered in the previous section, you might not get a good price when you go to buy your next eTIB. So potential losses from future planned re-investment will need to be taken into your account in planning.
I can think of 2 ways to mitigate this risk:
1. Plan to use some investments from higher-expected-return assets, such as an equity index fund, to cover future price penalties. This could work well especially at a 10+ year time horizon, where equities are more likely to have delivered significant real returns.
2. Buy your whole bond ladder (or as much of it as you can) early on, if prices are reasonable, to lock in lower prices and higher yield. This strategy works well but requires significant luck. Specifically: you need to be lucky to have a lot of capital to invest and you need to be lucky to be investing at a time when prices are low.
Most individuals will probably want a little of both: use some portion of equities or other risk assets to fund future eTIB purchases at higher prices and opportunistically buy eTIBs that match your investment goals at low prices if/when they become available.
### Inflation decreases
What if inflation goes down during a [deflationary](https://en.wikipedia.org/wiki/Deflation) period?
In that (albeit unlikely) case, you will continue to receive coupon payments as a percentage of newly adjusted face value. But you will not be compensated for any negative difference between the price you originally paid for the bond and its current adjusted face value.
For example, if you bought a bond at a price of $110 with an adjusted face value of $120, but inflation went down by 10% over the following quarter, the newly adjusted face value would be 120 - 10%, which is $108. You would not be compensated for the $2 difference between the purchase price you originally paid ($110) and the new adjusted face value ($108). For this reason, it's best to diversify your safe assets. Rather than relying solely on eTIBs, you might hold some mixture of eTIBs, regular bonds, cash and various other safe assets.
Alternatively, you can simply accept that you might lose some money in a deflation and make your calculations include the possibility of a "worst-case" scenario. If you invest enough into eTIBs that you still have a substantial amount without the inflation adjustment, then at least you have met your goals, even if you ended up losing money.
In the planning spreadsheet I share at the end of this article, you can find columns for "worst case" (deflationary), "best case" (inflationary) and "average" (average of worst and best) scenarios.
Historically, [inflation has very rarely gone negative](https://www.abs.gov.au/statistics/research/70-years-inflation-australia). During periods of price stability, which is most periods so far, inflation is above zero. The rate of increase of inflation can increase or reduce, but prices do still net increase very gradually. This is a "steady state" that the Reserve Bank deliberately targets, to meet its [mandate of maintaining price stability](https://www.rba.gov.au/about-rba/). Even in a disinflation (a reduction in the rate of increase of inflation), your eTIBs will continue to provide inflation protection.
> Pull-quote: “In deciding where to set the cash rate, we want to keep inflation low and stable, averaging 2-3 per cent – our inflation ‘target’, if you like. But we want to do it in a way that keeps the level of employment as high as possible.”
>
> – [Our Role and Functions • Reserve Bank of Australia • Michelle BULLOCK](https://www.rba.gov.au/about-rba/)
### Sovereign credit risk
Australian government bonds are very safe assets, issued by a government with a world-leading credit rating. Relative to other governments, Australia is [ranked highly by prominent ratings agencies](https://en.wikipedia.org/wiki/List_of_countries_by_credit_rating) such as Moodys and Fitch.

Bond defaults, while extremely unlikely, are possible, of course. So are extreme weather events, serious health issues, etc. One must balance the risks of inflation protection against other risks including the risk of inflation itself – inflation is highly likely to continue, at least moderately, as it is part of the Reserve Bank's target.
### Policy change
Government policies can and do change over time. Changes in bond issuance and payments, taxation of bond income and changes in calculation of CPI itself (as noted in an [interview with Laurence Kotlikoff](https://www.youtube.com/watch?v=NDqSgwgxa4M)) could all impact your eTIBs.
Of course, policy changes need not always be adverse. Some might even be beneficial. For example, the recent changes mentioned in the Tax section in this article might actually benefit the inflation protection of eTIBs.
### Currency volatility
The Australian Dollar (AUD) functions well within Australia itself, with our robust payments system. But it has undergone a [long period of decline](https://en.wikipedia.org/wiki/Australian_dollar#Exchange_rate_history) relative to prominent overseas currencies, such as the [USD](https://www.xe.com/currencycharts/?from=AUD&to=USD&view=10Y), [GBP](https://www.xe.com/currencycharts/?from=AUD&to=GBP&view=10Y) and [EUR](https://www.xe.com/currencycharts/?from=EUR&to=GBP&view=10Y).
Also the Australian dollar has tended to depreciate when its own stock market falls, making it a poor safety net at these times for an investor with liabilities in foreign currencies
> Pull-quote: “Investors in the Australian and Canadian stock markets are keen to hold foreign currency, regardless of the particular currency under consideration, because the Australian and Canadian dollars tend to depreciate against all currencies when their stock markets fall; thus any foreign currency serves as a hedge against fluctuations in these stock markets.”
>
> – [Global Currency Hedging • Journal of Finance • John CAMPBELL](https://campbell.scholars.harvard.edu/sites/g/files/omnuum5881/files/campbell/files/globalcurrencyhedging_20090128_manuscript.pdf)
On the positive side, Australian dollars have appreciated at times, such as during periods of high commodity demand. And Australian interest rates are among the highest in the world.
If you plan to spend most of your time living in Australia, and keep your short-term savings in high interest accounts, currency devaluation isn't a real risk. If you want to spend significant amounts of time abroad, you might want to think again and diversify your stock and fixed income globally. For inflation protection in other currencies, there are [foreign inflation-linked bonds](https://en.wikipedia.org/w/index.php?title=Inflation-indexed_bond&oldid=1305650361), such as US TIPS, UK Indexed Gilts and/or the various European and Asian indexed bonds.
### Individual inflation
Inflation protection from eTIBs is based on the Consumer Price Index (CPI), which is adjusted each quarter and published regularly by the [Australian Bureau of Statistics](https://www.abs.gov.au/) (ABS).
The percentage of inflation is calculated based on the prices of a hypothetical "basket of goods", meant to represent a typical person's consumption over a year.
There is a risk that your own individual, personal inflation rate might differ substantially from the official CPI, because your personal "basket of goods" might be very different than the official CPI basket.
For example, [in the year 2025, the ABS weighted housing at 21.39%](https://www.abs.gov.au/statistics/economy/price-indexes-and-inflation/annual-weight-update-cpi-and-living-cost-indexes/latest-release) of the overall basket. This might have been close to what most Australian home-owners were spending on home maintenance at the time. But if you were in the then-minority of renters, you might have been spending significantly more than that.
There can be mitigating factors to such an imbalance, however.
- Inflation in one group may "flow" through to other groups. For example, if the cost of real estate overall increases, it can flow through to your supermarkets and petrol stations, which after all also occupy real estate, and thus be reflected in those prices.
- Inflation extremes may even out over time. For example, a temporary spike in fuel costs may be temporary and eventually moderate.
- You might figure out ways to reduce your own spending in one or more groups, bringing your spending more in line with the CPI basket. This factor is probably the one most in your own control.
### Tax
Depending on your situation, eTIB income may fully taxable, similar to employment and dividend income.
> Pull-quote: “Interest withholding tax applies to interest payments (within the meaning of section 128A(1AB) of the Income Tax Assessment Act 1936) to an eTIB Holder.”
>
> – [Investor Information Statement • australiangovernmentbonds.gov.au](https://www.australiangovernmentbonds.gov.au/sites/default/files/2025-03/eTIB%20Investor%20Information%20Statement%20-%20March%202025.pdf)
Under current tax rules (mid-2026), capital growth on your eTIBs is also likely subject to Capital Gains Tax (CGT), which would be payable if you sell a bond at a gain or a bond matures and you receive the principal adjustment realised as a capital gain.
However under upcoming tax legislation, the capital growth component of eTIB income may cease to be taxable. This is because, assuming capital growth is exactly equal to inflation over the period of holding, it would be excluded from the 30% minimum tax on capital gains. This is outlined in the [Budget Explainer 2026-27](https://budget.gov.au/content/factsheets/download/tax-explainers-negative-gearing-capital-gains-tax.pdf) under the Cost base indexation section (pp. 2).
### Maturity gaps
There are, unfortunately, long gaps between the maturity dates. For example, there is a 5-year gap between the maturity of GSIO35 and the maturity of GSIO40. During those gaps, the return from the prior period needs to be held in some form that won't be eroded too much by inflation. This is a real problem if you will be relying significantly on maturity payments.
(If you're a multi-millionaire, then I suppose you can afford to live off only the interest on a long bond. But in that case, you might have enough to live off cash, without the hassle of setting up a bond ladder!)
One idea is to hold them in an interest-bearing cash account, such as a [High Interest Savings Account](https://moneysmart.gov.au/banking/savings-accounts) (HISA) and/or [Term Deposits](https://moneysmart.gov.au/investments-paying-interest/term-deposits). Additionally, some funds could be re-invested into later eTIBs. This is described in more detail in the [Ladder strategy](#ladder-strategy) section of this article.
## Where eTIBs fit into a portfolio
> Pull-quote: “The long term is made up of many short terms.”
>
> – Ronnie COLEMAN
Where do eTIBs best fit into a portfolio with multiple asset types, to minimise the impact of inflation?
I would say they fit snugly between cash in a savings account and riskier assets such as real estate or stocks.
Cash provides a "good enough" short-term inflation hedge, if invested at the highest possible interest rate, such as in a High Interest Savings Account (HISA) or Term Deposit. Banks will tend to increase the interest rates on cash savings during periods of high inflation. This is a flow-on effect of the Reserve Bank raising interest rates in response to inflation, and was evidenced by the [Reserve Bank's recent cash rate increases](https://www.sydney.edu.au/news-opinion/news/2026/02/04/rba-raises-interest-rates-as-inflation-pressures-remain-high.html).
However, **cash you save today will likely be heavily eroded by inflation 5-10 years later**. This is because the [Reserve Bank of Australia](https://www.rba.gov.au) (RBA) deliberately targets long-term mild inflation in order to maintain full employment (at the time of writing). Even a modest inflation rate compounds over time. So while 3% inflation might not seem like much, compounded over 10 or more years, it will reduce your $100 savings to only around $73 (100 * ((1 - 0.03) ^ 10) ≈ $73.74).
Diversified equities in a low-cost index fund provide long-term protection against inflation. This is backed up by strong theoretical and empirical evidence. Ben Felix discusses this at length in a [video on inflation protection](https://www.youtube.com/watch?v=1a3XnvRCcVo).
However, **equities do not always and reliably hedge inflation**. Stocks are volatile and can undergo periods of downturn. Worse, periods of high unexpected inflation and low GDP growth, equities have been volatile and even seen negative real returns.
> Pull-quote: “Although it is often claimed that equities are a hedge against inflation, we find that for both equities and bonds, real returns tend to be higher when economic growth is higher and inflation is lower.”
>
> – [Global Investment Returns Yearbook 2026 • Dimson, Marsh, Staunton](https://www.ubs.com/global/en/wealthmanagement/insights/2026/global-investment-returns-yearbook.html)
So you might want some "safe asset" to cover your expenses during periods when inflation is high and equities are down. Something that keeps up with inflation over the longer run but is less volatile than stocks.
**eTIBs can help you to bridge the gap** between low yielding cash savings and highly volatile stock markets. During periods of negative real stock returns and ongoing inflation, the inflation-protected income from eTIBs can help support your basic consumption needs.
If you're still working, this income can supplement your earned income. If you're retired, it can help reduce or eliminate your equity withdrawals, increasing the long-term safety and stability of your equity portfolio. This is the niche that eTIBs can help you to fill.
If you plan to retire early, you could use eTIBs to provide a safe floor of income between your early retirement and your eligibility for the [Australian Age Pension](https://moneysmart.gov.au/retirement-income-sources/age-pension-and-government-benefits). The protects your most critical spending (such as food and housing) in the case of a [bad sequence of returns](https://www.investopedia.com/terms/s/sequence-risk.asp). Additionally, it reduces your drawdown on equities, allowing your equities to last longer and provide more upside during the good times.
## Ladder strategy
Unless you have a lot of money to invest, the coupon payments from eTIBs won't on their own be large enough to offer meaningful protection. One trick is to buy eTIBs on multiple maturity dates and earn inflation-protected income from both coupon payments and maturity payments. These eTIBs form a "ladder" from shortest to longest, providing income over multiple periods.
On each maturity, some of the funds are invested into the next "ladder rung" of eTIBs. These re-invested funds might not totally match inflation, but over periods of ~3-10 years, they should hold most of their value.
There is some re-investment risk, as this strategy involves future buying of eTIBs, and, over time, they might increase in price. If the eTIB income is supplemented with other income sources, such as equities, then the total can be re-invested into eTIBs. Over a 10-15 year period, the returns on diversified equities should likely match or exceed inflation. This might help to make up for future price increases in eTIBs.
You might also take advantage of the potential upside of re-investment. For example, in years when your equities perform well, you can sell off a portion of that over-performance and re-invest it into eTIBs. This can increase the level, duration and/or safety of your inflation protected safe income.
## Summary
For what they are, eTIBs can be a very useful tool to have in your inflation protection toolkit.
They are certainly no "silver-bullet solution" to the problem of inflation. They come with risks including taxation, individual inflation risk, deflation risk and sovereign risk.
However, they do at least provide broad inflation protection according to a clearly defined metric (Australian CPI). And their income (by means of coupon and maturity payments) is uncorrelated with the returns of the stock and bond markets. This makes them a diversifier during periods of high inflation combined with market volatility. Simultaneously, with enough invested, they also provide a safe floor in case of deflation, based on the original face value.
Having some safe real income during stock market turbulence may also provide some psychological benefits and help you to avoid or minimise drawing down on stocks at the worst times.
Overall, I think eTIBs are worth looking into – either on your own or with the help of your financial adviser.
## Calculating income from eTIBs
I built a spreadsheet to calculate income on eTIBs over time. Feel free to download it and tailor it to your own purposes.
- OpenOffice • [Download: eTIB_Income_Calculator.ods](/downloads/articles/etibs/eTIB_Income_Calculator.ods)
- Excel • [Download: eTIB_Income_Calculator.xls](/downloads/articles/etibs/eTIB_Income_Calculator.xls)
- Google Sheets • [eTIB Income Calculator](https://docs.google.com/spreadsheets/d/1uoIuK-Ey3AqeT0cMKxBeizgY35avDrSSChsCEdGPh88/edit?usp=sharing)

## Product idea
I think it would be great if the Finance / Fintech industry developed a more user-friendly solution for the general public. In my Ideas section, I proposed a simple [Inflation-linked savings account](/ideas/inflation-linked-savings-account). Maybe I'll try to build a product like this myself one day.
## Further reading
### Australia-specific (eTIBs)
- [Course: Australian Government bonds | ASX](https://www.asx.com.au/investors/investment-tools-and-resources/online-courses/australian-government-bonds-course)
- [Paper: Investor Information Statement - eTIBs | ASX](https://www.asx.com.au/content/dam/asx/investors/investment-options/agb-investor-information-statement-exchange-traded-treasury-indexed-bonds.pdf)
- [Paper: eTIBs - Course Module 4 | ASX](https://www.asx.com.au/content/dam/asx/investors/investment-tools-and-resources/online-courses/government-bonds-course/agb-course-04.pdf)
- [Website: Investments paying interest - Bonds | MoneySmart.gov.au](https://moneysmart.gov.au/investments-paying-interest/bonds)
- [Website: australiangovernmentbonds.gov.au](https://www.australiangovernmentbonds.gov.au)
### General and theoretical
Some very interesting general and theoretical work has been done around inflation linked bonds. One example is the investment life cycle model espoused by personal finance economist [Ben Matthew](https://rationalreminder.ca/podcast/340), which involves modelling investment and spending using an amortization formula and using inflation linked bonds in the implementation. Related work has been done by [Kevin Esler](https://www.youtube.com/watch?v=NDqSgwgxa4M) and [Zvi Bodie](https://zvibodie.com).
- [Video: In Search of the Ultimate Inflation Hedge • Ben FELIX](https://www.youtube.com/watch?v=1a3XnvRCcVo)
- [Podcast: Ben Mathew: The Lifecycle Model vs. Safe Withdrawal Rates (SWR) • Episode 340, Rational Reminder](https://rationalreminder.ca/podcast/340)
- [Tool: TIPSLadder](https://www.tipsladder.com)
Dealing with flaky tests2026-02-18T00:00:00.000Zflaky-testsFlaky tests are tests that produce inconsistent and non-deterministic results, sometimes passing and sometimes failing. They can undermine the reliability of testing processes and complicate software development by masking real issues and wasting time.
Flaky tests are particularly difficult to debug and fix because of their non-determinism. We cannot simply go through the usual development cycle of test → modify → re-test. This is because we cannot reliably reproduce the error on each re-test, and thus, cannot know whether any single modification has corrected it.
Rather than going all in on one tactic, for flaky tests, I prefer to have a grab-bag of techniques at my disposal. I'll pick and choose one or tactics from this grab bag, based on the situation and context.
In this article I'll share my grab-bag of techniques. These are tactics I've used myself or seen used by others with success.
First we try to reproduce and diagnose the flakiness.
Then, once we have a (hopefully firm) notion of the cause, we can apply solutions or mitigations.
1. **Solutions:** actually fixing the flaky tests
2. **Mitigations:** minimising harm, impact, cost, etc. for flaky tests we cannot fix
The examples are in Jest and Playwright, as that is what I use in most of my work environments, but similar principles likely apply to other tools.
But before diving into tactics, let's take a brief step back and look at first reproducing the flakiness.
## Reproducing flakiness
Fundamental to addressing any kind of software bug is **reproducing** it.
But how do you reproduce a flaky test? As discussed above, flaky tests are difficult to reproduce consistently because their behaviour is non-deterministic: sometimes they function incorrectly, sometimes not.
> Aside: **Warning:** It's important at this point to note that *incorrect function* of a test can occur in various non-obvious ways, from giving false-positives (passing when it should fail) to ending prematurely (i.e. ending before the system functionality has been fully exercised).
There are a couple of options here:
- Running the test repeatedly to generate a mass of failures
- Observing prior test failures in logs
### Running the test repeatedly to generate failures
We cannot reproduce the failure on a single run but we might have a chance on multiple runs.
Assuming Jest and a `test` script, we can use a command like this to repeatedly run a test:
```bash
for i in ;
do (
npm run test -- '≪test-path-filename≫' --no-watch ||
(echo "Failed after $i attempts" && break)
);
done
```
Some test frameworks provide this re-running capability out-of-the-box. Here's how to do it [with the Playwright CLI](https://playwright.dev/docs/test-cli):
```bash
npx playwright test '≪test-path-filename≫' \
--repeat-each=20 \
--fail-on-flaky-tests
```
To increase the failure rate for reproduction purposes, we can simulate failure conditions.
For example:
- Simulating slower CPU and/or fewer cores
- Simulating lower available memory
- Simulating slower network speeds
These failure conditions should generate more failures, giving us a faster diagnosis of the cause.
Some technologies for enacting these simulations include:
- **Virtual machines:** Running the tests in a Virtual Machine with slow configuration.
- **Containers:** Running the tests in a container, such as a Docker container, with slow configuration.
- **Test runners:** Configuring the test runner itself to run tests slower.
#### Virtual machine
Using [VirtualBox](https://www.virtualbox.org) or similar, we can configure limited resources. VirtualBox allows [limiting CPU count and processing cap](https://www.virtualbox.org/manual/topics/working-with-vms.html#ct_settings-window).
#### Container
Using [Docker](https://www.docker.com) or similar, we can configure limited resources. Docker allows this via [CPU arguments](https://docs.docker.com/engine/containers/resource_constraints/#cpu).
For example, we could create a Dockerfile for our app:
```docker
FROM node:22.12.0-alpine
WORKDIR /app
COPY package*.json ./
RUN npm ci
COPY . .
```
And use it run our tests, with constrained CPU, like this:
```bash
docker run --cpu-shares 2048 tests npm run test
```
#### Test runner
In Jest, we can try one or more of:
1. Turning off the cache using [`--no-cache`](https://jestjs.io/docs/cli#--cache)
2. Turning off multiple workers using [`--runInBand`](https://jestjs.io/docs/cli#--runinband)
3. Increasing the worker count, using [`--maxWorkers`](https://jestjs.io/docs/configuration#maxworkers-number--string)
> Aside: By running a higher number of workers than CPU cores, we effectively add more workload to our machine, causing it to run slower. This can help create conditions that will reproduce a test's flakiness.
### Observing prior test failures in logs
Alternately/additionally, we can try to gather information about the test failures we have had in the past.
We can gather and analyse analytics on test results over longer periods (weeks up to months). This can be done using tools such as [BuildPulse](https://buildpulse.io) or [Datadog CI Visibility](https://www.datadoghq.com/blog/datadog-ci-visibility/), or we can build our own pipeline.
Analytics from test runs in CI can be used to identify patterns of test failure, such as certain tests failing more often. We can then narrow in on the flaky tests, gather log output from the CI environment and examine it to search for clues as to why they are flaky.
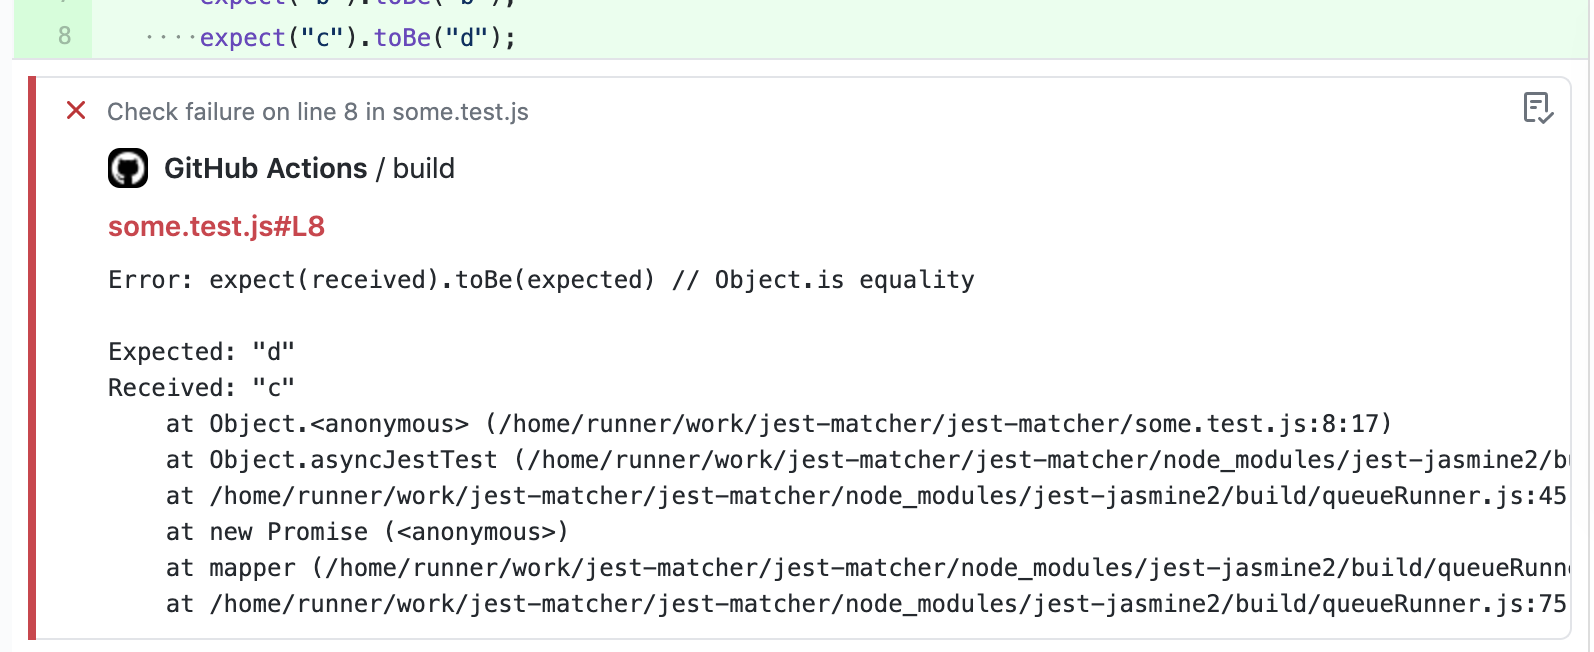
Maybe we can learn something about the cause of the failures by observing phenomena related to the failures.
👀 Phenomena
🚨 Implications
Test fails at a certain time of day
Issue with date/time logic
Issue with resource in a particular availability zone
Test fails only when modified
Issue with caching
Test fails when the CI server is being heavily utilised
Issue with test being vulnerable to resource availability
> Aside: **Tip:** [Structured logging](https://newrelic.com/blog/log/structured-logging) with detailed information about resource usage, date/time and other data can help to expose more information about test failure in logs. Such info can be logged on test failures. For example, in Jest, we can handle the [`afterEach`](https://jestjs.io/docs/setup-teardown) hook in a [setupFile](https://jestjs.io/docs/configuration#setupfiles-array) and inspect [`testInfo.failed`]. Structured logs can be generated using a library such as [structured-log](https://github.com/structured-log/structured-log).
## Diagnosing flakiness
Once we are able to reproduce flakiness, we can move to diagnosis, to uncover the root cause.
Similar to diagnosing regular bugs, we can diagnose flaky tests by making small changes and measuring the results. With flaky test rates, rather than a single pass/fail, we measure the overall pass/fail rate. A significantly lower percentage of failures can be correlated with a code change to help uncover the cause of the failure.
Some of the usual diagnostic techniques can be applied:
- **Debugging:** using console logging statements to observe behaviour of the test and/or application code during test execution
- **Comparing recent versions:** using [`git bisect`](https://git-scm.com/docs/git-bisect) or similar to compare results between recent versions of the branch
- **Process of elimination:** removing parts of code and measuring results, to "eliminate" irrelevant parts and identify parts that are actually causing flakiness
## Solving flakiness
This section covers possible solutions to flaky tests.
Some solutions might become evident from examining output after reproducing flakiness. In other cases, it might be worth experimenting with various solutions in a "try-and-see" approach.
- Await your elements
- Keep your promises
- Reduce test size
- Reduce test file size
- Reduce the number of workers
- Clean up at the end
- Optimise test code
- Optimise the application under test
- Disable resource-intensive application features when running in tests
- Increase timeouts
### Await your elements
Problem: Operations occur before the DOM has completed loading. For example, the test tries to click a button inside a dialog before the dialog has loaded.
Solution: Wait until elements have been rendered before performing operations that depend on them.
❌
```ts
const deleteButton = screen.getByText("Delete");
await userEvent.click(deleteButton);
const confirmButton = screen.getByRole("button", );
await userEvent.click(confirmButton);
```
✅
```ts
const deleteButton = screen.getByText("Delete");
await userEvent.click(deleteButton);
await screen.findByRole("dialog");
const confirmButton = await screen.findByRole("button", )
await userEvent.click(confirmButton);
```
### Keep your promises
Problem: Test operations are being done before Promises on which they rely have been completed. For example, an async API call is made, but the test runs an operation that depends on the API result before the promise has completed.
Solution: Wait for calls to have been made, using, say, a "completed" flag.
❌
```tsx
jest.spyOn(accountsApi, "getAccounts").mockResolvedValue([]);
jest.spyOn(accountDetailsApi, "getAccountDetails").mockResolvedValue();
render();
const heading = screen.getByRole("heading", );
expect(heading).toHaveText("Jack's Primary Account");
```
✅
```tsx
jest.spyOn(accountsApi, "getAccounts").mockResolvedValue([]);
jest.spyOn(accountDetailsApi, "getAccountDetails").mockResolvedValue();
render();
await waitFor(() => );
await waitFor(() => );
const heading = screen.getByRole("heading", );
expect(heading).toHaveText("Jack's Primary Account");
```
### Reduce test size
Problem: A test is very long and, thus, times out before being completed.
Solution: Reduce test size.
Even if we prefer longer integration-style tests, as recommended by Kent C. Dodds in [Write fewer, longer tests], there can still be ways to reduce the size of our tests while preserving their scope.
For example:
- Remove operations that are incidental and not really required for the test to exercise the code.
- Remove operations that are already covered by other tests.
- Simplify operations. For example, retrieve a DOM element directly where possible, rather than traversing multiple parent/child elements unnecessarily.
### Reduce test file size
Problem: Test files are large. Processing each large file ties up system resources (especially processor usage), causing other tests to time out.
Solution: Reduce test file size.
One way is to split up test files by function or component.
> - orders-pending.test.tsx
> - orders-delivered.test.tsx
> - orders-cancelled.test.tsx
> - orders-previous.test.tsx
Or we could use numbering or lettering system.
> - small-test-01.test.tsx
> - small-test-02.test.tsx
> - small-test-03.test.tsx
> - small-test-a.test.tsx
> - small-test-b.test.tsx
> - small-test-c.test.tsx
### Reduce the number of workers
Problem: Test runners such as Jest may be greedy and fail to balance resource usage between tests when running many tests in parallel on resource-constrained environments such as CI
Solution: Check the CPU configuration of the CI if possible. Try to reduce the number of simultaneously running tests by configuring the test runner.
Contrary to our human intuition ("more is better") it may be better to reduce the number of simultaneously running tests. This is because test runners can be greedy and consume as many resources as possible at any given time (CPU, memory, etc). Running multiple tests at once can cause resource usage to become imbalanced, as tests compete with eachother for resources.
The solution may be to reduce the maximum number of workers. Jest allows this to be configured via the [`maxWorkers`](https://jestjs.io/docs/configuration#maxworkers-number--string) setting. However, if this exceeds the number of CPU cores on the machine, the processor may be forced to split execution time between multiple threads. This may cause tests to take longer than expected to execute, resulting in timeouts. This problem may only occur on CI environments, where CPU resources may be more limited, making it tricky to identify. Try reducing the `maxWorkers` setting or even eliminating it. (Jest defaults to the number of cores available on the machine, which is usually the safest bet.)
### Clean up at the end
Problem: Tests leave behind "uncollected garbage", such as memory usage, threads, promises, etc. This slows down the test suite as a whole, making some tests flaky.
Solution: Cleaning up after each test reduces resource demand on the test runner, which reduces the occurrence of flakiness.
Note that the flaky test itself might not be the culprit here, but rather, some or all other test(s) as a whole generating garbage. This uncollected garbage might only be noticeable when all tests are run together in CI, not when running an individual test on its own. This can make the "uncollected garbage" issue tricky to detect. It might only be detectable by trial-and-error – say, observing resource usage on the whole test suite over repeated runs.
### Increase timeouts
Most test frameworks provide allow timeouts to be configured.
Increasing the timeout allows tests to run longer without failing, which may solve flakiness.
- Jest has [testTimeout](https://jestjs.io/docs/configuration#testtimeout-number) configuration and the [timeout](https://jestjs.io/docs/api#testname-fn-timeout) parameter
- Playwright has [timeout configuration](https://playwright.dev/docs/test-timeouts) and [test.slow()](https://playwright.dev/docs/api/class-test#test-slow) (called within a test)
Downside: Increasing timeouts too much or globally might allow performance issues to creep into the application. Timeouts should be increased only on flaky tests if possible, and we should find ways to enure those features continue perform adequately for end-users.
Where the test framework allows it, longer-running integration-style tests or end-to-end tests can be decomposed into steps, which can have their own custom timeouts set. This allows the test runner to spend more time where it counts (i.e. where it reduces flakiness) without spending too long where a test really should fail (i.e. where the code is system under test is actually wrong). Playwright has [`test.step`](https://playwright.dev/docs/api/class-test#test-step), which can be passed a [`timeout`](https://playwright.dev/docs/api/class-test#test-step-option-timeout) parameter.
### Optimise test code
Problem: The test code is slow, leading to flakiness from timeouts during execution.
Solution: Find slow points in the test code and optimise their performance.
Test code can be optimised in various ways, including:
- Caching values that are otherwise lengthy to re-compute.
- Using more efficient algorithms or data structures. For example, array traversal could be replaced with indexed lookup.
- Optimising DOM traversal. This can include caching and re-using elements, using more efficient selectors, or avoiding unnecessary DOM access.
### Optimise the application under test
Problem: The application we're testing is itself buggy or just slow. If the application itself is slow, then the automated tests that exercise it will probably also be slow, leading to flakiness.
Solution: Find slow points in the application under test and optimise their performance.
To find slow points, we can add timer statements to different parts of the test or application.
```js
console.time("Fetch user details");
const userDetails = await fetchUserDetails();
console.timeLog("Fetch user details");
```
We can also try rigorous [manual testing](/articles/manual-testing), combined with performance tooling, such as [Chrome Devtools Performance tab](https://developer.chrome.com/docs/devtools/performance).
Techniques to improve performance can then be applied – see: [improving performance in React apps](/articles/react-performance).
## Mitigating flakiness
So maybe we've tried all the above and nothing has worked. In that case, we can consider mitigation – approaches that reduce the impact of the problem without solving it entirely.
These might be used temporarily as an emergency resort or permanently if considered a reasonable compromise.
- Disable resource-intensive application features when running in tests
- Reconfigure test runners
- Tag known flaky tests and configure accordingly
- Use a different kind of test
- Use a different method of verification
### Disable resource-intensive application features when running in tests
Problem: Some features of our application may be resource-intensive, causing flakiness, while not offering much value in an automated testing context.
Mitigation: Disable resource-intensive features for test environment only.
Certain application features may be inherently resource intensive and not needed to verify correctness for a given automated test.
Common examples:
- Animations (even when implemented with CSS transitions only can create drag)
- Graphics (large complex DOM-heavy graphics and loaded as part of a page, such as 3D sprites in Canvas or complex SVGs)
- Event Subscriptions (say, to backend events via WebSockets)
These features can be disabled only for test execution, via, say, feature flags.
### Reconfigure test runners
Problem: Flakiness produced by resource-constrained environments is not worth the cost savings of the resource constraints.
Mitigation: Increase resources to get better value for investment, such as higher developer productivity during a critical period.
Depending on the cause, test flakiness might be drastically reduced in the short-term by simply beefing up resources on the test runners. Depending on the organisation, business context, timeframe, etc. this might be an optimal approach.
For example, suppose a legacy system is scheduled to be decommissioned in a few weeks, with a newer, totally re-written version already performing well in canary testing and ready to be rolled out next week. If the legacy system has a lot of flaky tests, blocking developers from deploying changes during that short space of a few weeks, it might make sense to increase resources just to unblock developers. Engineer time is more valuable and costly than brute resource usage.
Or suppose the business context is seasonally sensitive, such as an online retailer experiencing very high demand during holiday periods. During this period there is a high velocity of new feature releases, requiring a large number of automated tests of varying quality to run smoothly. Here, trading off resource cost for feature velocity might be worthwhile, at least during the peak period.
### Tag known flaky tests and configure accordingly
Problem: Flaky tests block the whole pipeline, interfering with delivery velocity.
Mitigation: Separate flaky tests from non-flaky tests, to ensure that they run correctly or at least do not disrupt other tests.
Many test frameworks allow tags to be applied to tests, allowing those tests to be grouped and treated as a unit, for separate execution, separate configuration, or some other kind of separation.
Flaky tests, once identified, can be grouped in this way for special treatment.
In Playwright, [test tags](https://playwright.dev/docs/test-annotations#tag-tests) can be included in the test name:
```js
test('test full report @flaky', async () => );
```
In Jest, a similar effect can be achieved by passing a carefully written regex to the [testNamePattern](https://jestjs.io/docs/cli#--testnamepatternregex) config setting:
package.json:
```json
"scripts": ,
```
Once separated, flaky tests might be treated in various ways:
- **Separate environment:** for example, run flaky tests on an instance with more resources (CPU, memory), faster network connections, etc.
- **Separate lifecycle:** for example, run flaky tests periodically, so that they are still useful but do not block non-flaky tests.
- **Separate execution style:** for example, re-try the flaky test more times than other tests so that they don't fail
### Use a different kind of test
Full end-to-end browser tests are known to be more flaky than traditional unit or unit-style integration tests. This is due to the performance overhead of loading a whole browser, loading the whole application at once, triggering interactions with whole DOM elements and waiting for feedback.
We could instead shift some of these tests to integration-style unit tests. Described in Kent C. Dodd's famous article [Static vs Unit vs Integration vs E2E Testing for Frontend Apps](https://kentcdodds.com/blog/static-vs-unit-vs-integration-vs-e2e-tests#integration), these tests can cover entire user flows (such as logging in) while mocking the calls that could otherwise call flakiness, such as server-side API calls.
Another option, for tests target intermittent but approximately deterministic behaviour, is to use fuzzy logic to verify that behaviour. For example, suppose we need to exercise some behaviour that operates on the current date and time, but for some reason cannot control the current date and time by mocking. If the test assertion does not need to have millisecond-level precision, perhaps we could instead assert against a range considered correct.
❌
```javascript
expect(timeAfterClickPause.getTime())
.toEqual(new Date(2026, 3, 1, 13, 1, 1).getTime());
```
✅
```javascript
expect(timeAfterClickPause.getYear()).toEqual(2026);
expect(timeAfterClickPause.getMonth()).toEqual(3);
expect(timeAfterClickPause.getDate()).toEqual(1);
expect(timeAfterClickPause.getHours()).toEqual(13);
expect(timeAfterClickPause.getMinutes()).toEqual(1);
expect(timeAfterClickPause.getSeconds()).toEqual(1);
```
### Use a different method of verification
If our automated test is trying to exercise something that is inherently prone to intermittent failure, within no acceptable margin of error, perhaps we need a different method of verification altogether.
For example, there is probably no good way to write an automated test for generating the next Bitcoin hash on the official fork. (Until/unless we get quantum computing in the cloud, in which case, any crypto-based business model might be in jeopardy!) For this case, we would probably need to wait until we have a large and engaged enough user base and then apply observability.
Various methods of verification that might fit the scenario:
- **Local browser tests:** tests that are run locally and manually by engineers, not in CI.
- **Monitoring / observability:** simply provide observability into a feature without necessarily testing it. Failures can be surfaced in a dashboard or alert. Downside of this method: we risk catching a failure too late, after it has already affected a significant number of users before being discovered.
- **Manual testing:** periodically manually test a feature in a prod-like environment.
- **Visual diff testing:** automatically capture screenshots of the application or component, raising alerts when differences are detected. Causes of differences can be sought by, say, comparing versions of the code base (using [`git bisect`](https://git-scm.com/docs/git-bisect) or similar).
## Preventing flakiness
Prevention is better than the cure, in test health as in human health. We can prevent flaky tests by following good practices in test design and implementation.
Some of these practices are covered in my [Front end development checklist - Testing section](/checklists/front-end-development#testing) and include:
- Avoiding async code where possible
- Await all expected async side-effects by the end of the test, to avoid dangling promises.
- Check for async assertions not running at all, causing unit test to break or to not properly cover the system under test.
- Use `waitFor`, `findBy*` or equivalent to explicitly await all expected side-effects.
- Use `void` rather than `async` prefix with `renderAsyncComponent`, then wait for one of its elements to render (using `findBy*` or `waitFor` block).
- Always `await` calls to `userEvent` such as `userEvent.click()`, etc.
- Run the test many times repeatedly to test for flakiness (time permitting).
- Wait for asynchronous mocked API calls to complete before making assertions that depend on their completion.
- When there's a chain of API calls, see if you can wait for each to evaluate first, before asserting, to reduce likelihood of flakiness.
## Conclusion
Flaky tests undermine testing processes, developer morale and ultimately product reliability. So it's important to address them. Unfortunately fixing flaky tests can be more difficult than consistently failing tests, due to their non-determinism.
Difficulties reproducing flaky tests can be addressed by:
- Running the test repeatedly to generate failures
- Observing prior test failures in logs
Flaky tests can be dealt with by:
- **Solutions:** Optimising async or time-sensitive code, optimising test or file size to smooth test runner execution, configuring the test runner itself (workers, timeouts) or optimising the application under test.
- **Mitigations:** Disabling application features that tend to induce flakiness, increasing test runner resources (temporarily or permanently), separating flaky tests (say, by tagging) or opting for a different kind of test or verification.
## Further reading
- [Article: Troubleshooting Jest • Mindful Chase](https://www.mindfulchase.com/explore/troubleshooting-tips/troubleshooting-jest-fixing-slow-tests,-flaky-behavior,-and-memory-leaks.html)
- [Article: Debugging slow Jest tests • Harry TALBOT](https://htalbot.dev/posts/debugging-slow-jest-tests)
- [Article: Optimizing Jest Performance • Andrey LUIZ](https://andreyluiz.com/posts/optimizing-jest-performance/)
- [Article: JavaScript Unit Testing Performance • Christoph NAKAZAWA](https://jestjs.io/blog/2016/03/11/javascript-unit-testing-performance)
- [Article: Slow running Jest test cases – How to optimise it? • Sumanta BANERJEE](https://engineering.rently.com/slow-running-jest-test-cases-how-to-optimise-it/)
- [Article: Jest simple tests are slow • StackOverflow](https://stackoverflow.com/questions/45087018/jest-simple-tests-are-slow)
- [Article: How to Reproduce CI Failures Locally in Playwright • Debbie O'BRIEN](https://dev.to/playwright/how-to-reproduce-ci-failures-locally-in-playwright-lfl)
- [Article: Improve Jest Runner Performance • Vikram GUPTA](https://medium.com/adobetech/improve-jest-runner-performance-a8f56708ba94)
- [Article: Troubleshooting · Jest • Simen BEKKHUS](https://jestjs.io/docs/troubleshooting#tests-are-extremely-slow-on-docker-andor-continuous-integration-ci-server)
- [Article: How I fix flaky tests • Jason SWETT](https://www.codewithjason.com/how-i-fix-flaky-tests/)
- [Article: What causes flaky tests • Jason SWETT](https://www.codewithjason.com/what-causes-flaky-tests/)
Front end development checklist2026-02-18T00:00:00.000Zfront-end-development-checklistI thought I would share my front end development checklist.
## Why I use a checklist
Many who worked with me will know I'm a big fan of checklists. I think a good checklist can benefit you in several ways.
- **It helps you get started.** When the task ahead seems overwhelming, such as reviewing a giant pull request, you can just start with the first checklist item and keep going from there.
- **It helps you organise your thinking.** Quickly get clarity on what matters and doesn't matter. Avoid overwhelm and mental fog by following a predictable process.
- **It helps you identify blind-spots.** Common human biases (such as confirmation bias) and also your own individual biases (from past experiences).
Professional software construction and code review are complex tasks involving many elements. Research shows that the human mind is limited and can only work with a finite number of concepts at a given time.
> Pull-quote: “the working memory is only capable of processing two to six things at a time ... When you are trying to solve a problem that involves too many elements ... your working memory will become “overloaded.””
>
> – [Felienne HERMANS • The Programmer's Brain](https://www.oreilly.com/library/view/the-programmers-brain/9781617298677/) (brackets mine)
Additionally, research shows the human mind can be affected by cognitive flaws and biased thinking. While we are _capable_ of thinking rationally, our minds, in an attempt to conserve energy, often default to a shortcuts and heuristics, leading to critical errors. In [_Thinking, Fast and Slow_](https://en.wikipedia.org/wiki/Thinking,_Fast_and_Slow), cognitive psychologist [Daniel Khaneman](https://en.wikipedia.org/wiki/Daniel_Kahneman) describes several of these errors, such as the [anchoring effect](https://en.wikipedia.org/wiki/Anchoring_effect) and the [availability heuristic](https://en.wikipedia.org/wiki/Availability_heuristic).
A good checklist can help you overcome these biases and errors. Surgeon and author [Atul Gawande](https://en.wikipedia.org/wiki/Atul_Gawande) famously wrote a book about this, demonstrating the use of checklists in mission-critical contexts from passenger flights to hospital operating rooms.
> Pull-quote: “Checklists seem to provide protection against such failures. They remind us of the minimum necessary steps and make them explicit. They not only offer the possibility of verification but also instill a kind of discipline of higher performance.”
>
> – [Atul GAWANDE • The Checklist Manifesto](https://en.wikipedia.org/wiki/The_Checklist_Manifesto)
Similar points about checklists have been made by [Michael Mauboussin](https://www.jermainebrown.org/posts/michael-mauboussin-and-charlie-munger-checklists-tame-luck) and [Charlie Munger](https://www.jermainebrown.org/posts/the-psychology-hacks-behind-charlie-mungers-billion-dollar-decisions).
## How to use a development checklist
You can use a development checklist in the following ways:
- **Self review, prior to submitting changes.** Check your work against the list. This gives you an opportunity to anticipate and address any issues in advance, which reduces the code review burden on team mates and helps you to get faster approvals.
- **Code review, on others' changes.** Check others' work against your checklist. You can deliver useful feedback and mentor colleagues.
When scanning the list and picking items to check, you can factor in what makes sense for your current team and project. In this article I provide a general front end development checklist. But you can create your own variants of the checklist, such as one for each project.
## Automation and AI
Checklist reviews can be partially or fully automated using AI assistants.
You can feed a checklist and code changes into an AI assistant, using a [prompt](/prompts/code-review-branch) like this:
```md
Please review the code changes in the current branch.
Look at the checklist in the file: `≪~/Downloads/front-end-development-checklist.md≫`.
Identify which checklist items are relevant for this change.
For each relevant checklist item:
- Review the code change and evaluate whether complies or not.
- List any checklist items for which the code change is not compliant.
- For each non-complied checklist item, provide an explanation and recommendation on how to address it.
```
> Aside: **Tip:** If performance is poor or costing you a lot of tokens, one solution is to break down the checklist into smaller sub-lists. Each sub-list can have a `"description"` section, specifying the conditions under which the AI assistant read and use it. Following [progressive disclosure](https://docs.claude-mem.ai/progressive-disclosure) in this way minimises context and streamlines AI performance and cost.
There are other ways a checklist can be used with AI to boost productivity, such as:
* When vibe-coding, include instructions for the AI assistant to self-review its work against the checklist, either in the prompt or in context files.
* When using the AI assistant to generate a solution design, prompt it to self-review the solution design against the checklist.
* Prompt the AI assistant to go review the whole code-base against the checklist and list cases where the items are not complied with.
## Continuous improvement
Feedback you receive in code reviews can be incorporated back into the checklist.
This creates a cycle of continuous improvement, making the checklist a dynamic adaptive system.
```mermaid--svg
flowchart TD
A["☑️ Checklist"] -->|improves| B
B["⌨️ Code"] -->|is submitted for| D
D["💬 Code review"] -->|improves| A
```
Other high quality resources that can be used as sources for checklist items include books, online courses, podcasts, open-source code-bases and code review feedback from past projects
## Precedent-based model for code reviews
For team projects, where I add/modify a checklist item in response to feedback, I like to include a link to specific feedback comment.
In subsequent code reviews, if a similar issue is being discussed, I can simply locate the closest matching guideline in the checklist and mention it in the discussion thread, with a link back to the original discussion. The linkage to the prior discussion helps to ground the discussion and provides a precedent for my decision in that specific case.
I found success with this approach, in the following ways:
- In some cases, the team agree to stay consistent with the approach suggested by the link to the prior discussion. This agreement helps to drive consensus and move the pull request toward approval.
- In other cases, a different approach is proposed. Agreement is found. I can improve the checklist by updating it with a link to this more recent discussion. Additionally, the team benefits by gaining more clarity over the reasoning behind the decision and also a sense of the broader approach being followed.
- In a few cases, there is lively debate about which approach to follow. Here, the "precedent model" helps us to organise our thinking and to keep the discussion on-track. In the worst case, I can at least demonstrate effort, think clearly, [disagree and commit](https://en.wikipedia.org/wiki/Disagree_and_commit) and maintain forward momentum.
## Organising and filtering the checklist
With 916 items and growing, you well might wonder how I have the time to go through that many items. 😂
The truth is that I only use a subset of checklist items per situation. The checklist items are grouped into headings and tags which can be filtered. Using the filters, I can quickly narrow down the list to a much more manageable size.
For example, when reviewing a code change that only affects styling, I can filter by styling-related tags.
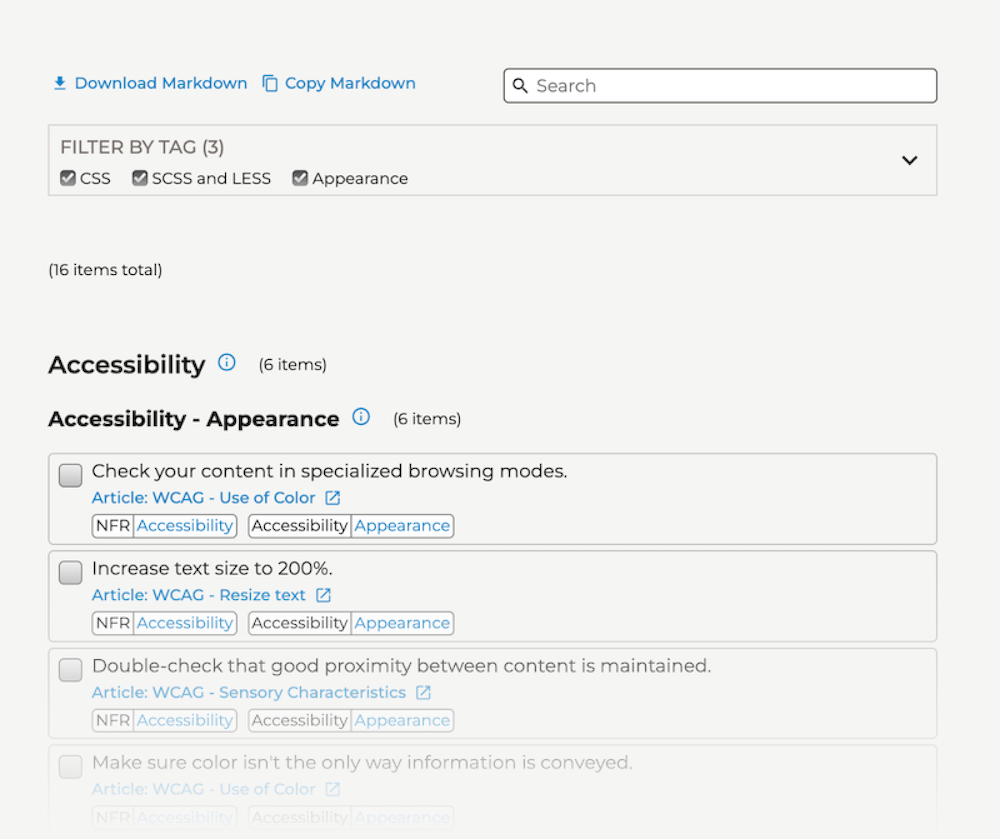
## Front End Development Checklist
Here is the link to the checklist:
You're welcome to [download](/downloads/checklists/front-end-development/front-end-development.md) and re-use it for your own purposes and [suggest improvements](https://github.com/jonathanconway/conwy/issues/new?title=Front%20end%20developer%20checklist%20-%20&body=&labels=checklist).
## Further reading
- [Book: The Checklist Manifesto • Atul GAWANDE](https://en.wikipedia.org/wiki/The_Checklist_Manifesto)
- [Book: The Programmer's Brain • Felienne HERMANS](https://www.oreilly.com/library/view/the-programmers-brain/9781617298677/)
- [Book: Thinking, Fast and Slow • Daniel KAHNEMAN](https://en.wikipedia.org/wiki/Thinking,_Fast_and_Slow)Front end observability2026-02-18T00:00:00.000Zfront-end-observability> Summary: Observability can be applied to front end code, specifically: user events, HTTP events and browser events. Tracing can reveal all the events in a particular user-system interaction, while querying across events can identify patterns and anomalies or just learn more about how the system functions. Observability can be surfaced in documentation, empowering all members of a multi-disciplinary team.
I've been reading the book [_Observability Engineering_](https://info.honeycomb.io/observability-engineering-oreilly-book-2022) by Charity Majors and thinking about how to apply the ideas to front end development.
She describes the concept of a **_structured event_** - an event "which captures everything that occurred while one particular request interacted with your service" (Chapter 5).
On the front end, a structured event might capture everything that happened during, say, a user interaction or receipt of an HTTP response. This might be done by placing logging calls at key points in the code, similar to how we might place `console.log` statements for local debugging.
In this article I'll give an overview of front end observability with some examples using [Sentry](https://sentry.io/).
## Observability on the front end
A key benefit of structured events (compared to unstructured logs) is that they can contain ***rich contextual data points***:
- **User events**, such as what value was entered into an input
- **HTTP events**, such as responses received from a backend
- **Browser events**, such as location data

These data points are ***queryable*** and we can filter for them using the powerful querying facilities of a monitoring platform such as [Sentry](https://sentry.io/), [DynaTrace](http://dynatrace.com), [AWS CloudWatch RUM](https://docs.aws.amazon.com/AmazonCloudWatch/latest/monitoring/CloudWatch-RUM-custom-events.html) or [Azure Monitor](https://learn.microsoft.com/en-us/azure/azure-monitor/logs/log-query-overview).

With structured logs in place, developers can "ask" arbitrary questions about how the application is behaving in production.
We can pro-actively search for unanticipated bugs or diagnose difficult errors involving complex front end logic.
> ### Aside: Capabilities of observable systems
>
> In defining "observability" (Chapter 1), Majors lists the following capabilities:
>
> - Understand the inner workings of your application
> - Understand any system state your application may have gotten itself into, even new ones you have never seen before and couldn’t have predicted
> - Understand the inner workings and system state solely by observing and interrogating with external tools
> - Understand the internal state without shipping any new custom code to handle it (because that implies you needed prior knowledge to explain it)
Let's look at some examples.
## Example 1 - User event

Suppose our front end app validates a change to a numeric field:
When the user edits the stake of a shareholder, we want to validate that the total of all shareholder stakes is never more than 100%. But this only applies to _active_ shareholders – we want to skip shareholders which have been turned off.
We want to make the state of our component observable.
Let's log two structured events:
1. ***changeStakeValid*** - stake was valid; we'll submit a PATCH
2. ***changeStakeSumError*** - stakes sum was too high; we'll show an error
,
});
await patchShareholderStake();
refreshShareholders();
} else ,
});
showShareholderStakeError();
}
}
`}
Suppose we subsequently receive a bug report:
> The user attempted to enter a 20% stake for one node, but got an error, despite the enabled nodes having a total <= 80%.
We might ask ourselves a bunch of questions:
- Why didn't our "enabled" logic work in this case?
- Was there a bug in the front end logic?
- If so, how should we fix it?
Instead of having to guess or consult various sources, wouldn't it be nice if we could more directly observe what happened?
Let's query Sentry for:
- Events generated by this component - `message:"useShareholderStakeEditor*"`
- For this user - `user.id:1234`
- And this company - `companyId:5678`

We find our error event - `changeStakeSumError`:

Clicking on the row reveals some interesting details:
![Sentry error details, showing an item (id: 112) with the word "[Deleted]" in its name](/images/articles/front-end-observability/example-stake-sentry-query-result-detail.png)
We see that the user was trying to set one shareholder (id: 113) to have a stake of 30%.
However, another shareholder (id: 112), which was `enabled: true`, had the word "Deleted" in its name. The presence of the word "Deleted" likely confused the user into thinking that its 40% stake would not included in the total.
Now we have enough information to propose further actions:
1. Solution: We could add logic that removes words like "Deleted" from names of shareholders, to avoid confusing the user like this in future
2. Solution: We could ask the user to disregard words like "Deleted" and share that knowledge with other users publicly (e.g. via Slack)
3. Investigation: We could find out why users were using the word "Deleted" in shareholder names; is the delete function broken?
Notice that we don't have to ask the user questions and wait for their response, nor run the application and attempt to reproduce the error, nor query the database, nor puzzle over server-side logs.
Rather, **_we can to go directly to the root of the problem_**, observing logs generated by the specific part of the code which the user was interacting with at the time of the event.
Even better, by naming each logging statement uniquely and using a strict hierarchical naming convention (e.g. `$/$`), we can query more broadly by component, then narrow in on the event, to locate the exact line of code which generated the event!
When you think about it, observability is not all that different from the standard practice of adding `console.log` statements at appropriate points and debugging locally – only it's more rigorous and queryable and **_we can observe production_**.
## Example 2 - HTTP event

On saving a shareholder's stake, the front end app should refresh the list of all shareholders' stakes.
But suppose we receive another bug report:
> A user reports that the stakes did not refresh after they saved a stake.
So we ask some questions:
- Why did the refresh not work?
- Was there a problem with the PATCH request?
- Did the front end code handling of the PATCH request fail?
- Was there some other kind of issue?
If we log an event on refresh, it should be easier to find out.
) );
captureEvent(,
},
});
const refetchShareholdersResult = await refetchShareholders();
captureEvent(,
},
});
} else
}
...
}
`}
As in the previous example, let's query Sentry for:
- Events generated by this component - `message:"useShareholderStakeEditor*"`
- For this user - `user.id:1234`
- And this company - `companyId:5678`
We find our two events - `changeStakePatchCompleted` and `changeStakeRefreshCompleted` - were both logged:
However, examining the refresh event, we see that the new stake value was not provided.
Now we know why the stake did not refresh properly – the back end is returning stale data! We'll need to discuss cache-busting with the back end developers.
## Example 3 - Browser event

For our final example, suppose the front end app should refresh the list of all shareholders' stakes periodically, e.g. every 30 seconds.
We receive the following bug report:
> A user reports after one user had modified the stakes of certain shareholders, the other users didn't see the updates until the following day.
We might ask:
- Why did the auto refresh not work?
- Was there a problem with the GET request or code handling the response?
- Was there a Backend issue, such as a cache becoming stale?
Let's query Sentry for observability on the auto-refresh hook:
- Events generated by the hook - `message:"useShareholdersAutoRefresh*"`
- For this company - `companyId:5678`
We find our autorefresh event - `useShareholdersAutoRefresh` - was logged:

And hovering over the events column, it looks like it has been running at regular intervals:
What could have gone wrong? Inspecting the details, we see that different values were returned for one user than for another:
This indicates that the back end may be serving stale updates for some users, rather than propagating changes to all users at once.
## Tracing with breadcrumbs
From the previous examples, you may have noticed continuity between events. For example, the user action of editing a shareholder stake generates a sequence of related events: `changeStakeValid`, `changeStakePatchCompleted`, `changeStakeRefreshCompleted`.
Wouldn't it be nice if we could see a sequence or "flow" of events together in a list?
Thanks to Sentry's [breadcrumbs feature](https://docs.sentry.io/product/issues/issue-details/breadcrumbs/), we can. Simply open the details of one of the events, scroll down to the Breadcrumbs section, then filter by "Tranaction".
## Querying across events
With detailed structured events in place, we can form more interesting queries, proactively searching for anomalies or just simply learning more about how our system functions in production.
For example, as we included `companyId` in the events concerned with shareholders, we could more generally query all events associated with that `companyId`. More powerfully, we could query all events associated with **_any_** `companyId`, that is, all company-related events. This could be useful if company was an important entity in our system and we wanted to prioritise fixing of errors related to that entity.
Or take another example – querying by date and time. We could query for events with `message:"*error*"`, within a time of day in which users are experiencing a lot of issues. This would allow us to diagnose the cause of those issues separately from more time-independent issues.
## Observability and documentation
Documentation can be an excellent place to surface observability.
Links to queries in a monitoring system can be placed in wiki pages, where they can be discovered by our team members or others in the organisation as needed.
For example, from our previous example, wouldn't it be great if a new team member could not only read a textual description of Shareholder stakes, but also be linked to actual production data around this feature?
We could achieve this by querying Sentry for all events with `message:"*shareholderStake*"`, grabbing a link to that query and pasting it into a "Shareholder stakes" wiki page, perhaps under a heading titled "Observability" with a link titled "shareholderStake events".

Imagine if all feature documentation was augmented with links to observability queries. This could give newcomers and experienced team members alike a boost in understanding how each of those features functions in production.
## Managing observability code
In the interests of keeping code clean and readable, we might want to reduce the quantity and complexity of logging code.
Some ideas:
* Abstraction
* Removal
* Aspects
### Abstraction
We can hide logging behind a more abstract function, to reduce its complexity and surface area.
For example, in a React codebase, rather than directly calling `captureEvent` from `@sentry/react`, we could create and consume our own custom hook, named something like `useLogEvent` returning a function like `logEvent`. The hook and function could encapsulate concerns such as caching re-used data and following a hierarchical naming convention.
### Removal
Similar to feature flag controls, logging code could be scheduled for removal after a period of time, if the software has been working well and is considered not in need of monitoring.
Alternately, we could comment-out logging calls or add a special flag to disable them. Developers could quickly determine that the code is not in use and skip over it.
### Aspects
Aspect-oriented programming involves augmenting the behaviour of existing code without modifying it, typically using a declarative pattern such as [decorator](https://www.w3schools.blog/java-decorator-design-pattern). Frameworks such as [AspectJ](https://github.com/eclipse-aspectj/aspectj) are already used for logging in back end systems.
In front end, [Typescript Decorators](https://devblogs.microsoft.com/typescript/announcing-typescript-5-0/#decorators) may in the near future allow logging to be added in a similar, unobtrusive style.
## Security and privacy
A word about security – sensitive data (such as [personal data](https://en.wikipedia.org/wiki/Personal_data)) should probably be omitted from structured events, to avoid data leakage and comply with regulations.
The chance of sensitive data being accidentally leaked grows with increased use of logging in production (as with any other use of data production). So if your system deals with sensitive data, it's crucial to have processes in place to ensure that this data is not leaked in logs. This could be part of a code review process as well as an ongoing independent review process, likely involving examination of both code and logs.
## Conclusion
Observability in software engineering is about observing the internal state of a software system during regular usage in production, typically by capturing and monitoring detailed and structured log outputs.
While more commonly applied to distributed systems on the back end, observability can also be applied to the front end, using front end compatible tools such as Sentry to observe states generated by user, HTTP or browser events.
Distinct from typical logging, structured events capture detailed contextual information surrounding the events and make the events queryable (e.g. with tags in Sentry) and traceable (e.g. with Breadcrumbs in Sentry).
Using structured data generated by production logging, we can diagnose an issue or answer an unanticipated question about the behaviour of the system. Additionally, we can proactively search for issues or anomalies by querying across events. And those queries can be integrated into documentation, where they can be discovered and accessed by engineers or other interested parties.
Observability is a newly emerging field within software engineering, and we can't know for sure what it will look like in the future. Increasing the observability of a front end could potentially be a very worthwhile pursuit, in terms of time and cost saved, where an application is already running in production and complex issues need to be diagnosed and resolved quickly.
## Code example
The source code for the examples mentioned in this article can be found here:
[https://github.com/jonathanconway/observability-example-react](https://github.com/jonathanconway/observability-example-react)
## Further reading
These resources inspired this article:
- [_Observability Engineering_](https://info.honeycomb.io/observability-engineering-oreilly-book-2022) by Charity Majors
- [_Sentry Browser JavaScript Docs_](https://docs.sentry.io/platforms/javascript) by Sentry
We're all full stack now2026-02-18T00:00:00.000Zfull-stackI've noticed a recent trend toward traditionally more specialised developers (including my own area, front end) working more full stack.
Working full stack doesn't necessarily have to mean writing back end or platform code, but it might mean:
- Being aware of, and understanding, systems further up the stack
- Knowing enough about the whole stack to understand other engineers and "speak their language"
- Being able to debug back end or platform issues or isolate issues to any part of the whole stack
One tricky thing about software development is that work doesn't necessarily come in neat little packages that can be handed off to front end or back end. For example, a task that seems to be targetting user experience might end up involving a config change on the back end. Or a task that seems to be aimed at reducing server utilisation might end up involving a change to a front end API calling pattern.
It's very helpful for an engineer to be able to "jump in" to another part of the stack to make a code change or "jump on" a call with a engineers of a different specialisation.
This is quite a change from the very clearly demarcated front end vs. back end divide that I observed in the 2010s.
What explains it? A few factors from what I can gather:
- **Tightened budgets.** Thanks to the [end of ZIRP](https://newsletter.pragmaticengineer.com/p/zirp-engineering-practices) and other factors, organisations want to do more work with fewer people and thus may demand more flexibility from their engineers.
- **Increasing complexity and coupling of systems.** Application features often require tight front end and back end coupling. For example, quickly filtering and visualising very large data sets stored on the server.
- **Blurring of the lines.** [React Server Components](https://react.dev/reference/rsc/server-components) (RSC) and associated frameworks such as [NextJS](https://nextjs.org/) involve code executing on both server and client, while [HTMX](https://htmx.org/) focuses on markup and emphasises use of full-stack/backend templating engines to generate code targetting the browser. Working with these new tools blurs the distinction between the front end and back end skill set.
- **Security issues that cross boundaries.** Hackers don't care about our engineering specialisations! Exploits have increased in recent years and some of them (for example, [CVE-2025-55182](https://react.dev/blog/2025/12/03/critical-security-vulnerability-in-react-server-components)) touch on the whole stack.
- **Maturation of the industry.** As the current crop of front end engineers (including myself) mature and develop in their abilities, they are both able and expected to handle a broader set of problems.
- **Increasing efficiency of tools.** Spending less time fighting tools frees up engineers to focus on broader problem solving, across the stack.
With quite a few independent factors seeming to be involved, this seems like a pretty robust trend, which is likely to continue.
That said, I don't think the specialisations will disappear. I think there will continue to be distinct roles: front end, back end, platform, data, etc. But I think individuals in these roles will be expected to have knowledge beyond their area and be flexible about contributing in other areas.Wireframing techniques2026-02-18T00:00:00.000Zinteraction-wireframes> Summary: Interaction wireframes depict a user interface at low fidelity including additional information on each component and interactions – how the interface responds to user activity.
It’s nearly 2021, so I thought I’d share a small achievement of 2020:
**A way of depicting interactions in UI wireframes!**
Background: I've been doing a lot of complex UI work lately. In the process I've been finding it useful to diagram out these interfaces. I like to do this both before and during the actual development work. It really helps to understand and reason about the UI. These are very interactive UIs - lots of clicking, dragging, dropping, etc. So the question arises: can the interactions also be expressed in visual form?
From experimenting with a number of projects and techniques, I've settled on a consistent style, which I now use in all wireframes:
1. Elements □ - Shapes and enclosed text
2. Markers ○ - Numbered circles (with a legend)
3. Interactions → - Connecting arrow lines (with labels)
Let's do a quick dive into each.
## 1. Elements
The actual elements that make up the interface are marked out with shapes such as rectangles, rounded rectangles, circles, etc., similar to how they would appear in the final application.
Here's a convention to follow for shapes:
- Straight rectangles for panels, modals, headers, etc.
- Rounded rectangles for buttons, input boxes, checkboxes, etc.
And here's an example:

## 2. Markers
We might want to "mark" or "tag" a particular part of the UI with additional info.
For example, to indicate that a specific component should be used, when it isn't obvious just by looking at the diagram, we might want to mark that part of the wireframe with the name of that component.
For this purpose, we can drop in numbered circles, and along with a legend item for each indicating the name of the component.
Here's how it looks:

## 3. Interactions
Finally we get to the exciting part: _interactions_.
The user might generate events (click, drag, drop, keypress, etc) which cause the UI to change in some way (e.g. open a drop-down, move an element, hide a modal, etc).
You might have assumed that depicting interactivity would require the use of a prototyping tool, but actually it can be done in a static wireframe too.
We can simply add a connecting arrow lines made up of the following parts:
1. Source of the connector - the element from which the event originates
2. Label on the connector - name of the event
3. End of the connector - arrow-head pointing at a component (or group of components) which depict the state of the UI when the event is handled
For example, suppose we want to depict that when the user clicks a button, a modal box appears. We draw an arrow from the button to the modal, with ‘(click)’ in rounded brackets on the connector.

Notice that we don't necessarily have to depict the whole UI in the 'after' part of the wireframe. We only have to depict the part that changed - in this case, the modal. This habit of only depicting the change really speeds up the wireframing activity. We only have to depict _changes_ in our UI, not the whole UI in every possible state.
There might be some logic to these interactions. For example, if the user enters a correct username and password to log in, we display a success notification. But if they get the password wrong, we show an error message underneath the password field. This kind of logic can be depicted by augmenting our diagram with a flowchart shape.
## Putting it all together
Here's the whole UI - elements, numbered labels and event connectors (with logic).

Notice how you can read and comprehend this quite quickly, just like we'd read a paragraph out of a book. Wireframes can communicate a information that is better represented visually and spatially rather than in paragraphs of plain text.
Notice also that this wireframe can manipulated - split apart, combined with other elements, used to form a new wireframe. This can be an excellent tool for experimenting with alternative designs. It can also be great for communicating - you can easily slice of any part of the design, paste it into a Slack discussion, and gather some feedback from your colleagues.
## Conclusion
I've found simple, low-fidelity wireframes that highlight **interactions** to be highly useful when developing highly interactive or logic-intense user interfaces.
- They help me to understand how the software will actually work.
- They give me a feeling of control over my work environment - I can change the design at any time and in any way.
- They can help me to think clearly and form a good mental model of the requirements.
- They provide a visual aid for communicating requirements to team members and getting their feedback.
- They serve as a guide and reference point while I'm actually writing the code.
## Further reading
Books that inspired me:
- [_Designing for the Digital Age_](https://www.wiley.com/en-us/Designing+for+the+Digital+Age%3A+How+to+Create+Human+Centered+Products+and+Services-p-9780470229101) • Kim GOODWIN
- [_Macintosh Human Interface Guidelines_](https://developer.apple.com/design/human-interface-guidelines/) • Apple Computer
Keyboard shortcuts2026-02-18T00:00:00.000Zkeyboard-shortcutsIn this article I want share the keyboard shortcuts that I use on a daily basis, in various environments.
Advantages of using shortcuts:
- Shave off a few seconds or milliseconds, hundreds of times over. The time savings really add up.
- Make you look smarter in screen sharing sessions, live demos and pairing.
- They're just fun to use!
## Visual Studio Code

| Shortcut | Action |
| :- | :- |
| ⌘ + ⇧ + ⌥ + ( ↑ / ↓ ) | Rectangular selection |
| ⇧ + ⌥ + 🖱️ Drag | Rectangular selection (mouse) |
| ⌘ + A | Select all |
| ⌘ + L | Select line |
| ⌃ + ( A / E ) | Skip to line start / end |
| ⌥ + ( ← / → ) | Skip by word left / right |
| ⌥ + ⇧ + ( ← / → ) | Select by word left / right |
| ⌥ + ( ↑ / ↓ ) | Move line up / down |
| ⌥ + ⇧ + ( ↑ / ↓ ) | Duplicate line up / down |
| ⌘ + ⇧ + ( [ / ] ) | Switch tab left / right |
| ( ⌃ + ⇤ ) / ( ⌃ + ⇧ + ⇤ ) | Switch tab most / least recent |
| ⌘ + ( [ / ] ) | Indent / outdent |
| ⌘ + / | Toggle comment |
| ⌘ + W | Close current tab |
| ⌘ + K, W | Close all tabs. Keep window open. |
| ⌘ + ⇧ + W | Close current window |
| ⌘ + P | Quick find file |
| ⌘ + ⇧ + P | Quick find action |
| ⌘ + T | Quick find symbol |
| ⌘ + N | Open new tab |
| ⌘ + ⇧ + N | Open new window |
| ⌘ + ⇧ + E | Focus on file browser |
| ⌘ + F2 | Select all instances of current word |
## Sublime Text

| Shortcut | Action |
| :- | :- |
| ⌃ + ⌘ + ( ↑ / ↓ ) | Rectangular selection |
| ⌥ + 🖱️ Drag | Rectangular selection (mouse) |
| ⌘ + A | Select all |
| ⌘ + L | Select line |
| ⌃ + ( A / E ) | Skip to line start / end |
| ⌥ + ( ← / → ) | Skip by word left / right |
| ⌥ + ⇧ + ( ← / → ) | Select by word left / right |
| ⌥ + ( ↑ / ↓ ) | Move line up / down |
| ⌘ + ⇧ + D | Duplicate line down |
| ⌘ + ⇧ + ( [ / ] ) | Switch tab left / right |
| ( ⌃ + ⇤ ) / ( ⇧ + ⇤ ) | Switch tab most / least recent |
| ⌘ + ( [ / ] ) | Indent / outdent |
| ⌘ + / | Toggle comment |
| ⌘ + W | Close current tab |
| ⌘ + P | Quick find file |
| ⌘ + ⇧ + P | Quick find action |
| ⌘ + ⇧ + W | Close current window |
| ⌘ + N | Open new tab |
| ⌘ + ⇧ + N | Open new window |
| ⌃ + ⇧ + G | Select all instances of current word |
## iTerm2

| Shortcut | Action |
| :- | :- |
| ( ↑ / ↓ ) | Previous / Next history |
| ⌃ + R | Search history |
| ⌃ + C | Stop current process |
| ⌃ + ( A / E ) | Skip to line start / end |
| ⌃ + W | Delete previous word |
| ⌃ + D | Delete next character |
| ⌘ + T | Open new tab |
| ⌘ + N | Open new window |
Some additional convenience shortcuts can be added by [configuring iTerm2 key mappings](https://mariusschulz.com/blog/keyboard-shortcuts-for-jumping-and-deleting-in-iterm2), as described in Marius Schulz's excellent article.
| Shortcut | Action |
| :- | :- |
| ⌥ + ( ← / → ) | Skip by word left / right |
| ⌘ + ( ← / → ) | Skip to line start / end |
| ⌥ + ⌫ | Delete previous word |
| ⌘ + ⌫ | Delete line |
## Slack

| Shortcut | Action |
| :- | :- |
| ⌘ + B | Bold |
| ⌘ + I | Italic |
| ⌘ + ⇧ + X | Strikethrough |
| ⌘ + V | Make the selection a link with pasted URL from clipboard |
| ⌘ + U | Upload file with file picker |
| >, Space | Start a blockquote |
| ⌘ + ⇧ + C | Toggle inline code block |
| >, Space | Start a blockquote |
| ``` | Start full line code block |
## Fork

| Shortcut | Action |
| :- | :- |
| ⌘ + C | Copy full file name of the selected file. Including path. |
| ⌘ + ⇧ + O | Open the selected file. Uses the default editor. |
| ⌘ + ⇧ + C | Focus on the commit message input. |
| ↓ | On message input, show recent commit messages. Click to re-use. |
| ⌘ + ⇧ + ( [ / ] ) | Switch tab left / right |
| ⌘ + T | Open new tab |
| ⌘ + N | Open new window |
## Other resources
Here are some shortcuts others have shared:
- [iTerm2 key mappings by Marius Schulz](https://mariusschulz.com/blog/keyboard-shortcuts-for-jumping-and-deleting-in-iterm2)
- [My MacOS Shortcuts by Callum Silcock](https://callumsilcock.com/articles/my-macos-shortcuts)
- [Visual Studio Code and Sublime Text cheat-sheets from Addy Osmani](https://www.facebook.com/addyosmaniofficial/posts/10155385510134601/)Living systems blueprint2026-02-18T00:00:00.000Zliving-systems-blueprintImagine you're a new joiner in a corporate environment.
You are faced with a complex network of systems: databases, servers, platforms, logs, etc. Links to them are scattered around various internal wiki pages, buried in chat threads, etc.
You have the challenge of trying to get your head across everything fast enough to be useful to the team.
**You need a map of where to find everything that concerns you.**
This is because whenever you get hit with a new code review, bug report, prod support ticket or just regular task, you will need to quickly locate specific systems
and jump into them instantly.
This is not about conceptual or theoretical knowledge. It's about being able to actually navigate and **access real, running systems**.
- Read actual logs
- Query actual databases
- Push actual code changes
Here is where a "living systems blueprint" might come in handy.
## What it is
Borrowed from the [service blueprint](https://www.nngroup.com/articles/service-blueprints-definition/), famous in the world of UX design, this is a diagram of services.
> Pull-quote: A service blueprint is a diagram that visualizes the relationships between different service components — people, props (physical or digital evidence), and processes — that are directly tied to touchpoints in a specific customer journey.
However, for our purposes as software engineers, it focusses on technical systems and services.
And it has an important additional feature: ***links***. Crucially, you want this to be more than a diagram. It should **link** you to the real systems so you can actually ... you know ... *do stuff*!
You can create a diagram like this yourself, for your own use. Its sole purpose is to help you navigate your digital work environment. To diagrammatically represent all the important systems you might work with and how they connect to each-other.
## Diagram format
Here's an example of such a diagram:

Notice the links. **One click** (or copy and paste into a tool) can take you directly to the system.
Say, to a CloudWatch log in Prod. Or a Postgres database in UAT. Or an API request in Postman.
Here is a breakdown of the elements of the diagram:
Components
Depicted by a rectangle
Components of the system, such as services, databases, log storage, blob storage, mobile apps, web front ends and more.
Dependencies
Depicted by a line and arrow
Dependencies between components, so that one "depends upon" another, such as a service depending on a database.
Compositions
Depicted by a line and circle
Compositions of components, such as parent/child or container/contained.
Within each component rectangle, we have:
Icon
Quickly identify the type of the service.
Simple shape, such as a [Material Design icon](https://fonts.google.com/icons), or one of the standard vendor or cloud provider icons, say for [AWS](https://aws.amazon.com/architecture/icons/), [Azure](https://learn.microsoft.com/en-us/azure/architecture/icons/), [Google Cloud](https://cloud.google.com/icons), etc.
Title
Title of the service, as referenced in code, docs, etc.
Text in a larger font.
Type
Type of service. E.g. Web Service, Log, Database, Mobile App, etc.
Text in brackets, in a smaller font.
Links
Links to access the entity or related to the entity. For a web application, it might include links to environments. For a database, it might include links to a console or a URI that can be plugged into a database client.
Text with underlined links, in a smaller font.
Within the "Links" row, you might put links to the system itself, including multiple environments (also known as "stages") such as Development, Staging and Production.
Development | Staging | Production
## How it helps
Building a living systems blueprint has helped me in two ways:
1. Learning a new system
2. Working with a complex system
### Learning a new system
It has been demonstrated that ["active learning" techniques](https://cei.umn.edu/teaching-resources/leveraging-learning-sciences/active-engagement-material-improves-learning), such as writing and reacting to real-world problems, can be more effective than passive learning, such as just reading.
Applying this approach to learning systems, it can be helpful to develop in your mind a strong mental model of what your systems are made of and how they work. This can prepare you to "think on your feet", contributing usefully to meetings and discussions and solving unexpected problems at short notice.
This kind of "theory building" is already a well-known in at the code level.
> Pull-quote: “The programmer having the theory of the program can explain why each part of the program is what it is”
>
> •••
>
> “The programmer having the theory of the program is able to respond constructively to any demand for a modification of the program”
>
> – [Peter NAUR • Programming as Theory Building](https://cekrem.github.io/posts/programming-as-theory-building-naur/)
With a living systems blueprint, we can apply similar techniques to learn at the systems level.
Of course, you might not need a living systems blueprint if you're working with a very simple system, with a few parts. Or if you're already very familiar with your system, having worked with it regularly for a long time. In these cases, likely your brain has already memorized the systems in its Long Term Memory (LTM). And you can use simpler tools such as browser bookmarks and address-bar auto-suggest to navigate to them quickly as needed.
### Working with a complex system
Suppose you're working with a complex system comprising many services; too many to memorize all their names. There might be complex or non-intuitive integration patterns. You might want to access any part of this system unexpectedly at a moment's notice.
Here a living systems blueprint can help you to access your Long Term Memory. Its spatial and connected form can provide visual cues to help you refresh your memory quickly. The connections can be visually traversed to quickly locate just the resources you need via links, whether they are logs, consoles, dashboards, code files or anything else.
> Pull-quote: “the LTM needs clues to retrieve the right memories. The more specific the clue, the more likely we are to find the right memory”
>
> – [Felienne HERMANS • The Programmer's Brain](https://www.oreilly.com/library/view/the-programmers-brain/9781617298677/)
For example, imagine someone comes to you with the following request:
> Help! Panic! I need to find out why Transfer from customer #098238 are failing in UAT!
You can check your living blueprint, locate the Transfer service, see that it's connected to the Transactions database and follow the link to the Console in UAT to query recent transactions. The diagram jogs your memory *and* quickly takes you to the right place to investigate the problem.
## Systems blueprint sketches
Portions of systems blueprints can be split into "sketches".
You might want to do this if your main systems blueprint gets too crowded with components or if you want to depict a group of interrelated components on their own.
You could share a sketch with a colleague via a link, as part of a discussion in, say, a chat thread, pull request discussion thread or ticket comment thread.
## Sources
Where might you acquire the knowledge to build a living systems blueprint?
Anywhere and everywhere...
- Ask your colleagues and managers
- Search chat and wiki
- Ask AI agents
- Analyse code and configuration files
- Analyse logs and output
- Analyse the applications(s) themselves
## Resources
Here are some templates you can use to create your own living systems blueprint diagram:
- [Download: Systems Blueprint Diagram - Template - Draw.io](/downloads/articles/living-systems-blueprint/systems-blueprint-template.drawio)
- [Download: Systems Blueprint Diagram - Template - Figma](/downloads/articles/living-systems-blueprint/systems-blueprint-template.fig)
- [Download: Systems Blueprint Diagram - Template - Miro](/downloads/articles/living-systems-blueprint/systems-blueprint-template.rtb)
And some system icon sets, depending on which (if any) vendors/providers you are using:
- [Material icons](https://fonts.google.com/icons)
- [AWS icons](https://aws.amazon.com/architecture/icons/)
- [Azure icons](https://learn.microsoft.com/en-us/azure/architecture/icons/)
- [Google Cloud icons](https://cloud.google.com/icons)
How to lose weight (without getting lucky)2026-02-18T00:00:00.000Zlose-weight> Summary: To lose unwanted fat in a healthy, sustainable, frugal and environmentally-friendly way, follow a whole-food plant-based low-fat diet and perform steady fasted cardio and strength exercises on a daily basis.
Over the last few years I've been making steady progress toward getting in better shape. It's not been a straight path, but I'm pleased to report that I've been able to get very close to my ideal body type several times (body-image issues aside) and am much closer now than I was even a few months ago!
In this article, I'll try and share what worked for me.
BTW, the title is a riff on [*How to get rich (without getting lucky)*](https://www.goodreads.com/book/show/53662964-how-to-get-rich) by Naval Ravikant, one of my favourite modern writers.
> Aside: Caveat: I don't pretend to be any kind of authority on this. This article will just be a catalog of ideas I collected from various sources (some evidence-based, some experience-based) which seem to have worked for me.
## Goal
Before launching into the tactics, I want to clarify my goal. I didn't actually start out with a clear goal, but rather I developed the goal over time and refined it quite a few times.
My basic goal now is a lean-muscular, moderately "athletic" body.
There are some constraints around this goal:
- **Long-term.** Not just for a few months. Ideally life-long.
- **Healthy.** Not involving toxic chemicals or unhealthy extremes.
- **Frugal.** Spending little or no more money on food than I would otherwise.
- **International.** I can move to another location while maintaining the diet/lifestyle.
- **Environmentally conscious.** At least not adding more damage to the natural world than I would otherwise.
As you can imagine, adding these constraints necessarily adds some complexity. However I still found it doable, given some ingenuity and (importantly) persistence!
## Motivation
> Pull-quote: “Visualize your success and then go after it.”
>
> – Arnold SCHWARZENEGGER
It's important to always have a "north star", "dream", "vision" or whatever you want to call it.
Some thoughts that keep me going:
- I can achieve something difficult that even some great or famous people have struggled with.
- I'll feel "light as a feather" and energized throughout the day, carrying less weight around.
- Looking good, with a body that is pleasant to behold, is a plus, for myself and possibly others.
- I see myself keeping physically fit into my 70s, regardless of what happens to me, health or otherwise. This is a life-long vision.
- Avoiding serious health issues associated with obesity and unfitness, such as cardiovascular issues and cancer, is well worth the effort.
When all else fails, I just imagine having ripped abs while partying on a yacht in Fiji. That usually does it! 😄

These all visions congeal into an image in my mind of a successful, active, fit, mature adult.
I think overall health is critical. I would never go on any regimen – diet, exercise or otherwise – that directly risked my overall health. Keeping overall health in mind is good in and of itself. But it also supports your weight loss goals. You can maintain consistent exercise and diet more easily if you are in good health most of the time.
It's important to celebrate wins – large and small. If you notice your looks or energy levels improving, take a moment to glow with self-pride and celebrate your achievement! Even if there are no visible changes, if you're able stick to your routine for some period of time, celebrate that too. Positive reinforcement of health behaviour is more sustainable than negativity and self-punishment.
## Lifestyle system
When making significant lifestyle changes, it's often helpful to step back and think of your lifestyle as a system. In a systems approach, you develop a network or web of goals. These goals are connected to eachother, and thus reinforce eachother.
For a simple example: you could move home to a location that is at least 15 minutes walk from the nearest public transport or park your car 15 at a location that is minutes walk from your home. Then you are forced to walk at least 30 minutes per day - from and to your transportation. This small change in habits automatically generates an additional 30 minutes per day of exercise.
The effect is amplified when you combine elements that are beneficial on their own and mutually reinforcing. For example, you could begin doing all your shopping at a supermarket that's 15 minutes from your home. Thus you set up a pattern of eating healthier (your supermarket is more likely to have healthy food like fruits and vegetables) **and** walking for 30 minutes daily.
For more information, you can check out books on systems thinking such as:
* [Thinking in Systems • Donella MEADOWS](https://en.wikipedia.org/wiki/Thinking_In_Systems%3A_A_Primer)
* [Early Retirement Extreme • Jacob LUND-FISKER](https://archive.org/details/earlyretiremente0000fisk)
## Mind state
> Pull-quote: “Meditation practice is also a kind of food because it nourishes us. Consider the practice offered by the Buddha to be a kind of food. Any practice must be a kind of food. Walking is like a delicious food. Eating is a delicious food, sitting is a delicious food, and working meditation is also delicious food.”
>
> – Thich NHAT HANH • _How to Eat_
I practice a few minutes of daily [mindfulness meditation](/articles/mindfulness), which helps to reduce anxiety and reduce mental blocks. During this I take some time to wish strength, health and wellness, both for those I know, and for myself. I try to cultivate a spirit of "non-grasping" generally. I try to notice when I'm mentally reaching toward something, whether it's food or rest. Simply noticing this helps me to slow down and go back to a more relaxed, reflective frame of mind, putting me more in the drivers seat and in control of my actions.
There are some other mental tricks I use to manage anxiety, such as focusing on next actions and the future, while deliberately moderating expectations and reducing thoughts about the past.
Understanding and harnessing the effort-reward cycle I also find important. For example, I try to do my morning exercise before having my first shower or drinking my first coffee. This helps motivate me to do the exercise (effort) in order to get the reward (shower, coffee). I use a similar cycle for my afternoon/evening exercise. First I exercise (effort) then I enjoy dinner/supper (reward). These cycles can show up in all kinds of little parts of life, so I try to make best use of them whenever possible.
> Pull-quote: “The best moments in our lives are not the passive, receptive, relaxing times...the best moments usually occur when a person's body or mind is stretched to it's limited in voluntary effort to accomplish something difficult and worthwhile.”
>
> – Mihaly CSIKSZENTMIHALYI • _Flow: The Psychology of Optimal Experience_
Flow activities can help you active and energized and reduce unnecessary eating.
When one feels tired, it may seem that food and rest are needed. But counter-intuitively, I've found that's often not the case. In fact, more activity seems to generate more energy. Note that the activity need not be intense or stressful. I've had the best experiences with moderate activities – a steady walk or hike, slow body weight exercises, a lazy afternoon swim or even chores around the house like cleaning and cooking.
## Monitoring
Any long-term endeavour should have appropriate monitoring.
I've given up on measuring body weight or mucking around with measuring tape.
***A quick look in the mirror on a regular basis seems the surest measure!***
And the best way to avoid making excuses.
There is one other kind of monitoring I consider crucial: blood tests. These can be obtained relatively inexpensively (at least in Australia, the UK, etc). You take the results to your GP/doctor and they tell you if you have any deficiencies. In my case, there were minor calcium and iron deficiencies, which I remedied by supplements.
Monitoring aside, I think it's best to focus on **behaviour change** as a goal, rather than a particular body type, size, etc. Your bodily appearance can fluctuate a lot, especially over short periods like a few days or a week. Even if your goal is to look a certain way, it can be difficult to get to that goal if you cannot sustain effort over long periods such as months. So it's better to focus on achieving long-term behaviour change – such as eating the right foods and right portions, doing the right kinds and quantities of exercise, etc.
Carefully observe your progress in developing better habits and celebrate your wins in the area of behaviour change. Persist in this, regardless of what your body looks like on any given day. Over time, you will move closer to your ideal bodily appearance and feeling, as long as you're performing the right actions and doing so consistently.
## Routine
> Pull-quote: “We are what we repeatedly do. ... Excellence, then, is not an act but a habit.”
>
> – Aristotle
> Pull-quote: “Don't Make Me Think”
>
> – Steven KRUG
> Pull-quote: “Each evening, there is a tiny moment—usually around 5:15 p.m. that shapes the rest of my night. ... the ritual is changing into my workout clothes. If I change clothes, I know the workout will happen. Everything that follows—driving to the gym, deciding which exercises to do, stepping under the bar—is easy once I’ve taken the first step.Don't Make Me Think”
>
> – James CLEAR • _Atomic Habits_
One thing that has helped me the most in my health and fitness pursuits is simply **maintaining a consistent daily routine**. Making a habit of daily exercise and healthy eating ensures consistent and steady progress toward my goal. Strong habits tend to be self-reinforcing. Once you get accustomed to taking that regular morning walk or that afternoon workout, it becomes automatic and a way of life.
My routine has become a kind of "sensible default", which I can execute almost mindlessly, without stressing and lapsing. It enables me to accomplish all my tasks, including exercise, work tasks and life admin, as easily and directly as possible, without hesitation or doubt.
This has actually been good for my mental health too. I'm less anxious when I don't have to constantly worry about what my day will look like. Of course, I do sometimes change my routine as circumstance dictate. But I try to do so in a relaxed, contemplative frame of mind, not in the heat of the moment.
I've been able to maintain my routine pretty consistently throughout international travel, changing work hours and various ups and downs of life.
One trick is to make the routine flexible and focus primarily on *activities*, rather than timing. So if I miss a morning workout, it's Ok, not the end of the world. I just need to do that workout in the evening instead. So the *times* are flexible, while the *activities* remain solid.
I also have certain routines in the evening that help me to wind down, relax and avoid unplanned snacking. These include dimming the lights to create a cosy atmosphere, according to the famous Scandinavian [Hygge](https://en.wikipedia.org/wiki/Hygge) effect. Even on travel this can be done quite effectively with a portable USB lamp and/or tweaking my laptop display configuration. I also like to floss and brush my teeth, which gives me a fresh taste that helps to avoid any temptation to eat.
## Exercise
Exercise is a critical part of my routine. Exercise builds and maintains muscle tone, sustains health (including mental) and energy levels and reduces appetite / food cravings.
There's a fantastic cumulative effect with exercise: as you lose fat and gain muscle, the exercise gets easier and you feel less hungry, which make it easier to exercise more, etc. The challenge, of course, is to maintain consistency and not slack off.
All the exercises I'm about to list are:
- Reasonably environmentally friendly do not by nature involve any damage to the environment
- Can be done in practically any major city or town, at any time of day
- Are healthy and low impact on your body, unlikely to cause serious injuries when done long term, assuming they're done with reasonable care
I try to do at least one session of both walking and strength training every day, and some swimming and HIIT every week.
Keeping the exercises simple and safe increases the likelihood of doing them consistently, which I think is critical to getting most of the benefits of exercise.
### Walking
Yes, simply walking.
The real beauty of walking, apart from being minimal and easy to do almost anywhere on travels, is how it can be combined with other activities. With smartphone in hand, I can tune in to a fantastic array of audio material: [audiobooks](/reading), podcasts, online courses and great music.
I can also combine it with travelling to appointments, shopping, remote meetings, connecting with nature (bush-walking) and just general exploration of the world. 🙂 It's wonderful to become immersed in my environment and visiting familiar streets and parks feels similar to visiting old friends.
During walking, I try to focus on posture, keeping a tall, straight upper back. Posture issues are a growing concern these days, not just for IT/tech workers who often have to face forward to use laptops, but also now for the general public, who are often consuming content heads-down on mobile devices.
You can add novelty to walks by taking different routes, varying your pace and stride, noticing and engaging with strangers from time to time and combining various activities with your walks like picking up packages or sight-seeing.
I aim for 30 minutes to 1 hour of walking every day.
There is [some research](https://veganmiche.blog/2023/01/07/how-much-fat-can-you-lose-from-walking-how-to-lose-more) showing that exercise at a moderate pace (60% max heart rate) is optimal for fat burning.
### Strength training
Here's a list of the specific strength exercises I do.
I like to do body weight exercises, also known as callisthenics. These include:
- Pull-ups and muscle-ups on the bar. Forward and reverse grip. Several sets, each as much as I can while keeping form.
- Push-ups. Lateral and tilted up or down. On the bars or the floor.
- Dips. On the bar or between two chairs.
- Ab crunches. While resting on the bar or hanging off the bar, or lying on the floor with a weight.
- Step-ups onto a low bar, large stair step, rock, or even bedside.
- Military presses with weight or resistance band.
- Bicep curls with with weight or resistance band.
- Some other body-weight exercises like planking, squats and lunges.
Some other points:
- **Core strength.** Try to incorporate core / ab training into as many exercises as possible. Abs are involved in many full-body exercises, so by focusing a little on your abs, you get a kind of bonus "2 in 1" effect. While doing pull-ups, push-ups, band rows, etc. you can "feel into" your abs and make sure they're coming along for the ride.
- **Quality over quantity.** In each workout, I try to prioritise overall quality. First priority is safety – none of the movements should cause severe pain or injury. Next, I want to strain the muscles enough to feel satisfied that it was a thorough workout. This involves a kind of "good pain" or burning feeling, where you know that your muscle was tested. This doesn't necessarily have to involve training to complete failure, though I try to do that from time to time.
- **Maximising reps, minimising sets.** I try to maximise the number and/or intensity of reps and minimise the number of sets. Research shows that the number of sets is not as important as the intensity of the first set. What is important is to thoroughly exercise the muscle at least once in a session. It is less important how many _times_ within a single session a muscle is stressed. (See: [Extending an Active Life: Insights from Molecular Exercise Physiologist with Professor Keith Baar](https://www.youtube.com/watch?v=anB-UMXIDQA))
- **Variation.** I try to make each workout a little different and unique so that each muscle group is being adequately challenged. This could mean varying the grip, intensity, number of reps, order of reps or many other possible variables.
In case you didn't notice, many of these can be done either with or without the gym! I can just use body weight, furniture or outdoor facilities. This makes the exercise routine easy to maintain while travelling and resilient to unexpected changes in the my day plan.
Strength-training builds muscle, which aids weight loss in multiple ways:
- Speeds up metabolism, aiding digestion and fat loss
- Improves general stamina for cardio
- Good for general health - heart, lungs, etc.
I aim for 3-5 strength training sets every day.
### HIIT
I've recently been trying [high-intensity interval training](https://en.wikipedia.org/wiki/High-intensity_interval_training). Here I do body-weight cardio exercises at a high intensity, with 20 second breaks, for a period of 5-10 minutes.
HIIT seems to generally accelerate my progress. Plus, I've seen plenty of studies showing its benefit for overall health.
The real beauty of HIIT is its simplicity, minimalism and time efficiency. No equipment is needed, just a little floor-space and discipline! And one can almost always spare 5-10 minutes out of a 16-hour waking day. These factors make it simple to maintain HIIT during travel or changes to my day plan.
HIIT also gives various benefits, such as slowing ageing, improving heart health and (See: [https://www.youtube.com/watch?v=anB-UMXIDQA](https://www.youtube.com/watch?v=anB-UMXIDQA)).
My HIIT routine varies, but typically consists of:
- Burpees
- Squat-jumps
- Star-jumps
- Push-ups
- Back squeeze while lying on chest
- Jogging on the spot
I found HIIT to be the toughest exercise to begin, yet the easiest to complete once started. Funny that!
YouTube videos like this one are a helpful aid: [Intense 15 Minute BURPEE ONLY HIIT Workout for Serious Results!](https://www.youtube.com/watch?v=X34SBfiT7xo).
Moderate to high intensity exercise can be used with high impact movements (such as running, squat jumping or jumping onto and off of a raised surface) to improve bone strength, preventing osteoporosis. (See: [The Best Exercise Type and Frequency for Bone Density](https://www.youtube.com/watch?v=bHS1zzlbNV4), [Best Exercises to Strengthen Your Bones (Backed by Science)](https://www.youtube.com/watch?v=HzPNUIA732Y)).
I do a brief session of HIIT 2 times per week. I also try to incorporate some high intensity periods into of my strength training sets and swimming laps.
### Swimming
I like to do laps at the local pool. Maybe pool-swimming is not 100% good on the environmental scale, so I might someday switch to ocean or lake swimming. Swimming is a great all-round cardio workout and very safe and low-impact, as well as being good for flexibility and posture. And being in the water is fun!
I aim for one session per week.
### Standing
I've been trying to stand for more hours of the day. Studies have shown that spending more time standing is good for overall fitness and posture and can burn more fat. Most modern offices have standing desks.
At home it's easy to turn almost any surface into a standing desk using a sturdy cardboard box or a crate or two. Even better, you can combine the standing with moving around and taking mini-breaks from work to do small chores such as cleaning up, vacuuming, etc. So you get two-in-one: fitness _and_ a cleaner home!
I aim for at least 4 hours of standing per day.
### Managing pain
It's important to get any localised or persistent pain treated. After experiencing some upper back pain, I personally found it helpful to visit a physiotherapist for a few sessions, over which they provided training on specific exercises and postures I could practice, to treat the issue.
To be sure, there can be some unavoidable physical pain involved in regular exercise. Feeling fatigued, occasional muscle aches, the odd heel spur. Assuming full care is taken to avoid injury, workouts can just feel tough sometimes.
> Pull-quote: “What upsets people is not things themselves but their judgements about the things. ... So when we are thwarted or upset or distressed, let us never blame someone else but rather ourselves, that is, our own judgements.”
>
> – EPICTETUS • [_Handbook (Encheiridion), 5_](http://classics.mit.edu/Epictetus/epicench.html)
> Pull-quote: “Start by doing what's necessary; then do what's possible; and suddenly you are doing the impossible.”
>
> – St Francis of ASSISI
I don't have any one sure answer to "solve" inherent pain in exercise, but more like a set of small "mind hacks" that help me to manage pain and stay the course.
- **Exercise even when I don’t want to.** *Especially* when I don't want to, so as to reinforce the habit.
- **Meditation, mindful breathing.** Deep inhalations, breathing into the pain, being with my body.
- **Effort-reward cycle.** Making the effort with the knowledge that I'll feel better at the end. (And yes, 99% of the time I do feel better!)
- **Awareness of body.** Especially the effect of heat/cold, caffeine, sleep. When drowsy or lethargic, I remind myself of external factors to avoid excusing myself from putting in work.
- **Mental imagery.** I like to use my imagination to create pleasant and comforting imagery so that I feel relaxed and happy throughout the painful episode. For example, when working out in the cold, I might put on some jazz music and imagine being in an Italian restaurant. Or when it's intensely hot, I might imagine being on an island in the Mediterranean, enjoying an ocean view from a luxury hotel. Persisting through tough times with imagination can unlock "coping" parts of your mind that you never knew existed!
- **Stoicism.** The stoic philosophy tells us that our minds often make things worse than they really are. I found this helpful when applied to exercise. My mind makes up a story about how difficult 10 push-ups will be. In reality, after the first 3 or so, I'm already on a roll. Effort is often not as difficult as it seems at first.
### Muscle recovery
There doesn't seem to be any evidence that breaks significantly improve muscle recovery. For this reason, I prefer to work out daily, though I slightly vary the routine just for fun.
There is evidence that certain foods are better for muscle recovery – fruits and vegetables, specifically. (See: [Foods to Improve Athletic Performance and Recovery](https://www.youtube.com/watch?v=bfERQJLvo6A)).
### Managing injury
Injury is, unfortunately, occasionally part of life. From time to time I might trip and get bruised or pull a ligament.
Interestingly, for injured ligaments, as long as the injury is not severe, research seems to indicate that the best way to recover is to continue exercising, albeit as a reduced intensity. Professor Keith Baar suggests bearing some weight using the affected muscle group to put tension on the affected ligaments. This helps keep the cells in these ligaments active, speeding up the recovery. (See: [Extending an Active Life: Insights from Molecular Exercise Physiologist with Professor Keith Baar - Common Injuries and Health Risks](https://youtu.be/anB-UMXIDQA?si=BRBHzRn6383OQclU&t=1800).)
In my own personal experience, I always recovered within days, continuing to exercise with reduced weight, intensity and reps and gradually increasing them back to normal.
### Enjoying the weather
I've found weather isn't usually a reason not to exercise. Actually, with the right mindset, I find the weather more of an incentive.
When it's hot and sunny, I immerse myself in the intensity of the heat and sunshine (with generous application of sunscreen, of course).
When its cold and wet, I savour the calming and relaxing feeling of the coolness and rain (under the comfort of a sturdy umbrella).
When it's humid and cloudy... well... I tell myself to toughen up! 😄 (Recalling Stoic quotes can help.)
Suitable clothing and gear really helps here.
- When it's hot, I wear minimal clothes, light materials and clothing styles that free up my body, like shorts and singlets.
- When it's cooler, I wear clothes that conserve heat while keeping my body flexible, like close-fitting long-sleeve wool shirts and tight pants.
- When it's rainy, I wear a comfortable rain jacket, pack an umbrella and wrap my backpack in a waterproof bag cover to keep my valuables dry. I also waterproof my boots with beeswax and maybe some proofing spray.
- I like to wear good quality, comfortable shoes, typically hiking boots.
With the right clothing, equipment and preparation, working out in any weather – from sunny to rainy – is no problem at all.
### Music
Music can be a great motivator during HIIT and intense strength training. I like to listen to music with a strong rhythm and high dynamic range. Some favourites include music from the [Ozora](https://www.youtube.com/results?search_query=ozora) Psytrance festival, smooth jazzy tracks of [Dimitri from Paris](https://en.wikipedia.org/wiki/Dimitri_from_Paris) and [classic 70s Brazilian samba mixes](https://www.youtube.com/results?search_query=+brazilian+samba+grooves).
I like to keep a playlist of exercise tracks on my YouTube app, always ready to go as soon as I commence a work out.
## Diet
After much research and experimentation, I've settled on a [whole food](https://en.wikipedia.org/wiki/Whole_food), [plant-based](https://en.wikipedia.org/wiki/Plant-based_diet) and [low fat](https://en.wikipedia.org/wiki/Low-fat_diet) diet. This diet consists of mostly fresh fruit, vegetables and whole grains, with some added spices and low fat seasoning (vinegar). For beverages, I consume water, black coffee and various teas.
After an adjustment period I've come to thoroughly enjoy this diet. It's high in nutrients, cost effective, filling and I find it delicious!
> Aside: Any diet you choose should be as enjoyable and tasty as possible. This is so you can stick with it. Unless you have the will-power of a saint, a diet that isn't enjoyable, interesting, varied and satiating will be very difficult to stick with, even if it technically meets your nutrient requirements.
I also take a few supplements occasionally as recommended by my doctor, such as iron. And I've experimented with various medicinal herbs and spices such as [Ashwagandha](https://en.wikipedia.org/wiki/Withania_somnifera), [Hibiscus tea](https://en.wikipedia.org/wiki/Hibiscus_tea) and [Flaxseed powder](https://en.wikipedia.org/wiki/Flax#Flax_seeds).
### Meals
Meals I prepare regularly:
- **Fruit.** Fresh apples, pears, citrus, watermelon. Also frozen berries with a ¼ cup of oatmeal and some cocoa powder – this combo I find especially refreshing in hot weather and/or just after an intense workout. High in Vitamin C, healthy carbs and antioxidants.
- **Veggies.** Steamed in a pot. Broccoli, cauliflower, kale, brussels sprouts, etc. With some added capsicum, red onions, button mushrooms or whatever else I feel like. Sprinkled with balsamic vinegar, herbs & spices and a ½ cup of yeast flakes. Veggies are high in vitamins and minerals, fibre and antioxidants.
- **Rice, roots and beans.** Cooked brown rice. Various tubers such as potatoes, sweet potatoes, carrots, turnips, beetroot and more. Also almost every bean and legume dish known to humans, from lentil curry to cuban black beans. These all make for very delicious and filling lunches and dinners and tick all the protein boxes.
These meals can be prepared in ~15-30 minutes at a time and I'm rarely spending more than an hour per day in the kitchen. (Though I enjoy cooking anyway!)
Most of these ingredients are cheap, available, healthy, reasonably environmentally friendly, simple to store and cook.
- **Cost:** Mostly cheap and can be purchased in bulk or found in aisles. The fresh fruit and veggies can be purchased frozen to save cost and studies show that in frozen form they are just as nutritious as refrigerated, and possibly even more nutritious!
- **Availability:** Thanks to the wonders of modern globalised trade, I've found most of these are available in most major cities and metro areas in much of the developed world. I do donate to food banks and other initiatives, with the hope that we will eliminate hunger and malnourishment for all people.
- **Health:** Nutritious, whole food, no added sugar, high-fibre, high in anti-oxidants, low in toxins. Fruit and vegetables also have a high water content, keeping you hydrated.
- **Environment:** I minimise use of animal products. This results in a low environmental impact.
- **Organic:** Using the money saved from minimising meat consumption, I can afford to buy some organic fruit and vegetables. These can be both healthier and less impactful on the environment, due to lower use of pesticides.
- **Storage:** Most of the stuff can just be kept in a cupboard. I'll usually pick up the veggies the same day I eat them, but they keep pretty well in the fridge if I decide to do a weekly shop. Frozen veggies can, of course, be kept in the freezer indefinitely (and apparently [may be more nutritious than fresh](https://edition.cnn.com/2019/05/30/health/frozen-fruit-vegetables-drayer-food/index.html)!). An additional advantage of plant foods is that they tend to spoil less and don't produce harmful bacteria when not cooled (say, when the power goes out, the fridge fails or you just forget to put them in the fridge).
> #### Aside: Yeast
> I like to top my vegetable dishes with [Yeast flakes](https://en.wikipedia.org/wiki/Nutritional_yeast). This tasty food item is high in protein and B-vitamins and has immunity benefits.
> #### Aside: Spicy food
> Everything I've read indicates that hot and spicy foods are good for health. Capsaicin and other chemicals found in chilli peppers and other hot foods are great for reducing bodily inflammation, which reduces risk of cancer and other diseases. Spicy foods seem to also increase my feeling of satiation after a meal.
> Some of my favourite spicy foods include:
> - Cayenne pepper
> - Hot chilli pepper - great topping for vegetable and seafood dishes
> - Chilli flakes - great for soups and stews
> - Black peppers - great with seafood and tofu
> - Scotch bonnet peppers - great for bean dishes. Especially Caribbean classics such as black beans and plantains.
### Drinks
I drink water, black coffee and various teas. For all of these I don't add any sugar, milk or anything else.
Drinks should generally be zero-sugar and zero-fat, in my opinion. Liquids are the worst way to get carbs - they're typically over-processed, resulting in insulin spikes. And you don't get to feel full and satisfied, because you're consuming them so fast.
> #### Aside: Timing coffee
> Despite its many benefits, on the downside, there is some evidence that caffeine disrupts calcium absorption. For this reason, it's probably best to limit caffeine and avoid pairing it with your calcium-containing meals. Caffeine can also interfere with sleep, if taken too late in the day. To address both of these issues, I generally limit my caffeine intake to 3 cups per day and only consume it before 3 PM. I consume most of my calcium-rich foods after 3 PM.
### Portion control
I control and measure my food ingredients. This gives me a lot of control over what and how much I consume, which helps me to find a healthy balance of nutrients and keep fat intake low.
I don't use anything too sophisticated, just simple measuring rules, such as the following:
- 3x ¼ cups of rice
- Palm-full of pasta
- Punnet of berries
- Piece of citrus fruit, bread roll, dried fruit
- Quarter of potato, onion
- Measuring cup scoop of oats
- Tablespoon of lemon/lime juice, vinegar
I have implements to help with these:
- Measuring cup - ¼ cup size
- Measuring spoon - ½ tablespoon size
- Measuring spoon - 1 teaspoon size



When preparing any meal, I simply follow the same predictable routine, with the same quantities. For example, only 3 ¼-sized cups of rice per day. I've made a habit of repeatedly using these simple measurements when preparing meals. This way, I don't have to think much about the quantities. I just follow the routine "blindly" and rely on "force of habit" to override and overwhelm any possible urge to add too much or too little. This consistency has helped me overcome temptation to overeat or under-eat. It took some time to build up the habit, but now it's pretty solid.
By measuring ingredients in a standardised, repeatable, "unthinking" way, I can "lock in" a certain quantity of food per day. This allows me fine-grained control over nutrient balance and macro intake (maximising carbs and protein, minimising fat). This way I can sustain the diet long-term in a controlled way and avoid the dreaded "yo-yo dieting", where extremes of under-eating and over-eating lead to stress and missed goals. It's also easier from a financial perspective – I can budget for a certain amount of food in the weekly shop.
While measurement is a useful tool for portion control, I would prefer not to lean too heavily on it as a **motivational** mechanism. To sustain healthy eating patterns over the long run, I think firm routines and mindfulness are most reliable.
> Aside: I think it's just as important to eat *enough* food as it is to *limit* it. Chronic under-eating can lead to health issues and compensatory over-eating, which can throw a good routine out of order. I find it better to avoid extremes either way. To lose weight, it's best to focus on sustaining a diet over a long period of time.
With this careful diet plan in place, I only need to store the necessary ingredients in my home. So I have no unhealthy foods lying around to be accidentally snacked on. This makes it easy to stick to my diet and, to paraphrase Rico Mariani, ["fall into the pit of success"](https://learn.microsoft.com/en-us/archive/blogs/brada/the-pit-of-success).
### Maximising food volume
> Pull-quote: “People who eat the most vegetables and fruits tend to have the healthiest body weight and gain less weight through their adult years. Eating lots of low-CD [calorie-density] vegetables and fruits instead of other foods can help you shed pounds and keep them off.”
>
> – Barbara ROLLS • _The Ultimate Volumetrics Diet_
Popularised by Barbara Rolls, volume eating is a tool that can be utilised to help with weight-loss. It allows you to eat more food and feel fuller without consuming excessive fat or protein. The trick is to select foods that are more bulky and filling. These are typically plant-based foods such as leafy green vegetables, fresh fruits, whole grains and beans. Many of these foods are very healthy anyway, so you get other health benefits beside fat loss from consuming them.
With my current diet, I found I can eat in quantities that are completely filling while still keeping fat very low.
### Minimising dietary fat
> Pull-quote: “Other than in the experimental situation of gross carbohydrate overfeeding, conversion of carbohydrate to stored lipid does not occur to any appreciable extent in humans.”
>
> – Essentials of Human Nutrition • Jim MANN, Arthur TRUSWELL
When we talk about weight loss, we usually mean ***fat loss***. We are probably not interested in losing muscle tone or bone density.
The body can easily store dietary fat as bodily fat ("adipose tissue"), as it is already in the form fat ("lipid"). By contrast, the body has more difficulty converting other kinds of macronutrients – carbohydrates and protein – into fat for storage. So consuming less fat and more carbohydrates and protein in the diet results in less fat gain overall. Yes, this is even true when calories are held constant!
The process of converting sugars into fats is a process called "de novo lipogenesis". According to various studies (such as this one: [De novo lipogenesis in humans: metabolic and regulatory aspects](https://pubmed.ncbi.nlm.nih.gov/10365981)), only a relatively small portion of the energy absorbed from carbohydrates is stored as fat on the body. Most circulates in the bloodstream ("glycogen") and is expended for bodily processes (including digestion), expended in normal daily activity, released as body heat ("thermic effect of food") or stored in the liver.
In my personal experience, I found that I could consume a far higher caloric content while still losing weight, if I strictly limited my daily fat intake. It's not necessary or possible to completely eliminate fat from the diet – even fruits and vegetables contain small amounts. But by following a whole-food plant-based diet and avoiding or limiting fattier foods such as avocados, nuts and seeds, fat content can more easily be reduced. The small amount that is taken in can be more readily burned off during moderate intensity fasted exercise such as a morning walk.
### Avoiding added sugar
> Pull-quote: “Stay strong.
> Get off the sugar train.
> Get off the addiction.
> Stop eating sugar.”
> – Discipline Equals Freedom • Jocko WILLINK
Many perfectly healthy foods contain sugar, including fruits, vegetables and wholegrains.
The problem isn't sugar or carbohydrates per-se. It is the ***processed sugar*** that is added to the food that's the problem as well as alcohol in any form.
The problem is that added sugar affects the human brain in ways that cause addiction. This addiction manifests in hunger, cravings, high appetite.
The key to avoiding sugar addiction is to eliminate added sugar from your diet, relying instead only on the naturally occurring sugars in whole foods, including fruits, vegetables, nuts, beans and grains such as brown rice and pasta.
Other benefits to avoiding sugar include reduced likelihood of diabetes, less tooth and gum issues and more stable energy levels.
### Enjoying food
I try to eat a bit slower and more mindfully. Famous spiritualist Thích Nhất Hạnh wrote a whole book on this topic: [How to Eat](https://www.penguinrandomhouse.com/books/545835/how-to-eat-by-thich-nhat-hanh/), which I've started reading. Some studies show that if we take 20 minutes or more to finish a meal, we'll feel more satisfied. Using small cutlery for eating, like a smaller fork or chopsticks, can help you to slow down and appreciate each bite more.
I like to eat while involved in some relaxing, social and/or moderately stimulating activity. Typically while in an online meetup, interacting in an online chat or forum, with friends and family, and/or watching or listening to something educational such as history or nature documentary.
One thing I noticed since childhood is that the layout of the food can really make eating an absolute joy! For example, I like to add small "sides" to my dishes that really pack a flavour and spice punch. I can combine different parts of the plate as I eat, creating a rich, varied experience. I noticed this kind of "mix-and-match" mode of eating is prominent in the more traditional world cuisines, no doubt for good reason.
- South Indian cuisine - thali
- Vietnamese cuisine - fresh spring rolls
- Spanish cuisine - tapas
- Mexican and Cuban cuisine - fresh salsas, black beans and rice
So with my regular diet, I take inspiration from this technique of having small side portions, but adapt it to my own nutrient profile.
### Fasting
I like to do most of my exercise first thing in the morning, when I'm feeling lightest and most alert. So I generally for most of the morning (except for water, coffee and maybe a small light snack).
I do most of my eating in the early to late afternoon. According to [some studies](https://veganmiche.blog/2023/07/04/optimal-breakfast-and-lunch-timing-for-weight-loss-and-health/), fat loss is greater when following this timing pattern. This may be due to the body being more active during the day and thus burning more fat.
### Avoiding unnecessary eating
Sometimes I feel hunger pangs for no obvious reason. At those times I try to run through a mental checklist and this usually sorts me out.
- **Am I feeling stressed?** Maybe I need a brief meditation or even just a few minutes of simple box-breathing. This is usually not a problem while out, at work or elsewhere.
- **Am I uncomfortable?** Maybe I just need to put on a coat or jacket, turn on the air conditioning briefly or go to the toilet.
- **Am I hydrated?** Thirst and hunger can be easily confused. I always carry a water bottle with me so I can hydrate regularly.
- **Am I tired?** This is more tricky during the day, but in the evening I can usually go to bed earlier if I need a bit more sleep.
I've found that 9/10 times, it's not that I'm genuinely hungry, but that I'm using food as a distraction to cope with some other issue. If I can quickly find the root-cause and address it, I have no need of food.
Humans need to eat, but we don't need to eat that much, and certainly not as much as is pushed on us by the capitalist/consumerist system. If we feel hungry outside of mealtimes, it's likely for some other reason, not a genuine need for food.
Finally, some little habits that give me a motivational boost sometimes:
- Simply wait for 20 minutes, most cravings will pass
- Look forward to tonight's or tomorrow's activities, including eating
### Herbs and supplements
Certain herbs and herbal teas can help burn fat and/or reduce appetite. For example, there is some evidence that [drinking hibiscus tea reduces body fat](https://nutritionfacts.org/video/fat-blocking-benefits-of-hibiscus-tea/). Some [moderate Flaxseed consumption has also been shown to reduce body fat](https://nutritionfacts.org/blog/are-there-any-benefits-of-flaxseed-for-weight-loss/).
I'm not very big on supplements, due to the cost, complexity and dubious health benefits. I do take one vitamin D tablet per day if I'm not getting out in the sun much. I take regular blood tests and if the doctor recommends supplementation to remedy any deficiency, I'll make sure to fit that it.
## Conclusion
I hope you found some utility and inspiration in this article!
Maintaining fitness and health is best treated as a long-term game in my opinion. The changes should be gradual, cumulative and sustainable.
In my experience, the surest way to lose unwanted fat is to minimise dietary fat and maintain exercise over a long period of time, sticking to healthy daily routines and trying to make them as enjoyable as possible.
The toughest aspect is to *persist over long periods of time*, which is why I emphasize simplicity, convenience, health, motivation and enjoyment! But I found Stoicism to be a great help when times do get tough.
Optimizing my exercise and diet has been a fun and fascinating (though sometimes challenging) journey. I see it as a kind of [infinite game](https://en.wikipedia.org/wiki/The_Infinite_Game), something I can always get better/smarter at and that enriches my life.
## Further viewing
- [Food and Health on Coursera](https://www.coursera.org/learn/food-and-health)
- [The Miraculous Healing Power of Food • Anthony LIM](https://www.youtube.com/watch?v=Nuts6ZE5wok)
- [Miche, PhD](https://www.youtube.com/@MichePhD)
- [Simon Hill](https://www.youtube.com/@TheProofWithSimonHill)
- [Physicians Committee](https://www.youtube.com/@PhysiciansCommittee)
- [NutritionFacts.org](https://www.youtube.com/@NutritionFactsOrg)
- [Talking with Docs](https://www.youtube.com/@TalkingWithDocs)
## Further reading
- [Eat, Drink, and Be Healthy • Walter WILLETT](https://nutritionsource.hsph.harvard.edu/2017/10/15/eat-drink-and-be-healthy-willett/)
- [NutritionFacts.org • Michael GREGER](http://nutritionfacts.org)
- [Food - What the Heck Should I Eat • Mark HYMAN](https://drhyman.com/products/food-what-the-heck-should-i-eat)
- [Losing weight mega-thread on MrMoneyMustache.com](https://forum.mrmoneymustache.com/ask-a-mustachian/help-with-diet-and-weight-loss!-way-too-chunky!)
- [Essentials of Human Nutrition • Jim MANN, Arthur TRUSWELL](https://global.oup.com/ukhe/product/essentials-of-human-nutrition-9780198866671?cc=au&lang=en&)
- [The Ultimate Volumetrics Diet • Barbara ROLLS](https://www.harpercollins.com.au/9780062060655/the-ultimate-volumetrics-diet/)
## Tools
Some tools to help you on your diet and fitness journey.
- [Callisthenics Parks](http://calisthenics-parks.com) - free outdoor gyms, all over the world
- [Free Outdoor Fitness](https://freeoutdoorfitness.net) - free outdoor gyms in Australia and New Zealand
Manual testing2026-02-18T00:00:00.000Zmanual-testing> Summary: Manual testing offers distinct and powerful benefits such as understanding system behaviour with minimal documentation, verifying changes rapidly in multiple environments and empathising with end-users. Structuring your manual test efforts compounds these benefits.
While automated testing methods have been established for a long time in the software development process (e.g. unit, integration and end-to-end tests), relatively less attention has been paid to manual testing.
However manual testing is far from "dead". Software developers still routinely verify their work by using products manually. Further, developers are usually required to take responsibility for the end-to-end functioning of their software, not just writing quality code and passing unit tests. They are usually encouraged not lean too heavily on QA.
In this article, I will:
- Review the distinct benefits of manual testing.
- Present a real-life scenario where manual testing adds value.
- Provide guidance for structuring your manual testing, so you can get maximum benefit from it.
## Benefits of manual testing
Manual testing allows you to achieve certain specific goals which may not be available through automated testing:
- Discover ***actual behaviour*** – how the system ***currently*** to behaves at runtime. (This information is not always readily available by other means.)
- Determine ***intended behaviour*** – how the system is ***expected*** to behave. (Also not always readily available.)
- Perform testing ***immediately*** – without setting up test frameworks, etc.
- Perform testing in ***any environment*** you can access – not just local or QA environments.
- Put yourself ***in the end-user's shoes*** – letting you experience the system as an end-user would.
- Verify ***complex, lengthy workflows*** – which might be too difficult to automate. For example, complex interactions between an end-user and the system or complex data processing activities on the backend.
As with any activity, manual testing can offer maximal benefit when performed in a structured manner.
In my experience this involves:
* Writing clear, structured test cases - e.g. heading, description, numbered steps with actions and expected results
* Organising test cases for rapid retrieval, by using consistent naming and tags
* Sharing test cases within the team/organisation, so others can leverage them
## Example of a test case
Here's a simple example of a test case involving a user logging in:
user_can_login.md:
```markdown
# User can login
Users who have an account should be able to log in.
## Steps
1. Go to the homepage
2. Click the login button
3. Expect that the login screen is shown
4. Enter username
5. Enter password
6. Click login screen submit button
7. Expect that you are shown logged in, in the header section
```
Notice we have a brief heading and description, followed by neatly numbered steps.
Steps can be:
* ***Actions*** (e.g. "click the login button") or
* ***Expectations*** (e.g. "expect that the login screen is shown")
This format allows us to quickly follow the steps of the test case (actions) and know what to look at to determine whether the test passed or failed (expectations).
## Scenario: critical fixes for a startup
A realistic scenario might make it easier for you to see how manual testing can help.
Imagine you begin work as a software engineer at a rapidly growing startup, building a complex product with many user flows.
You are assigned to work on the sign up experience. Users provide various personal details such as their country of residence. Based on these, the system provides various prompts then accepts payment.
You are given your first development task:
> "Please fix the flow for Japanese customers. They are getting stuck at the point where they submit their personal details, but before they have paid for the product."
This is based on direct customer contact. No one in the company can tell you exactly what "stuck" means or in exactly which part of the flow this is occurring.
There is also minimal unit test code, code quality is not good and there's little documentation. Remember, it's a fast-growth startup – they don't have the same time and resources as a more mature company.
How would you go about solving this? Your approach might look like this:
1. You go through the flow manually, simulating a Japanese customer (perhaps setting your browser location to Japan).
2. As you go, you write down the steps you are taking, such as which details you entered, which buttons you clicked, etc. (This makes it easier to keep track of what you're doing, in case you need to restart the process).
3. You find the exact point where the system is stuck - the submit button on screen 5 doesn't do anything.
4. Examining the requests/responses, you discover that the system skipped the collection of the user's driver licence details, which are required for customers in certain countries, including Japan, causing an underlying API call to fail if not provided.
5. Your verify this requirement with Backend engineers and the Product owner. Now you know what the fix is: you need to enable drivers licence details collection for Japanese customers.
6. You make the fix in the relevant part of the code-base.
7. Testing your work manually, you realise this data can be collected earlier in the sign-up flow, with a skip option given for customers who don't have the details on hand. This will be a nicer user experience and increase the number of potential customers in the sales funnel.
8. You complete all your changes, cover them with a unit test, save your manual testing steps in a markdown document (linked to from the pull-request) and push your changes.
9. Once in Prod, you do a quick verification and see that everything works as expected.
10. You can now report to the team that your task is completed with (hopefully) zero bugs!
Notice how documented manual testing helped you to solve this problem:
- You found the actual error by manually going through the flow (step 1).
- You kept track of your testing by writing down the steps, allowing you to quickly and efficiently repeat your test efforts whenever needed (steps 2, 7, 9).
- You easily verified your work in Prod (step 9).
- You empathised with the end-user and even found an opportunity to improve their experience as well as the onboarding rate (step 7).
- You added value to the team by documenting your manual testing steps (step 8).
As we'll soon see, this is only the beginning of the benefits!
## Tagging your test cases
Tagging can be a powerful way of making your whole test case collection searchable.
Suppose every time you refer to the login screen in your Markdown files, you use the exact phrase: "login screen". Perhaps wrap it in brackets: "(login scren)".
Now this exact phrase is searchable, via a simple find-in-files in your text editor. By searching for the string "(login screen)" you can find every test case involving that screen.
For example, your search might yield the following results:
* `user_can_login.md`
* `user_can_recover_forgotten_password.md`
* `user_cannot_login_with_wrong_credentials.md`
* `user_can_login_from_another_country.md`
* `user_can_login_with_a_linked_google_account.md`
This gives you powerful new capabilities such as:
* **Regression-testing** - checking various test cases, in case your change might have broken something.
* **Exploratory-testing** - observing how the application behaves in various scenarios, generating ideas for improvement or uncovering hidden bugs.
* **Determining which unit tests to write** - to boost test coverage in a critical area of the application.
## Test data
Suppose a feature you want to test relies on certain data existing in the system beforehand.
For example, you might need a certain kind of user account, such as a user who has their country set to Japan.
You could create a test user in your testing environment - `hiroshi@yompail` – and save it in your test case under a "Test data" heading.
user_can_login.md:
```markdown
# User can login
## Steps
1. Go to the homepage
...
## Test data
- User: hiroshi@yopmail.com / P@ssw0rd
```
## Results and artifacts
It can be very useful to know the full list of dates/times when you ran your test and what the result was on each run.
These can be added to a "runs" section of the test case file.
user_can_login.md:
```markdown
# User can login
## Steps
1. Go to the homepage
...
## Runs
| Date/time | Result |
| ----------------------- | --------- |
| 2024-10-01 9:00 AM | Succeeded |
| 2024-09-04 10:00 AM | Failed |
```
How might this be useful?
* **Spotting a pattern in failures** can indicate a systemic problem, such as insufficient compute resources or code quality issues with a particular part of the code base.
* **Correlating failures with code changes** can narrow your version control system search. For example, if you know the failure happened within the last week, you can limit your search changes made within that timeframe.
When with manual testing, it is common for engineers to capture artifacts of their work, such as screenshots, screen recordings and copies of log output. These serve to demonstrate work done, prove that things worked correctly at a certain date/time and capture additional information that could help identify additional problems or improvement opportunities.
Artifacts from manual tests can be organised alongside test cases, using a structured folder naming system.
I have found it best to keep artifacts in folders named after the test cases and test run dates from which they were generated.
Here's an example:
- `/test_cases`
- `user_can_login.md`
- `user_can_recover_forgotten_password.md`
- ... etc
- `/test_artifacts`
- `/user_can_login`
- `/2024_10_01_9_00_AM`
- `Screen Recording 2024-10-01 at 9.01.55 am.mov`
- `Untitled2.png`
- `/user_can_recover_forgotten_password`
- ... etc
## Manual testing workflow
You can make manual testing a regular, consistent part of your workflow. As you strengthen this habit, your work quality and overall knowledge of the system should improve.
Here are some ideas:
- Write a test case at the beginning of working on a major feature.
- Include or link to the test case in the task tracking system.
- Perform a test case of every major feature you deliver, writing a test case if one doesn't already exist.
- Include or link to your test case from every pull request you submit.
- Keep all your test cases in a shared knowledge system, such as your project's wiki.
- Copy relevant parts of a test cases in chat conversations about a feature or bug.
## Manual testing tools
There are a range of software tools to help you write and manage test cases.
- [Testmatic](/projects/testmatic). Shamless plug – I built this! It includes a web-based UI and CLI and saves everything to Markdown.
- [Azure Test Plans](https://azure.microsoft.com/en-us/products/devops/test-plans). This one has a nice web-based UI and integrates with the Azure suite.
- [DoesQA](https://does.qa/test-automation/codeless-vs-code). An interesting product that apparently allows you to write "codeless" but runnable tests.
## Conclusion
Manual testing offers distinct and powerful benefits, not offered by automated testing, such as understanding and representing current and desired system behaviour, making fast progress in challenging environments with limited documentation and test coverage, verifying changes in multiple environments, verifying complex workflows and empathising with end-users.
Structuring your manual test efforts compounds these benefits: you can quickly locate related tests (enabling regression and exploratory testing), ease your test efforts (using test data) and keep track of test results (helping you identify patterns in failures or find the root cause of an issue).
## Further reading
These resources inspired this article:
- [_Software Testing - A Craftsman's Approach_](https://www.routledge.com/Software-Testing-A-Craftsmans-Approach-Fifth-Edition/Jorgensen-DeVries/p/book/9780367767624) by Paul JORGENSEN
- [Article: Do you understand what \"testing\" really means? | SSW.Rules](https://www.ssw.com.au/rules/what-testing-really-means)
- [Article: Do you understand why testing cannot be completely automated? | SSW.Rules](https://www.ssw.com.au/rules/why-testing-cannot-be-completely-automated)
Mindfulness2026-02-18T00:00:00.000Zmindfulness> Summary: Recently I started the habit of practicing mindfulness-meditation daily. This resulted in some unique experiences and personal transformation including positive orientation, enhanced awareness and reduced stress.
> Pull-quote: “Let all those beings which exist --
> without enemies, without obstacles, overcoming their grief
> and attaining happiness, be able to move freely,
> each in the path destined for them.”
> – BUDDHAGHOSA • Visuddhimagga
> Pull-quote: “We are what we repeatedly do.”
> – ARISTOTLE
> Pull-quote: “Mindfulness is not merely a concept or a good idea. It is a way of being.”
> – John KABAT-ZINN
> Pull-quote: “You don’t make any decisions. You don’t judge anything. You just accept
> everything. If I do that for ten or fifteen minutes while walking around,
> I end up in a very peaceful, grateful state.”
> – Naval RAVIKANT
> Pull-quote: “Where do you seek the spiritual? You seek the spiritual in every ordinary
> thing that you do every day. Sweeping the floor, watering the vegetables,
> and washing the dishes become holy and sacred if mindfulness is there.
> With mindfulness and concentration, everything becomes spiritual.”
> – Thích NHẤT HẠNH
During my most recent sabbatical I experimented with mindfulness-meditation.
Starting with 10 minutes then moving up to 20 minutes per day, I sat in an small spot outdoors, observing my surroundings and well as my body and mental activities.
I'm glad to report that, with a little persistence, this has now become a firm daily habit and something that I quite look forward to!
During this period I was reading a number of books that seemed relevant, including:
- _Full Catastrophe Living_ by John Kabbat Zinn
- _Zen Mind, Beginner's Mind_ by Shunryo Suzuki
- _The Tao Te Ching_ by Lao Tzu (various translations)
I had some interesting experiences and thoughts, which I thought I'd share.
**Transformed experiences.** When I experienced sounds and sights, I observed my (rather overactive) mind reacting to them. I observed a tendency to distinguish and label objects, animals, people, etc. Over time I gently nudged myself away from labels, focussing more on the wordless experience of these phenomena. I also found my experience broadening to encompass the _overall atmosphere_ of the spot – the "total combination" (if you will) of all these phenomena. I found this practice began to subtly transform my experience of the environment, especially over time and repetition. I began to feel a greater sense of unity with the world. I don't think this was necessarily due to to any intellectual realisation, but more from developing a habit of ***not distinguishing*** myself from my surroundings.
**Enhanced memory.** I noticed an ability to recall things more easily – from facts and figures I've been learning in various studies to even imagery from dreams. I'm not sure whether this is attributable to my meditation practice, but at least it seems to have coincided with it.
**Beauty.** I catch myself more often being struck by beauty. Not only sunsets but also the beauty of peoples' dress, of language, of various animals (magpies, various insects) and plants, and also landscape features like hills. I don't experience the beauty of these separately (though it probably seems that way because of how I write about them), but more often together as part of the same scene. It's a great joy!
**Observing non-critically, withholding judgement.** I've been practising a more mindful approach generally. For example, when reading code or someone's writing, I try to practice a small hesitation. I hold back from assuming that my initial understanding is correct and re-read the material to check if I really understood it. I'm hopeful that this will help me to avoid mistakes in future and also make the reading experience more engaging (both for code and writing).
**Seeing obstacles as opportunities.** Initially I had to somewhat coax myself into mindfulness. I have been mindful many times throughout my life, but carving out a specific time in my day just for this practice took a bit of persistence. There is a saying that no meditation is "bad" – what matters most is that you simply do it. In this spirit, I tried to look at my effort (and the resistance to it) as an obstacle leading to an opportunity – the opportunity to increase awareness and inner peace. I found that the repeated practice of bringing attention back to the breath has helped me generally to identify and interrupt negative thought patterns.
**Self awareness.** Meditation helps me to reflect and see things I didn't earlier see in myself, both in thoughts and actions. This has helped me on my journey to undo bad habits and start good ones.
**Moving quickly without rushing.** In the _Catastrophe_ book, Zinn refers to: "being aware even when moving quickly" and suggests: "shift your awareness ... to a sense of your body as a whole moving through space". I practised this awareness during busy moments, such as shopping and commuting. It really took the stress out of these and at times made them quite enjoyable.
I found it possible to carve out time for my practice by "chaining" it onto other daily habits, as described in the book Atomic Habits.
I hope you found these insights interesting and that perhaps I've whetted your appetite for practising mindfulness – in whichever way works best for you.
Namaste!
## Further reading
- [Book: The Heart Of The Buddhas Teaching • Thich Nhat HANH](https://www.penguin.com.au/books/the-heart-of-buddhas-teaching-9781409020547)
- [Book: Full Catastrophe Living • Jon KABAT-ZINN](https://en.wikipedia.org/wiki/Full_Catastrophe_Living)
- [Book: Change Your Thoughts Change Your Life • Wayne DYER](https://terebess.hu/english/tao/dy.pdf)
- [Blog: Effortless meditation • Alex SIDORENKO](https://alexsidorenko.com/blog/effortless-meditation)
Uses of mock data2026-02-18T00:00:00.000Zmock-data> Summary: Rigorous use of mock data can benefit complex, long-term software projects by thinking about examples during modelling, providing unit test inputs, quickly simulate any desired application state and decouple immediate inter-team dependencies. The costs including the need to structure the application in a suitable manner and the time/effort to add mock data.
Mock data, dummy data, fake data, test data, sample data.
These terms all express the same thing:
**Data that a developer hard-codes in place of real data.**
In my observation, mock data has tended to be used in a rather loose, slipshod, careless manner. Unlike documentation, it is treated as the garbage of software material. (Sometimes even referred to as "garbage data"). People will try to avoid writing it by using elaborate "generators" such as [jFairy](https://github.com/Devskiller/jfairy) or [zed](https://github.com/brimdata/zed).
My argument in this article is that mock data, when treated with respect, turns out to be a supremely useful, versatile and valuable tool.
I find four special uses for mock data:
1. [Designing and documenting](#designing-documenting)
2. [Unit testing](#unit-testing)
3. [Manually testing](#manually-testing)
4. [Decoupling teams](#decoupling-teams)
I will elaborate on each of these.
## Designing & documenting
Let's begin with an example that should be reasonably familiar to most developers:
**Validating a username in a sign-up form.**
Suppose we want to capture and validate one of three kinds of username:
- an email address -or-
- a 9-character alpha string -or-
- a numeric employee number
We might begin by modelling the `username` field as a `string | number` data-type that covers all three kinds of username.
```typescript
type Username = string | number;
```
The above type expresses a part of our requirements but not all of them. Specifically, it doesn't express such facts as:
- the username might be an email
- the username might be a 9-character string
- the username might be a string longer than 9 characters, but that would be invalid
How might we express these requirements in code prior to writing a validation routine?
One way might be to write descriptive comments next to the field. Another way might be to bring in a hefty and cumbersome "validation framework" such as `zed` and try to twist and wrangle it to the shape of our specific requirements.
Or... we could simply create a few mock values:
```typescript
const UsernameMocks = ;
```
We have now enumerated the variants of the username field that we expect to deal with.
And we've given them descriptive names. Naming them this way helps us to think clearly about the requirement and allows us to document the requirement in code.
Looking at these mock values, we might also begin to ask questions. For example: does a numeric username have a lower and upper bound? Safe assumptions might be `0` and `Number.MAX_SAFE_INTEGER`, but we might want to check with a domain expert.
The point is, by laying out all the expected values of this field together in one view, we give ourselves an opportunity to think more deeply about the range of possible cases and how we will deal with these cases. In this way, mock data becomes a kind of tool for concretising requirements.
We can now begin to think about how we might design and test the validation routine.
## Unit testing
As we begin to write a username validation function, the `Username` type definition combined with `UsernameMocks` given above lead directly to four unit tests:
```typescript
describe("validateUsername", () => );
it("validates text 9 chars long as true", () => );
it("validates text more than 9 chars long as false", () => );
it("validates number as true", () => );
});
```
This isn't a coincidence – the whole point of mock data is to represent kinds of values we expect to deal with. Our unit tests need to do the same thing, to verify that the system under test behaves as we expect.
We can now begin to implement the requirement, writing each of the unit tests one by one, and writing enough code to make it pass.
Alternately / additionally, we could use this information about expected inputs to scaffold the function with comments:
```typescript
function validateUsername(username: Username): boolean
```
This is just scratching the surface!
As we write the tests, we notice that we can reference the mock constants directly inside the test code, to avoid repeating ourselves.
For example:
```typescript
describe("validate username", () => );
});
```
Notice how clean and readable this test is!
The naming of the mock constant reveals the intent of the test beautifully. Rather than pollute our test code with concrete values, we can extract them to well-named constants and have the test code focus on the _relationships_ between the values.
The re-use can go even further. Suppose, in a different part of the code, we want to display a user profile which includes the user's username. We want to style the text differently depending on what kind of username the user has.
We might extract the username type and mocks to its own module, say, `username.ts`. Then we can re-use the mock usernames in our tests, like so:
```typescript
describe("user profile", () => );
it("renders email username in sans-serif", () => );
it("renders alpha username in sans-serif", () => );
});
```
In future we might need to maintain username code – e.g. support additional kinds of username, remove support for a kind of username, fix a mistake in one of the mock values, etc.
It will be much easier to find the code that needs to change across the whole codebase if we use consistent mock constants than it will be if we use inconsistent mock literals.
class UsernameMocks
UsernameMocks ..|> Username
class UsernameTests
UsernameTests ..> Username
UsernameTests ..> UsernameMocks
class UserProfileTests
UserProfileTests ..> Username
UserProfileTests ..> UsernameMocks
`}
The end result is that any test code that deals with mock values will be:
- faster to write
- easier to read
- more maintainable
**Bonus:** And we're talking about more than just unit-tests here! Mock values can also be used to fill in live component demos (e.g. Storybook stories), dynamic documentation (e.g. Docusaurus pages) and snapshot tests (e.g. PhantomJS screenshots).
## Manually testing
Imagine if our application was augmented with mock data in such a way that all of its features could be used while running purely off the mock data, without ever having to connect to any real data-source. (By 'data-source', I'm referring to things like databases, APIs, etc.)
This capability would offer some unique advantages:
- We could simulate any behavior we desired in our application (by mocking states that could trigger that behavior)
- We could test how the application would respond to an unexpected state (by mocking that state)
- We could run and develop the application entirely on mocks while the external data-source was down, e.g. during an outage or planned maintenance
- We could develop new features in advance of the data-source supporting them (adding mock data as needed and only substituting real data as it becomes available)
- We could demo features of an application to stakeholders prior to having an external data-source to support that feature
- We could mock data to model changes to an external data-source, to clarify our own thinking and/or to communicate requirements to the data-source maintainers
Mocking all of an application's data-sources might seem like a daunting task. However, in my experience, it's easier than it might seem, especially if done in the early stages of a project.
But there are a few pre-requisites.
Firstly, the application needs an interchangeable data-source, so we can switch between real data and mock data. We need to write all our application code against that data-source abstraction, without concern for where the data actually comes from.
B -->|Yes| C[Use mock data]
B -->|No| D[Use real data]
`}
Secondly, we need to be able to switch the Application state between the real data-source and a mock data-source.
- Some Single Page Application (SPA) projects use a state container such as Redux. In that case, we might dispatch a `SetMockStateAction` which sets an `isMockMode` flag in the store. When this flag is `true`, all data-retrieval actions use mock data rather than making a real HTTP call.
- In other cases (typically a SPA or a micro-service), an HTTP API client sits between the Application state and the HTTP API and calls the HTTP API to fetch data. We could add a `setMockState` method here, which sets a private `isMockMode` field which, when `true`, uses mock data rather than making a real HTTP call. Or we could set up a Dependency Injection (DI) system, in which an abstract `APIClient` interface is implemented by `HttpAPIClient` and `MockAPIClient`, which can be substituted at runtime.
The "switch" could be activated by clicking a UI element, e.g. a small checkbox in the footer area of a web page, which is only visible to Admin users. The click handler toggles the Application state between real data-source vs. mocks.

Thirdly, we need all of our application state to be mocked in a set of mock constants. This is easiest if the application state is modelled in some more abstract way, e.g. using classes, interfaces, types, etc. That way, we can easily construct our mock data as a realisation of those abstractions.
class MockAccount
MockAccount ..|> Account
class Invoice
class MockInvoice
MockInvoice ..|> Invoice
`}
It would take significant effort to completely mock the data-sources of a pre-existing application. But that effort could be broken down into smaller pieces and pursued incrementally, similar to adding unit tests.
Once our application is completely augmented with mock data, maintaining the mock data going forward would only add a small overhead (and might even boost development speed, as described in sections 1 and 2).
---
How about switching between _multiple_ mock states? One way would be via a collection of mock controls, presented to Admin users in the UI, allowing the mocks to be adjusted at whatever level of detail is needed. These could be presented in a pop-up modal or panel activated by clicking a Mock Settings button located somewhere out-of-the-way and only accessible to Admin users.
The following screenshot depicts mock controls for a hypothetical online banking application, allowing the user's home country, preferred currency and business / personal accounts to be adjusted.

## Decoupling teams
Once our entire Application is able to run off mocked data, not only can we _operate_ the application while a data-source is unavailable, but we can also _operate and develop_ application features prior to the data-source even supporting them.
**Mocking our data-sources decouples our team's development efforts from other teams.**
For example, imagine we are working in an _Invoicing_ team in an online banking system. We want to build a "Foreign Accounts" feature. Suppose this feature depends on data from an _Accounts_ team. Without mock data, the Invoicing team might have had to await until the Accounts team had built certain APIs, which it would then consume.
But with mock data, the Invoicing team no longer needs to wait for the Accounts team to support a Foreign Accounts feature, but rather, it can immediately begin developing the Foreign Accounts feature. We merely need to model Foreign Accounts interface in a way that makes sense for Invoicing purposes, and from those models, derive mocks.
We can develop and test all the Invoicing logic against those mocks. When the Accounts team does finally support Foreign Accounts we can connect our Invoices system to theirs. Any dissonance between their models and ours can be solved by adding a mapping layer, e.g. an `AccountsAPIDataSource` which implements `AccountsDataSource` methods by calling AccountsAPI methods.
InvoicingApplication ..> ForeignAccountsDataSource
class ForeignAccountsDataSource
class ForeignAccountsAPIDataSource
ForeignAccountsAPIDataSource ..|> ForeignAccountsDataSource
ForeignAccountsAPIDataSource ..> AccountsAPI
class AccountsAPI
`}
Notice how we are building our Foreign Accounts feature against a `ForeignAccountsDataSource`, which functions as a kind of contract between the `InvoicingApplication` (which we control) and the `AccountsAPI` (which the other team controls).
This contract helps us to think more clearly about what we need from the Accounts team - the inputs and outputs and behaviors. So we can communicate more clearly with the teams who we depend on about the data we depend on them for.
### Sharing mocked states with team members
With mocked data in place, we can share various configurations of our application with team members such as QA engineers / testers, product owners, usability and accessibility professionals and others.
One technique applicable to web applications (which I used on a recent real-life project) is to configure the mock states via queryString parameters in the URL. The URL can then be shared with anyone who needs to see the web application in the mocked state. Rather than having the team member go through complicated sequences of steps to simulate a given state, all they need to do is to open the link.
For example, if we want to simulate the state in which the user entered a credit card into a payment page, but the card has expired, we might share a URL like this: http://myapp.com/payment-details?mockCreditCardExpired=true. This URL could be used to test the error message that is displayed for expired cards.
## Other uses of mock data
We're talking about more than just simulating expected (or unexpected) application states! We can also simulate large data-sets (e.g. to test scalability), error conditions (to test error handling logic), delays (to test performance under various network conditions) and... well... anything else it's possible and useful to simulate. The ability to simulate specific application states is kind of a super power.
## Summary
We've looked at four interrelated benefits of treating mock data with respect and rigour, with examples / pseudo-code for each.
1. It helps us to clarify our software design by thinking about examples during modelling, before diving in to implementation.
2. It boosts our unit testing efforts by providing a ready-made set of test inputs and making test code more readable and maintainable.
3. It gives us the powerful capability to run our application independent of external data-sources and, as such, to simulate any application behavior we desire.
4. Finally, it decouples us from immediate dependency on other teams while clarifying the relationships between teams by encouraging us to model them as contracts.
These benefits come at a cost. Using mock data in this way requires application code to be structured in a certain way (isolation of Application state). And it takes significant effort to augment a pre-existing application with mock data, especially if that application has complex logic.
Given all of the above, mock data seems best suited to long-term software projects of moderate complexity, where the advantages of using mock data outweigh the costs.
## Related tools
- [Mock Service Worker](https://mswjs.io/), targeted at web/typescript projects, provides some infrastructure for mocking web endpoints. The application can make requests as usual, but MSW can handle the requests and provide mock responses as if the Backend was mocked. The requests will appear in the Network Tab of Developer Tools, just like a regular request.
## Further reading
Books that inspired me:
- [_Domain Modelling Made Functional_](https://pragprog.com/titles/swdddf/domain-modeling-made-functional/) • Scott WLASCHIN
- [_The Art of Unit Testing_](https://www.artofunittesting.com/) • Roy OSHEROV
Parallel loading in React2026-02-18T00:00:00.000Zparallel-loading-react> Summary: The problem was: how to load a list of items, then load details of each item, then combine all of this information and render it to the user, all within one component. This could be done more easily by splitting details into a separate component, rendered in a `map` loop, and having each instance of that component make its own request.
Recently I had to build a React component that would merge the results of several independent requests into one set of data and render it as a single list.
The requests would look like this:
- GET to load initial list of items
- GET to load item 1 details
- GET to load item 2 details
- ... etc for each item in the list
I wanted the list to ultimately render like this:
- Item 1 + details
- Item 2 + details
- ... etc for each item in the list
The problem was: how to load a list of items, then load details of each item, making a separate request per item, then combine all of this information and render it to the user, all within one component.
> ### Aside: Caveat: Ideal simpler implementation
>
> This could be done more simply by splitting details into a separate component, rendered in a `map` loop, and having each instance of that component make its own request.
>
> However, for various reasons, this might not always be possible. For example, when working in a complex pre-existing code-base, there might not be time to refactor everything to the simpler implementation.
## Synchronously combining results
The simplest way would be to await all the requests and then render them together at once.
D -->|Yes| C
D -->|No| E(Combine items list with details)
E --> F(Render items list with details)
F --> G[Done]
*/}

Here is an implementation which uses `Promise.all`.
[Codepen Link](https://codepen.io/jonathanconway/pen/dyRQGam)
```jsx
function UsersAndStatuses(props) ));
setUsers(usersWithStatus);
}, []);
return (
))}
);
}
```
The problem with the above is:
**It could take a long time for all the requests to complete.**
We don't want to keep the user waiting for the whole list to load before they can see any results.
It would be better if we could
1. Load and quickly render the list of items without the details, then
2. Load and render the detail for each item as soon as each response is received
F -->|Yes| D
F -->|No| G[Finish]
*/}

## Asynchronously combining results
Implementing this improved solution raised a challenge:
**How to merge the details from all the requests together into one state variable without triggering a React refresh cycle?**
If the React refresh cycle triggered, it would have caused the state variable to contain incomplete data, as one partial value would override another.
It turns out the solution is rather simple: we just have to re-use the latest copy of our state variable each time we set it.
So instead of the typical `setState` call:
```js
setUsers();
```
We [pass a state setter](https://twitter.com/dan_abramov/status/816394376817635329) whose parameter (`currentUsers`) will always have the last updated value:
```js
setUsers((currentUsers) => ());
```
So... here's the parallel loading solution.
[Codepen Link](https://codepen.io/jonathanconway/pen/dyRQMQL)
```jsx
function UsersAndStatuses(props) );
const users = React.useMemo(() => Object.values(usersById), [usersById]);
React.useEffect(async () => ),
)
);
const userIds = usersList.map((user) => user.id);
userIds.forEach(async (userId) => ,
}));
});
}, []);
return (
))}
);
}
```
Generic HOC creator pattern for React2026-02-18T00:00:00.000Zreact-generic-hoc-pattern> Summary: Using a generic HOC creator pattern, I can compose two React components together in a highly decoupled way. The pattern is to create a HOC (Higher-Order Component) creator function, which can be applied to a general component by a combined components and exported for re-use by consumer components. Examples of applications include Tooltips and Form controls.
I've recently developed a pattern that allows me to compose two React components together in a highly decoupled way, using a generic HOC creator.
In this article I'll motivate and outline the pattern, provide an example, and discuss my own implementation, `createWithHOC`.
## Motivation
Suppose we have an extremely ***general*** component, which we want to widely re-use by connecting it to other components in our component library.
We are happy for the immediate consumers of the component need to know about the general component.
But we don't want their consumers – the ***end consumers*** – to know about it.
For these end consumers, we just want to expose some special props, which will ultimately be passed through to the general component.
## Pattern
The pattern here is to create a HOC (Higher-Order Component) creator function, which can be applied to the ***general*** component by the ***combined*** components and exported for re-use by the ***consumer*** components.
1. The HOC creator function is called and passed the general component as a parameter, along with a string descriptor (more on that later).
2. Its result is a HOC, which is exported. This exported HOC allows the general component to be combined with another component.
3. One or more other components call this HOC, to combine themselves with the general component.
4. Its result is a component which has almost identical props as the combined component, except that it includes one additional prop. This additional prop, named by the string descriptor from step 1, contains the props to be passed to the general component.
## Example
Let's look at a realistic example to see how this pattern can be applied.
Suppose we have a `Tooltip` component, which takes a `children` prop and a `contents` prop. The `children` prop will have the component that triggers the tooltip. The `contents` prop will have the component that should be shown inside the tooltip.
```typescript
interface TooltipProps
export function Tooltip(props: TooltipProps)
```
Now in our component library, there are several different components that might all need to have a tooltip.
For example:
- Button
- Checkbox
- Image
For each of the above three components, we want to allow their consumers to provide an optional tooltip. But we don't want to couple these three components too closely to the Tooltip component. And we want the re-use of the Tooltip component to be as easy and straight-forward as possible.
First, in our `tooltip.tsx` file, lets create and export an HOC that exposes `Tooltip` in a re-usable manner:
```typescript
export const withTooltip = createWithHOC(Tooltip, "tooltip");
```
Notice that `createWithHOC` doesn't know much about `Tooltip`. It just receives its definition and a string descriptor - "tooltip". However, what it returns - `withTooltip` - is very useful.
Here's a simple implementation of our `Button` component:
```tsx
interface ButtonProps
export const Button_ = (props) =>
);
};
export const Button = withTooltip(Button_);
```
If we were to consume `Button` directly, without the `withTooltip` wrapper, it would have the `children` and `onClick` props, as we would expect.
However, with the `withTooltip` wrapper call, `Button` is now augmented with an additional `tooltip` prop. (Named by the string "tooltip", which we originally passed to the `createWithHOC` call in our `tooltip.tsx` file).
So now the props of `Button_` look like this, from a consumer's point of view:
```typescript
// Note: Fictitious interface name.
// This is just the un-named type of the props parameter of the
// `Button` component exported in the previous code sample.
interface ButtonProps
```
So when we consume `Button`, our code can look like this:
```tsx
const Item = () => } // <-- props
>
🗑️
)
}
```
This will have the same net effect as if we had consumed `Button_` directly, wrapped in `Tooltip`, passing the appropriate props to each.
```tsx
const Item = () =>
```
## Advantages
I found three advantages of using this pattern, where applicable:
- Smaller consumer code
- Aesthetically pleasing consumer code
- Ability to constrain re-use of general components
### Smaller consumer code
Consumer code is significantly smaller and less indented, as we are relying on props rather than nesting. This benefit can add up quickly when, say, rendering multiple instances of the same component type side-by-side.
Here's an example of multiple buttons with tooltips:
```tsx
const Item = () =>
```
### Aesthetically pleasing consumer code
Consumer code is also more aesthetically pleasing, when relying on props. It presents as a cleaner, more compact and concise list of components.
Here's an example, in which we render different kinds of form controls side-by-side.
Using the generic HOC pattern, each form control is passed a prop to configure one or more of:
- A label
- A default
- Validation logic
```tsx
const Item = () =>
```
All controls appear at a consistent level of indentation and so do their props. This is easier to read and more aesthetically pleasing than if each control was nested in a different set of containers (validation, etc) and appeared at inconsistent levels of indentation.
> Aside: This could be viewed as a variant of the principle of "cleaning up irregularity", discussed in Dustin Boswell's book [_The Art of Readable Code_](https://www.oreilly.com/library/view/the-art-of/9781449318482/), under Aesthetics (Chapter 4, pp. 37).
> The code follows a regular pattern, making it easier to visually scan and add/remove similar items (in our example, form controls).
### Ability to constrain re-use of general components
An additional advantage of this pattern is that we could, if desired, constrain the re-use of our general component.
For example, we could keep the `Tooltip` itself private to its module folder and only export the `withTooltip` HOC. Then we could only apply `withTooltip` to components that we are confident will work well with the `Tooltip`.
As a consumer, it would be easy to determine whether a given component supports the tooltip or not – we could simply examine the available pops via our IDE's ***auto-suggest*** feature.
Here's an example with Visual Studio Code IntelliSense:

## Implementation
Here's the `createWithHOC` function I developed in Typescript for creating the `with*` HOC creator.
```tsx
export function createWithHOC(
HOC: ComponentType,
hocName: THOCName,
) else
};
};
}
```
I also published it as a GitHub Gist: [create-with-hoc.ts](https://gist.github.com/jonathanconway/8a4144df3304505f720429e464641a4a).
Please feel free to re-use, tweak and/or share as desired. I hope someone out there finds it useful!Refactoring vs documentation2026-02-18T00:00:00.000Zrefactoring-documentation> Summary: Understanding and documenting existing systems and code can be a better use of time than large-scale refactoring. This is particular the case in fast-growth businesses, where time is limited and pragmatic concerns outweigh code aesthetics.
Most of the software projects I've worked on involved complex and poorly structured code. This can happen for various reasons, even with the most dedicated and experienced developers. The problem space is complex, difficult to navigate and/or highly dynamic, time is limited, there is a high turn-over of developers, language and frameworks have limitations.
Refactoring is an oft-touted solution, aiming to bring order to a chaotic code-base by cleaning and improving the code without changing its functionality. Regression testing, via unit tests and end-to-end tests, allow us to verify that the code still performs its intended function.
The problem with refactoring is that almost no team (that I've worked on) ever has time for it. There always seem to be other activities that would generate more business value, and faster, and those activities tend to be prioritised. In the professional world, at least, code only exists to achieve an outcome, not as a work of art for its own sake.
> Pull-quote: In some situations, such as a rapidly growing or changing business environment, understanding and documenting existing code might be a better use of time than a lengthy refactoring.
Given the above, I've come to think that, at least in some situations, such as a rapidly growing or changing business environment, understanding and documenting existing code might be a better use of time than a lengthy refactoring. Bad code can stay bad, but can be worked with effectively, if it is well understood by the development team so that they can work with it efficiently.
If software engineering is the art of managing complexity, software documentation is the art of managing the complexity of software.
Let me dive deeper to explain this perspective.
## Why refactoring takes so long
Code-changes themselves are easier than ever. IDEs provide powerful tools for bulk renaming, find-and-replace, structural search, regular expression search, etc. Unit and integration tests can verify correctness of individual components and groups of components. And practices like inversion-of-control, object-oriented programming and functional programming can support decoupled, flexible code bases that are easy to modify.
The time-consuming part of refactoring is not necessarily the code changes. It can be:
1. Working out what changes need to be made and
2. Ensuring that those changes don't cause system behaviour errors
During a refactoring (at least, in in any non-trivial code-base) we are likely to learn a lot more about the code, frameworks, business domain than we knew beforehand. As we learn more, our refactoring moves change. This means that what started out as, for example, a simple extraction of a function, can quickly turn into a major alteration, impacting many parts of the codebase.
Additionally, as the scope of the refactoring changes, so too does the scope of the regression testing that will need to be done, to ensure that the changes do not cause breakage. Even with 100% unit test coverage, any code change may open up gaps in coverage, requiring tests to be changed or new tests to be written. The application also needs to be end-to-end tested, whether in an automated or manual manner, and the scope of the end-to-end testing is also impacted.
These factors compound, causing a seemingly small refactoring to turn into a major undertaking, with questionable justification for time spent in proportion to business value.
## Understanding the code
For any significant refactoring to be successful, the Developer likely needs to first have a solid grasp of the code being refactored. This means understanding the structure of the code as well as the expected behaviour of the code and the business problem it is intended to solve. Gaining this understanding takes a significant amount of time, as does making the actual changes. [1](#note-1)
I would argue that such understanding is necessary anyway, not only for refactoring, but for making any changes to the code at all, such as implementing new features, making modifications or fixing bugs.
If we have to spend time understanding code, whether or not we actively perform refactoring, then that understanding itself is of value. So we might as well invest more time into understanding the code, rather than trying to refactor it, given the greater payoff of understanding.
That understanding can be converted into documentation, for future reference and to transfer the knowledge to the rest of the team.
## Documentation structure
A powerful feature of documentation is that can be organised in ways that best facilitate understanding and knowledge transfer.
This is much harder to do in code itself. Code usually has to deal with a mixture of concerns at once, such as the programming language itself, software frameworks, interfacing with other modules and systems (such as databases), security, performance, etc.

For this reason, the way a code base is structured usually does not mirror the structure of the problem it is solving or the feature it is implementing. And even if some of the code could be refactored into a perfect, pure representation of the problem space, the problem space itself may be complex and multi-faceted, making it difficult to represent clearly in code.
Documentation, on the other hand, can be structured in any way or multiple ways at once. So documentation can be divided, grouped and organised in whichever way will best facilitate understanding and communication. For example, documentation can pull together information about each feature in the application into a set of "feature" pages.

## Documentation as a reference tool
Documentation can serve as a handy reference to consult when a certain question needs to be answered around a particular topic.
For example, suppose a Product Owner asks a Developer about some recent problems encountered with the a "Minimum order free shipping notification" feature. The Developer could consult a feature document which contains links to various resources such as web server logs. The Developer could then follow the link to the web server logs to check if any errors were logged.
So documentation can act as a central repository in which to find pointers to various resources, such as parts of the code and other systems.

This referenceability, if used correctly, can make it much easier for a Developer to navigate a complex mass of code modules, databases, services, etc. in order to achieve some goal such as answering a question or diagnosing a bug.
## Flavours of documentation
Let's look at a few documentation "flavours" that could be applied in various scenarios, depending on the situation.
### Feature documentation
This flavour of documentation focuses on a feature of a software product or system used by customers or other actors.
It may give a brief summary of the feature and also provide some background information such as the business case.
It might then have sub-sections detailing the parts that make up the feature. It might also list the components or systems involved in implementing the feature, including links to code repositories and/or individual code files. It might also contain diagrams depicting user flows, execution flows and/or communication between systems. And it might link to various other flavours of documentation described in this article, such as User interface documentation for the User interface components that make up the feature.

#### How it helps to work with difficult code
- Clarifies how the system behaves, or at least, is intended to behave
- Specifies which code or systems implement the behaviour
### Project documentation
This flavour of documentation is similar to feature documentation, only it focuses on a project (which is time-bound), rather than a feature (which may exist indefinitely).

#### How it helps to work with difficult code
- Clarifies why certain code or systems are changing
### User interface documentation
This flavour of documentation describes the various parts of a user interface. A Developer can create this kind of documentation to communicate how the user interface currently works, is intended to work and/or should work in the future.
These docs could be organised as a hierarchy, aligned with the navigation structure of the application's user interface. Each leaf in the hierarchy has a dedicated page, and that page includes screenshots of that part of the UI, along with descriptive text broken into headings.


#### How it helps to work with difficult code
- Conceptually maps user interface elements to the code that implements them, when that mapping isn't made obvious by the code itself
- Clarifies how the user interface currently functions, or at least, is intended to function
### API documentation
This flavour of documentation describes a programming interface of an application, such as the REST API of a web backend.

#### How it helps to work with difficult code
- Conceptually maps APIs to the code that consumes them, when that mapping isn't made obvious by the code itself.
- Clarifies how the APIs currently function, or at least, are intended to function.
### Topic documentation
For material which fits none of the above categories, specific "topic" documents can be created.
Suppose we are trying to describe something which isn't clearly a feature, a project, a part of the user interface or an API. For example, behaviours of an application which only apply in one particular country, for example, Australia. A topic document titled "Australia" could be created, and grouped under a heading such as "Country-specific behaviours".


#### How it helps to work with difficult code
- Communicates knowledge on specific topics associated with the code base, which are not clearly expressed by the code itself and don't fit into other categories of documentation.
## Conclusion
Suitable documentation can facilitate understanding of complex and poorly structured code, enabling developers to work with it more efficiently.
Unlike refactoring, documentation can be added without a full build-deploy cycle, without risking breakage and without having to follow the structure of the code.
Creating documentation may be a better use of time than complex refactoring, if you are dealing with a complex code base, have tight time constraints and need to minimise risk.
## Notes
1 According to research, almost 60% of programmers’ time is spent understanding rather than writing code. See “Measuring Program Comprehension: A Large-Scale Field Study with Professionals” by Xin Xia et al. (2017), [https://ieeexplore.ieee.org/abstract/document/7997917](https://ieeexplore.ieee.org/abstract/document/7997917). From the book [_The Programmer's Brain_](https://www.oreilly.com/library/view/the-programmers-brain/9781617298677/) by Felienne Hermans.
## Further reading
These books inspired this article:
- [_Software Engineering at Google_](https://www.kobo.com/au/en/ebook/software-engineering-at-google) by Titus Winters, Tom Manshreck, Hyrum Wright
- [_The Programmer's Brain_](https://www.oreilly.com/library/view/the-programmers-brain/9781617298677/) by Felienne Hermans
Self-similar: a versatile folder pattern for code2026-02-18T00:00:00.000Zself-similar-folder-pattern> Pull-quote: “The word 'isomorphism' applies when two complex structures can be mapped onto each other, in such a way that to each part of one structure there is a corresponding part in the other structure, where "corresponding" means that the two part play similar roles in their respective structures.”
>
> – Douglas HOFSTADTER
>
> [Gödel, Escher, Bach](/books/godel-escher-bach) • Meaning and Form in Mathematics • pp. 57
I've seen various trends come and go in code folder and file structure.
The two big ones in web development seem to have been:
- Function-focussed.
- `📁 controllers`
- `📁 views`
- `📁 models`
- etc...
- Feature-focussed.
- `📁 posts`
- `📁 comments`
- `📁 likes`
- etc...
There have been various efforts to combine them, such as the [feature-sliced design](https://feature-sliced.design/blog/frontend-folder-structure).
For example, we can have:
- `📁 posts`
- `📁 controllers`
- `📄 list.ts`
- `📄 detail.ts`
- `📄 create.ts`
- `📄 delete.ts`
- `📁 views`
- `📄 list.tsx`
- `📄 detail.tsx`
- `📄 create.tsx`
- `📄 deleted-message.tsx`
- `📁 models`
- `📄 post.ts`
- `📁 comments`
- `📁 controllers`
- `...`
- `📁 views`
- `...`
- `📁 models`
- `...`
- `📁 likes`
- `...`
Overall I like the above strategy. But I wanted to take it one step further.
You see... sometimes I feel I want to have the best of both worlds. A bit of functional and a bit of feature.
- Some kinds of things seem to fit neatly into a single feature.
- `📁 posts`
- `📁 comments`
- `📁 likes`
- Other kinds of things seem to make more sense as functional pieces.
- `📁 hooks`
- `📁 utils`
- `📁 mixins`
What I've settled on is: consistency in naming with freedom in ordering.
## Rules
Here are the rules of the self-similar folder pattern:
1. Any word can be pluralized: `comment` => `comments`.
2. Any word can be combined with any other word (or combination of words) by a dash: `delete`, `comment` => `delete-comment`.
3. Any word (or combination of words) can be used to name a folder or file, at any nesting level.
## Process
First we start with listing all of the unique "naming words" or tokens in our present file/folder structure (non-pluralized):
border
comment
controller
create
delete
deleted
detail
fetch
get
hook
like
list
local
mixin
model
post
recessed
relieved
storage
use
util
view
Then we group similar words, based on how they seem to be used in the system and how they seem to naturally fit together. (Note that words can be re-used as many times as needed.)
> Aside: This technique has long been known in UX design as [card sorting](https://en.wikipedia.org/wiki/Card_sorting).
- `border`, `recessed`, `mixin`
- `comment`, `list`, `create`, `delete`
- `post`, `detail`, `list`, `create`, `delete`
- `like`, `list`, `create`, `delete`
- etc...
It becomes clear that certain **functions** cluster around a single **feature**. For example, `post` has `detail`, `list`, `create` and `delete`. For these cases, we adopt feature grouping.
It becomes similarly clear that certain **functions** stand alone or group with other similar functions. For example, `border` variants `recessed` and `relieved` are each a kind of `mixin`, which I consider a function not a feature. For these cases, we adopt function grouping.
Based on the groupings, we order the words by priority:
And then nest them in order.
The end-result:
- `📁 posts`
- `📁 controllers`
- `📄 list.ts`
- `📄 detail.ts`
- `📄 create.ts`
- `📄 delete.ts`
- `📁 views`
- `📄 list.tsx`
- `📄 detail.tsx`
- `📄 create.tsx`
- `📄 deleted-message.tsx`
- `📁 models`
- `📄 post.ts`
- `📁 hooks`
- `📄 like-post.ts`
- `📁 comments`
- `📁 controllers`
- `...`
- `📁 views`
- `...`
- `📁 models`
- `...`
- `📁 likes`
- `...`
- `📁 hooks`
- `📁 local-storage`
- `📄 hook`
- `📁 utils`
- `📁 fetch`
- `📄 get.ts`
- `📄 delete.ts`
- `📄 post.ts`
- `📁 mixins`
- `📁 border`
- `📄 recessed.ts`
- `📄 relieved.ts`
Notice that this folder structure exhibits a kind of **self-similarity**.
For example:
- `detail` can appear within either `controllers` (as a controller) or `views` (as a view).
- `controllers`, `views` and `models` can appear within features `posts`, `comments` and `likes`.
- `hooks` can be grouped together with other hooks, such as `local-storage`/`hook.ts`, but alternatively, they can be grouped with a feature, such as `posts`/`hooks`/`like.ts`.
This self-similarity makes the folder structure extremely powerful yet flexible. Any word can be a unit of re-use, but no word is "locked in" to only appearing in one part of the structure. The form is extremely flexible, yet also extremely rigorous.
## When to use
It requires effort and teamwork to keep this kind of folder structure well organised. Card sorting is a high-energy, collaborative activity. So this folder structure is probably not a good fit for all scenarios.
If you are a team of, say, Ruby engineers, in a medium-sized corporation, who want to play it safe and follow an established pattern, there's nothing wrong with going function-based. The enemy here is risk of losing control.
If you are a startup, who need to move fast, and don't have time for any hand-wavy card-sorting UX nonsense, there's nothing wrong with going feature-based. The enemy here is time.
Where I see the sweet spot for this kind of structure is a long-term, fairly complex project, with a small team of experienced polyglot programmers. Lots of collaboration, lots of care, but also lots of autonomy. The enemy here is complexity of the code itself, and a structure that accommodates organic complexity without succumbing to it seems best.Simulating application states2026-02-18T00:00:00.000Zsimulating-states## Motivation
Engineers are increasingly called upon to provide on-call support for complex software running in production.
To ease the diagnosis and resolution of issues in these systems, it can be beneficial to be able to ***simulate*** – at will – any of the important states the system can be in.
This article covers what I've learned thus-far about simulation for the purposes of easing production support.
## Benefits of arbitrary state simulation
There are a number of benefits to being able to simulate states of interest, even before incidents occur.
- Testing in advance
- Faster diagnosis
- Fewer team interdependencies
### Testing in advance
*A bug is better discovered and resolved at 1 PM than at 3 AM!*
Engineers and testers can try out various states of the application in production, in advance, to uncover any unexpected bugs, unknown-unknowns, etc. As much as we try to keep all our environments consistent and predictable, there's always a chance some issue catches us by surprise only when it reaches production. It could be anything, from a quirk in the CPU architecture of the cloud instance to a difference in the time-zone where the instance is running.
### Faster diagnosis
*The faster an issue can be resolved at 3 AM the better!*
When an issue occurs, rather than going through a lengthy procedure to try and "reproduce" the bug, it's better if engineers can follow a quick, systematic and repeatable procedure to directly trigger the bug.
### Fewer team interdependencies
*The fewer people who have to be woken up at 3 AM the better!*
If an engineer can directly reproduce an issue themselves, this saves them from having to rely on subject-matter-experts, system administrators, product owners or others.
## Types of state
Here I will attempt to categorise system state into broadly the following types:
- **🌎 System state.** Example: A new feature is activated for all users.
- **🖥️ Instance state.** Example: Each instance performs a background job during off-peak hours. Instances are located in multiple time-zones.
- **🧑💻 User state.** Example: A user account can have a subscription or not.
- **⏰ Session state.** Example: A user account can be signed in or not.
- **⏳ Activity state.** Example: A user sees a loading screen if a certain data source takes >2 seconds to load.
Depending on the type of state we want to simulate, different tools and techniques can be applied.
## Tools and techniques
### Feature flags
Feature flags are settings that can turn on or off application states.
For example, if game developers implement a new kind of magic potion, say "Ginger potion", then its availability to game users could be controlled by a feature flag named: `GINGER_POTION_ENABLED`.
- **Looked up at runtime.** Example: A product owner logs into a feature flag management system such as [LaunchDarkly](https://launchdarkly.com/) and changes a flag setting, causing the feature flag to be switched on or off in production.
- **Built into the deployment.** Example: An engineer modifies a flag in a configuration file and deploys that change to production, causing the feature flag to be switched on or off in production.
- **Combination approach.** Example: An engineer specifies a default value for a flag in a configuration file and deploys that change to production, but that flag setting can be overridden by a product owner via LaunchDarkly.
### Test entities
Test entities are entities set up specifically to trigger certain application states.
Entities would typically be test user accounts, but might also be models of other entities in reality, such as bank accounts, credit cards or online products.
For example, if certain users of a banking account have an individual account, whereas others have a joint account with another user, we could create two test account entities: a "Test Individual Account" and a "Test Joint Account". By logging in to an appropriate test account, with credentials shared privately within the organisation, engineers could simulate states specific to either individual or joint accounts.
#### Fake and real
Entities could be faked, but might alternately be real if needed. For example, if an airline needs to be able to simulate an actual passport check, a real individual's passport details could be used (obviously agreed with the person in advance, and likely a high-ranking employee in the company).
### Special values
Particular values can be inputted into the application's user interface, to trigger particular states.
#### Fake and real
As with entities, these could be faked or real.
For example, to test an error state that is only revealed when a payment over $5,000 is attempted, we can simply enter a value of $5,100. But to test an error state that is only revealed when there is an unknown downstream system error, we might use a very specific value for the "Payment reference" field, such as "downstream-system-error". This should be a value which the customer is unlikely to ever use or guess, but which is simple for an engineer or tester to enter.
### Procedures
If we can use a reliable, repeatable and reversible procedure to generate a desired system state, then this might work out as a useful means of simulating that state.
For example, suppose a banking application has a state in which the customer has consumed all of their daily payment limit. We could simulate this state by creating a scheduled payment for tomorrow, which consumes the full limit. To reverse it, we can remove the payment on the same day. This should qualify as a simple, repeatable procedure.
In combination with fake values, we could add a "testing back door" into our application to make normally irreversible procedures reversible. For example, suppose we need to simulate a daily payment limit being reached on a same-day payment. We could make the payment as in the example above, but as an instant payment. Then we could reverse it by attempting to make a payment with a "Payment reference" field value of "reverse-payment". The application would have some code to implement an "undo" of the payment whenever that specific payment reference is used.
### Client controls
Browser clients for web applications allow the user to enter cookies, local storage values or other methods of storage.
These can be used to simulate application states.
* Client-side. Settings can be applied directly to the user interface.
* Server-side. Settings can be sent to the server to be applied there, such as cookies.
Other rich clients could have similar facilities, either built-in / off-the-shelf or custom built by the developers who maintain the client.
### In-app controls
Applications themselves could including in-app controls for simulating states, only available to internal staff, and activated by a special shortcut key or a menu item.
I implemented an experimental form of this on the Exchange project at the DTA.
## Comparing approaches
| Approach | Deployment required | Non-technical staff | Implementation effort | Types of state most suited for
| :- | :- | :- | :- | :-
| Feature flags | 🔸 Depends | 🔸 Depends | 🟠 Medium | 🌎 System🖥️ Instance
| Special values | 🚫 No | ✅ Yes | 🟡 Low-medium | 🧑💻 User🖥️ Instance⏳ Activity
| Procedures | 🚫 No | ✅ Yes | 🟢 Low | 🧑💻 User⏰ Session⏳ Activity
| Client controls | 🚫 No | 🚫 No | 🔴 High | 🧑💻 User⏰ Session⏳ Activity
| In-app controls | 🚫 No | ✅ Yes | 🔴 High | 🧑💻 User⏰ Session⏳ Activity
## Documenting state simulations
State simulations can be documented to put them in easy reach of all team members, from engineers to analysts and designers to product owners.
Some documentation patterns I've observed:
- Test accounts register
- Feature pages
- Pull requests
- README files
### Test accounts register
A table of test accounts, with columns providing login details such as username and password, as well as details on what the account can be used to test.
Usually a document in the team wiki (Confluence, Notion etc.) or a shared spreadsheet (Google Sheets, Excel, etc.).
| Username | Password | Usage |
| :- | :- | :- |
| individual1@test.com | P@ssw0rd | Individual bank account |
| joint1@test.com | P@ssw0rd | Joint bank account |
| admin1@test.com | P@ssw0rd | Customer service |
External resources can be linked to, such as:
- Account credentials in a secret store
### Feature pages
A document describing a feature, including descriptions of simulated states as part of that description.
Usually a document in the team wiki (Confluence, Notion etc.).
Simulated states can be:
- Listed out in their own section or
- Included as part of a test plan with test cases
Details can be provided inline, such as:
- Account credentials
- Feature flags
- Test entities
- Procedures
- Client controls
- In-app controls
External resources can also or alternately be linked to, such as:
- Account credentials in a secret store
- Feature flag pages in feature flag management system (such as [LaunchDarkly](https://launchdarkly.com))
- Feature flag settings in code files in a source code repository (such as [GitHub](http://github.com))
- Test entities in separate documentation pages or in a source code repository
- Procedures in separate documentation page
- Deep-links to in-app controls for setting up state simulations


## Conclusion
Being able to simulate all significant states is a super-power for development teams on medium to large sized projects.
Testing can be performed more thoroughly in advance, avoiding many bugs reaching production. In the case some bugs do make it to production, they can be more directly reproduced and resolved. With appropriately applied and documented techniques, such as feature flags, special values and in-app controls, the whole team can participate, reducing problematic dependencies.
Enabling state simulation will likely be a consideration on many more projects going into the future.What I learned studying Calculus2026-02-18T00:00:00.000Zstudying-calculus> Summary: Completing an Introduction to Calculus taught me a range of interesting lessons including lessons about learning, such as the importance of understanding fundamentals, visualisation, geometric analogies, parts vs. whole, focussing on correcting mistakes and thinking deeply about small things.
> Pull-quote: “I never regretted the time I spent on history and on math. Math sharpens
> your mind, history gives you some idea of your limitations and what’s going
> on in the world.”
>
> – Bjarne STROUSTRUP ([Video](https://www.youtube.com/watch?v=-QxI-RP6-HM))
> Pull-quote: “Curiosity is recognizing a gap in our knowledge about something that
> interests us, and becoming emotionally and cognitively invested in closing
> that gap through exploration and learning.”
>
> – Brené BROWN • _Atlas of the Heart_
Recently I completed [*Introduction to Calculus*](https://www.coursera.org/learn/introduction-to-calculus) on Coursera.
My motivations were:
* To improve my foundational math skills, enabling a better understanding of computing foundations and machine learning.
* To test and improve my learning skills by studying a less familiar field outside of my comfort zone.
* Ok... the real reason... to gain entry to the Sydney University B. Adv. Comp. program! 😄
The course has been fascinating and engaging. It's not only introduced me to Calculus but also helped me to brush up on basic arithmetic and algebra where I discovered I had serious gaps. [Prof David Easdown's](https://www.sydney.edu.au/science/about/our-people/academic-staff/david-easdown.html) regular participation in the forums was valuable gift to us students!
Some reflections in no particular order:
## Importance of fundamentals
The hard part often isn't the highest level concepts, but the foundations you need in order to (properly) understand and use them. I had to understand concepts such as *completing the square*, *long division of polynomials* and *derivatives*, not only theoretically, but well enough to apply them correctly to solve an unexpected problem. I've [commented](https://news.ycombinator.com/item?id=40083488) about this on HackerNews.
## Benefits of drawing, visualising
Using a high quality notebook and pen helped with enjoyment and motivation to study! Fleshing out problems on paper, down to the fine details, helped me to see how the pieces of a problem fit together, which was quite fascinating.
## Geometric analogies
I found it incredibly helpful when David presented an idea *geometrically*. Simple shapes such as triangles are intuitive to many learners. And the [Theorem of Pythagoras](https://en.wikipedia.org/wiki/Pythagorean_theorem) is now widely understood. The curve sketching exercises and Riemann sum rectangles were memorable examples but there were so many other cases where David made the idea clearer by some kind of geometric metaphor.
## Parts vs. whole
I found that solving a non-trivial math problem typically requires also understanding all the parts of the problem. (This is in contrast to my usual profession, software development, where many problems can be solved using "black-box" solutions such as libraries, without understanding their internals.) This experience of the parts/whole adds a dimension to my understanding of problem solving generally.
## Focusing on mistakes
Trying out the examples and practice tests and observing what I got wrong helped me narrow down specifically where my knowledge gaps lay and then actively and deliberately correct them, which also helped improve my long-term memory of the concepts. (This way of thinking is also helping me in other areas of life beyond math.)
## Different learning methods at different stages
I found different learning techniques useful at different stages of the course. Early in the course, I found repeated practice and deep thinking most useful. Midway through, I found sketching and visualisation more productive. Late in the course, I found all the above useful, plus reading various additional sources such as books.
## Thinking deeply about small things
Prof David mentioned this in one of the videos - such a powerful insight! Sometimes on a walk or another repetitive activity I turned over an idea in my head to try and understand it in its essentials (e.g. I did this a lot with Leibniz notation, trying to understand it at some deeper level than words).
## Temporarily suspending understanding
Introspectively, I found that getting stuck (what people call "writers block", "analysis paralysis", etc) often happens when I'm trying to understand an interconnected complex of ideas and am uncertain how to break them down. Here the usual approach of "divide and conquer" or breaking down the problem into smaller pieces doesn't work because I don't know how or according to what criteria to break them down. One way to proceed is to temporarily suspend trying to understand some parts so that I can focus on others. I'll treat them as small "black boxes" so that I can skip learning them. This enables me to move on to other problems and not be blocked.
## Concepts vs. application
Abstract conceptual knowledge is not the same thing as knowledge that can be applied. I could read a book on Calculus without really understanding it, but doing the practice tests in this course was better. After this course it's more likely that I'll be able to see a problem, see where Calculus might help, identify/name the components and then try to solve it using appropriate methods.
## The power of good notation
Prof David mentioned this in one of the videos on Leibniz notation. Amazing, rich insight. This immediately inspired ideas that I've been translating into my software development practices. Representing a problem differently can open the way to unexpected solutions. This inspired my [code selectors](/projects/codeselectors) project.
## Mathematics as a language
Sometimes thinking of a mathematical idea as language, or a set of concepts, helped me to understand it better.
Rather than trying to understand a concept's full meaning immediately, I tried first to think of it as a just label, which could then be gradually enriched with attributes and relationships, until I eventually had a more complete understanding of its meaning.
I was also able to leverage tools of thinking I was already familiar with, as a programmer, such as object-oriented (OO) modelling and relational database querying (SQL).
I found this learning technique helpful with understanding the concept of the derivative:
> ### Concept: Derivative
>
> Attributes:
> - It is a tool which can be applied to a function over the domain of real numbers
> - It can be defined as the limit of the function to which it is applied (that is, the value the function approaches as its input gets closer to some limit)
> - It is additive - you can add derivatives together, forming a new derivative, which is the derivative of the two functions added together
In object-oriented programmer-speak:
- The `Derivative` class...
- Supports methods:
- `add` (with `Derivative` as parameter and return type)
- `calculate` (with `RealNumber` as return type)
```mermaid--svg
classDiagram
class Derivative
```
In this way I was able to use my skill with object oriented (OO) modelling as a "bridge" to help me obtain an understanding of a mathematical concept.
By gradually building up and enriching in my mind these characteristics of the derivative (often meditating on them during long walks) I gradually started to develop an understanding of its basic nature. This helped me a later to understand the role the derivative plays in the bigger scheme of things, such as when differentiating and integrating. A lot of this meditation involved connecting the concept to other concepts I was more familiar with, such as functions, real numbers and basic arithmetic.
Another case where this technique helped was in understanding [Euler's number](https://en.wikipedia.org/wiki/E_(mathematical_constant)). Rather than trying to understand the particular number all at once (which stumped me for a while) I learned to think of _e_ more conceptually – as a set of *criteria* for a particular number. So I didn't need to understand the number as a whole, e.g. why it starts off as 2.71828... etc. I only needed to understand that it is a particular number which has certain carefully chosen properties.
The list of properties might start off like this:
- Is a real number
- Is larger than 1
- Is the limit, as _n_ goes to infinity, of 1 plus 1 over _n_ all raised to the _n_ power
- Is a number which, when used as an input to a function, gives the same result as the slope (or first derivative) of that function
(That last point was brilliantly made by Becky Weiss in an [AWS Conference talk](https://www.youtube.com/watch?v=YMj33ToS8cI).)
In relational database terms, I imagined a `SELECT` statement used to find Euler's number in an imaginary table of all mathematical constants. It might include multiple `WHERE` or `AND` clauses, but yield a single result: _e_ itself. I won't try to imagine the full query for such a number. 😅 But it might start off like this:
```sql
SELECT *
FROM MathConstants
WHERE NumberType = 'REAL_NUMBER'
AND Value > 1
```
By thinking of _e_ in terms of its constituent properties, rather than waiting for some "flash of insight", I was able to gradually develop an intuition for what _kind_ of number it is and how it is used.
## Growth can be deceptive
Toward the end of the course, I learned about the logistic function, which produces an S-curve that limits exponential growth.
Applying this to the notion of time, I stumbled upon what I consider to be a profound truth about life: **fast, apparently endless growth can taper off quite suddenly**! It will deceptively appear that a trend still has momentum, as the ground gained thus-far is not lost. But make no mistake, if growth slows, the slowdown will eventually be felt.
With a conceptual understanding of limits to growth, one can mentally get "ahead of the curve" and plan for a future non-growth or steady state scenario.
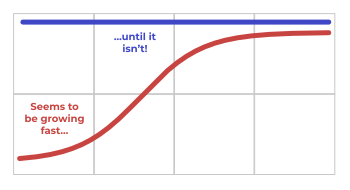
https://www.desmos.com/calculator/t8xi2q4p9m
## Directions for further study
I greatly appreciated David's frequent references and pointers to areas for further study. Explaining the *proofs* of a method, rather than just the method itself, is one example – I could use this knowledge for [formal verification](https://en.wikipedia.org/wiki/Formal_verification). Referencing more advanced concepts such as series expansions is another example. This makes me curious and motivates me to study the field further.
I started this course with some trepidation and had many challenges along the way, but I feel a great sense of satisfaction after completing it.
Now I can't wait to jump into my next learning challenge: [Linear Algebra](https://www.coursera.org/learn/introduction-to-linear-algebra)!
## Further reading
- [_Precalculus: Mathematics for Calculus, Seventh Edition_](https://www.amazon.com.au/Precalculus-Mathematics-Calculus-James-Stewart/dp/1305071751) • James STEWART, Lothar REDLIN, Saleem WATSON
- [_How to Solve It_](https://en.wikipedia.org/wiki/How_to_Solve_It) • George POLYA
Subformats2026-02-18T00:00:00.000Zsubformats> Summary: Subformats is a technique by which I extend an established format (such as Markdown), to add my own custom features, while remaining backwards-compatible, so I can re-use the content with third-party tools.
Let's face it: even the most versatile formats can become limiting.
For example, Markdown seems to support every kind of textual element we could ever want. Yet there will always be some users (like me) who want to, say, apply special styling to [pull-quotes](https://en.wikipedia.org/wiki/Pull_quote).
In this article I present the idea of a "subformat": a backwards-compatible variation of an existing format, which adds additional information to that format. That additional information can be used by a parser which understands the subformat.
## The problem
I recently encountered a problem while migrating content to [my new homepage](/projects/conwy).
The articles are in plain Markdown format (`.md`) but I had to migrate them to MDX format in
order to allow certain sections to be rendered as React components.
Example of React-rendered components enabled by using MDX format:
- **Code samples** - rendered by my `MdxCode` component, using PrismJS
- **Diagrams** - rendered by my `MdxMermaid` component, using MermaidJS
However I also wanted the ability to copy and paste the source Markdown code directly into other Markdown-based content platforms such as [GitHub](https://github.com/) and [DEV.to](https://dev.to/).
To do this, I would have to convert the content from MDX format back into plain Markdown format, then copy and paste it into the platform.
This wouldn't be so easy, with so many Mdx tags all over the place.
There are a couple of options to speed up the conversion:
- Use a free online converter such as [MDX Formatter](https://jsonformatter.org/mdx-formatter)
- Integrate an automated converter such as [mdx-to-md](https://www.npmjs.com/package/mdx-to-md), perhaps bootstrapped using my builder infrastructure
However both of these options would require some busywork / tedium and might bring up errors and anomalies.
I eventually settled on what seems like a better solution: **subformats**.
## What is a "subformat"?
I coined this term because there doesn't seem to be any pre-existing term that describes what I'm trying to do.
By "subformat", I basically mean a variation of an existing format, which adds additional information to that format. That additional information can be used by a parser which understands the subformat.
For example: I use the Markdown ***format***, but then add my own small backwards-compatible variations to it, creating my own Markdown ***subformat***.
In this case, I add small pieces of text to Markdown, which do not interfere with the normal rendering of the Markdown, but which can still be picked up and used by my own parser.
This keeps the content backwards-compatible (i.e., the same content can be used by normal Markdown parsers) while allowing a newer / different
parser to access the additional information.
Using this additional information, my own parser can add enhancements such as React controls or special styling.
## Markdown subformat I'm using
I'm using a Markdown subformat to provide additional functionality to my Markdown-based articles in a way that maintains
compatibility with regular Markdown parsers like GitHub and DEV.to.
Here are the variations that make up the subformat:
| Markdown element | Variation | Used for |
|-----------------------------|---------------------------------------------|--------------------------------------------------------------|
| `>` (block-quote) | Content prefixed with:`Blurb:` | Brief summary in purple text, at the top of an article. |
| `>`(block-quote) | Content prefixed with:`Aside:` | Aside text in a box, in an article body. |
| `>`(block-quote) | Content prefixed with:`Pull-quote:` | Pull-quote in a box, with a quotes icon, in an article body. |
| `` ``` ``(code block) | Content prefixed with:`// Lines (x) ` | Code with lines (x) highlighted. |
## Example: pull-quote
You can see an example implementation in my **pull-quote variation** of the Markdown `blockquote` element.
For context: I'm using [MDX](https://mdxjs.com/), which allows Markdown to be rendered using React components. The mdx-components.tsx file defines a mapping between DOM nodes and React components, including `blockquote` → `MdxBlockBuote.tsx`.
```typescript
export function useMDXComponents(components: MDXComponents): MDXComponents ;
}
```
In the `MdxBlockQuote` component which renders the Markdown blockquote, I pass the props through `getBlockQuoteSubformatProps`:
```typescript
export function MdxBlockQuote(props: MdxBlockQuoteProps)
);
}
```
The `getBlockQuoteSubformatProps` function in turn passes the props through a set of chained functions, each applying a variation and returning the resulting props.
```typescript
function getBlockQuoteSubformatProps(props)
```
> Aside: Note: This chaining pattern allows multiple subformats to be applied independent of one another.
The `getPullQuoteVariationProps` function first checks if the `children` prop has the "Pull-quote:" prefix (this is handled by `getIsSubformatChildrenPrefixed`). If it does, then this is a pull-quote. So then it adds the `pullQuote` class (imported from CSS modules), which applies pull-quote styling to the element.
```typescript
const PULL_QUOTE_PREFIX = "Pull-quote:";
export function getBlockQuotePullQuoteSubformatProps(
props: MdxBlockQuoteProps,
)
// Add pull-quote class
const className = cn(props.className ?? "", moduleStyles.pullQuote);
// Remove pull-quote prefix
const children = removeSubformatChildrenPrefix(
PULL_QUOTE_PREFIX,
props.children,
);
return ;
}
```
Now I can write the following in my Markdown file:
```markdown
This is a paragraph.
> Aside:
>
> This is an aside
This is another paragraph.
```
If I copy/paste it into, say, GitHub, it will render it like this:
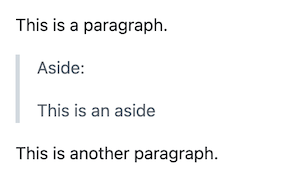
But on my own website, it will render like this:
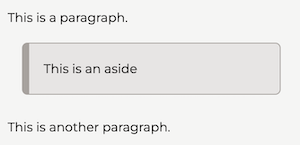
## Use cases
I think the subformats concept could be useful in the following senarios:
- You want to use a popular/common format or standard (such as Markdown) *and*
- You want to add certain custom features not natively supported by that format *and*
- You want to maintain compatibility with the format *and*
- You don't have good reason to believe that your custom features will make it into the popular format anytime soon
Based on these situations I can think of the following use cases for subformats:
- Embedding site-specific formatting into Markdown documents (such as the scenario above).
- Embedding type information into JSON files using structured comments.
- Demarcating insertion/interpolation points in files using comments, e.g. HTML templates using `` comments.
## Caveat
If the underlying format will support your use case in the near future, or there is a simpler alternative technique, then a subformat might be better avoided. This is a very specific tool for a very small subset of use cases.
## Examples
- [conwy.co](https://github.com/jonathanconway/conwy) project (this website)
- ``
- [Subformat](https://github.com/jonathanconway/conwy/blob/main/src/components/mdx/mdx-a/mdx-a-subformat/mdx-a-subformat.ts)
- [Download](https://github.com/jonathanconway/conwy/blob/main/src/components/mdx/mdx-a/mdx-a-subformat/mdx-a-subformat-download/mdx-a-subformat-download.ts)
- [Popup Note Link](https://github.com/jonathanconway/conwy/blob/main/src/components/mdx/mdx-a/mdx-a-subformat/mdx-a-subformat-popup-note-link/mdx-a-subformat-popup-note-link.ts)
- ``
- [Copyable](https://github.com/jonathanconway/conwy/blob/main/src/components/mdx/mdx-blockquote/mdx-blockquote-subformat/mdx-blockquote-subformat-copyable/mdx-blockquote-subformat-copyable.ts)
- [Subformat](https://github.com/jonathanconway/conwy/blob/main/src/components/mdx/mdx-blockquote/mdx-blockquote-subformat/mdx-blockquote-subformat.ts)
- [Aside](https://github.com/jonathanconway/conwy/blob/main/src/components/mdx/mdx-blockquote/mdx-blockquote-subformat/mdx-blockquote-subformat-aside/mdx-blockquote-aside.ts)
- [Subformat Result](https://github.com/jonathanconway/conwy/blob/main/src/components/mdx/mdx-blockquote/mdx-blockquote-subformat/mdx-blockquote-subformat-result.ts)
- [Summary](https://github.com/jonathanconway/conwy/blob/main/src/components/mdx/mdx-blockquote/mdx-blockquote-subformat/mdx-blockquote-subformat-summary/mdx-blockquote-subformat-summary.ts)
- [Pull Quote](https://github.com/jonathanconway/conwy/blob/main/src/components/mdx/mdx-blockquote/mdx-blockquote-subformat/mdx-blockquote-subformat-pull-quote/mdx-blockquote-subformat-pull-quote.ts)
- ``
- [Size](https://github.com/jonathanconway/conwy/blob/main/src/components/mdx/mdx-img/mdx-img-subformat/mdx-img-subformat-size/mdx-img-subformat-size.ts)
- ``
- [Popup Note](https://github.com/jonathanconway/conwy/blob/main/src/components/mdx/mdx-p/mdx-p-subformat/mdx-p-subformat-popup-note/mdx-p-subformat-popup-note.ts)
Thoughts on Tailwind2026-02-18T00:00:00.000Ztailwind-thoughtsI have mixed feelings about Tailwind, having used it on a [client project](/work/optus), built a [Typescript adapter](/projects/tailwindjs) for it and my own website for a while (before switching to [Vanilla Extract](https://vanilla-extract.style/)).
On one hand, it seems to have been overhyped and targeted to developers who want to throw stuff together fast, with the predictable result of messy, unmaintainable code. (But I guess the same could've been rightly said about HTML/CSS back in its early days, not to mention Java, VB, etc.)
On the other hand, I think Tailwind does sit on structurally sound foundations. It implements most or all of the core features of the CSS spec, while providing shortcuts in a careful and consistent manner. In this way, it forms a nice abstraction layer above plain CSS.
For example, this:
```html
```
Is shorter and arguably more readable than this:
```css
.foo:hover
```
So in the right hands, Tailwind can be used to produce clean, maintainable code.
I think a few best practices can go a long way:
- **Decompose complex HTML structures.** Into either smaller nested elements or your framework's flavour of components (React, VueJS, Web Components, etc). Reduce the number of classes you need to deal with at once.
- **Group and order classes in a consistent and sensible way.** For example: 1. Layout, 2. Background, 3. Border, 4. Foreground, 5. Animation, 6. Cursor. And order defaults before overrides: 1. defaults 2. :hover, :focus, etc.
- **Use custom theme variables for your custom brand-specific values.** Colours, fonts, etc. Rather than repeating the values throughout the code-base. This is similar to how variables are used in CSS.
Overall I think developers should use the framework/language they and their team are strongest in and be cautious about rapidly adopting any new framework/language.
We should especially avoid buying into hype but consider realistic trade-offs and pivot when necessary.
## Further reading
- [Blog: Moving away from Tailwind, and learning to structure my CSS • Julia EVANS](https://jvns.ca/blog/2026/05/15/moving-away-from-tailwind--and-learning-to-structure-my-css-/)
### Alternative opinions
- [Blog: Tailwind is the Worst of All Worlds • Colton Voege](https://colton.dev/blog/tailwind-is-the-worst-of-all-worlds/)Testing Steps2026-02-18T00:00:00.000Ztesting-steps> Summary: The BDD-style "Given/When/Then" syntax adds an additional learning curve and can be cumbersome for long flows. I suggest an alternative: numbered lists of steps and expectations marked out with an "Observe" prefix.
## Introduction
Over the years several [acceptance testing frameworks](https://en.wikipedia.org/wiki/Acceptance_testing#List_of_acceptance-testing_frameworks) have risen and fallen in popularity.
We have seen [Behavior Driven Development (BDD)](https://en.wikipedia.org/wiki/Behavior-driven_development), implemented in formats such as [Cucumber](https://en.wikipedia.org/wiki/Cucumber_(software)) and [RSpec](https://en.wikipedia.org/wiki/RSpec), aiming to provide a human-readable and machine-parsable syntax for defining requirements. Developers and business people collaborate to produce specs in a "Given/When/Then" structure. Developers then implement an executable test for each spec using a more standard programming language test framework, such as JUnit, XUnit, Jasmine, etc.
Though it has grown in popularity, the BDD style has two disadvantages:
1. The "Given/When/Then" syntax adds an additional learning curve for people not familiar with the language.
2. The "Given/When/Then" structure (if adhered to) constrains the tests, forcing all assertions to take place after all actions, rather than allowing a sequence of interleaved actions and assertions.
Instead of BDD, we could use a much simpler and more familiar syntax:
**An ordered list of testing steps**
In this _testing steps_ approach, we remove the Given/When/Then structure altogether and simply list our sequence of steps and assertions. As with BDD tests, we then write code that implements each of the steps, using templating and parameterization where appropriate for reusability.
Instead of:
```
GIVEN x
WHEN y
THEN z
```
We write this:
```
1. x
2. y
3. z
```
## An example
Suppose we wish to write a spec for the following requirement:
> Display an error if a currency conversion is over the limit for that currency, along with a Max button which resets the payment amount to the maximum amount, and then allows the user to proceed with the payment at that amount.
This requirement might be captured in two BDD specs such as the following:
> ### TITLE: Validate currency limit with max button
>
> ### SCENARIO 1: Validate currency limit
>
> - **GIVEN** I am a registered user
> - **AND** I have a bank balance of 100,000 GBP
> - **AND** The maximum conversion from GBP to CAD is 50,000
> - **WHEN** I go to the Make a Payment screen
> - **AND** I set the Destination currency to CAD
> - **AND** I set the Payment amount to 51,000 GBP
> - **THEN** I will see a Currency conversion over daily payment limit error
> - **AND** I will see a Fill max currency button
>
> ### SCENARIO 2: Provide Max button, which resets currency to limit value
>
> - **GIVEN** I am a registered user
> - **AND** I have a bank balance of 100,000 GBP
> - **AND** The maximum conversion from GBP to CAD is 50,000
> - **WHEN** I go to the Make a Payment screen
> - **AND** I set the Destination currency to CAD
> - **AND** I set the Payment amount to 51,000 GBP
> - **AND** I click the Fill max currency button
> - **AND** I click the Submit payment button
> - **THEN** I will see a Payment successful screen
> - **AND** I will see the amount paid as 50,000 GBP
Notice how cumbersome and repetitive this is.
Using a ***testing steps*** format, we could replace it with a single, neatly condensed sequence of steps:
> ### SCENARIO: Validate currency limit with max button
>
> 1. Log in as a registered user
> 2. Assume a bank balance of 100,000 GBP
> 3. Assume a maximum conversion from GBP to CAD of 50,000
> 4. Go to the Make a Payment screen
> 5. Set the Destination currency to CAD
> 6. Set the Payment amount to 51,000 GBP
> 7. Observe the following error is visible: Currency conversion over daily payment limit
> 8. Observe the following button is visible: Fill max currency button
> 9. Click the Fill max currency button
> 10. Click the Submit payment button
> 11. Observe the following success message: Payment successful screen
> 12. Observe the following field | value: Amount paid | 50,000 GBP
Notice how this latter form conveys the same information as the BDD spec, but without the Given/When/Then structure, and as a sequence of actions/events in a single flow.
Also notice that this is closer to how most human beings would manually test this kind of behavior. They wouldn't separate their testing into two sets of three distinct phases, starting over again after the first set. Rather, they would more likely perform just one sequence of steps, verifying the correctness as they go, all the way until the last step.
It's true that the testing steps don't explicitly tell us which of the steps are arrangements/pre-conditions, which are actions and which are assertions/post-conditions. For example, step 8 doesn't explicitly tell us that it is an assertion. However, I would argue that this fact is implicit in the language anyway and the average reader should have no problem interpreting a statement like "I will see a Fill max currency button" as an expectation rather than an action for the reader to perform.
From the developer's point of view, it doesn't matter either; any of these steps can have its own code block, associated via string/template matching. We don't need to specify whether a step is a Given, a When or a Then, in order to match the step to the correct code block. (If we want to make that attribute explicit in code, we can always do so with a comment, decorator, method naming convention, etc.)
## Conclusion
It seems to me that the "Given/When/Then" way of structuring spec tests is a relic of design by contract and intended to help the code more than the user. It is unnecessary to structure tests in this way. Instead we can use a simple sequential list of steps. This is simpler, more user-friendly and more suitable to typical testing in which actions and assertions are intermingled throughout a sequence.
Users don't normally think in terms of pre-conditions/post-conditions, but are much more likely to think in terms of sequence of actions they perform and responses they get from the system.
## Library
During writing of this article I developed a new testing framework which applies the concept of testing steps.
You can check it out here: `testing-steps`.
This framework is a Javascript/Typescript library which can be consumed by unit tests targeting the Jest test runner.
If there is enough interest, I will look at getting it ported to other languages/frameworks.
## Further reading
Books that inspired me:
- [_The Cucumber Book_](https://pragprog.com/titles/hwcuc2/the-cucumber-book-second-edition/) • Matt WYNNE
Three tests for accessibility2026-02-18T00:00:00.000Zthree-tests-accessibilityThere are many good reasons to make our software applications accessible. But to achieve this goal, we must undertake rigorous accessibility testing.
This presents what may look like an overwhelming challenge: given that there are so many criteria for good accessibility, and that the application itself may be complex in many ways, **how do we verify that all parts of the application are accessible?**
As accessibility is a developing and evolving field, we cannot pretend that there is one silver bullet or one definitive answer. However, I think it's worthwhile for us to put in a **best effort**.
If we can come up with a small number of tests that cover the most basic and crucial bases of accessibility, then run those tests on all the screens and components of our application, then we can at least say that we have made a significant effort and at most say that we have removed all the most obvious and important impediments to the accessibility of our product.
## Testing on principle
The [WCAG Guidelines](https://www.w3.org/TR/WCAG20/), from which much accessibility advice is derived, are based on [four principles](https://en.wikipedia.org/wiki/Web_Content_Accessibility_Guidelines#WCAG_2.0):
* **Perceivable** - Information and user interface components must be presentable to users in ways they can perceive.
* **Operable** - User interface components and navigation must be operable.
* **Understandable** - Information and the operation of user interface must be understandable.
* **Robust** - Content must be robust enough that it can be interpreted reliably by a wide variety of user agents, including assistive technologies.
I asked one fundamental question of each principle: **what kind of test would verify that this principle had been followed?**
Here are the answers what I came up with:
* **Screen-reader-only**. If I can fully use the application purely by listening to it through a screen-reader, then the application is at least basically "presentable to users in ways they can perceive" and "understandable" through those ways.
* **Keyboard-only**. If I can fully use the application with only a keyboard, then the application is at least basically "operable" by a range of assistive technologies, which operate through the same inputs as the keyboard.
* **Automated test**. If the application passes automated tests, using an appropriate WCAG-compliance testing tool, then it is likely "robust" enough to be be interpreted by various user agents, and meets certain basic technical criteria for being "perceivable" and "operable".
## Three tests
The three answers lead to three basic tests:
### Test 1: Screen-reader-only
Try to use the application, relying only on **hearing the spoken word**. Turn on a screen-reader and turn off or look away from the screen. You can use the keyboard to provide input as needed.
This tests whether the application is structured in such a way that it can be effectively "presented" to me through one other non-visual assistive technology (a screen-reader). If it can, then it is likely to work almost as well on other non-visual assistive technologies, which rely on the same information that a screen-reader relies on.
Tools:
* [VoiceOver](https://help.apple.com/voiceover/mac/10.14/) (built-in to MacOS and iOS)
* [TalkBack](https://support.google.com/accessibility/android/answer/6283677?hl=en-GB) (built-in to Android)
* [Narrator](https://support.microsoft.com/en-us/help/22798/windows-10-complete-guide-to-narrator) (built-in to Windows 10+)
* [NVDA](https://www.nvaccess.org/) (other versions of Windows)
* [ChromeVox](https://www.chromevox.com/) (Chrome browser on all operating systems)
### Test 2: Keyboard-only
Try to use the application, relying only on **keyboard input**. Put the mouse away or disconnect it, or disable your trackpad.
This tests whether the application is "operable" by a range of assistive technologies, which operate similarly to a keyboard. For example, speech recognition facilities or braille keyboards, which interpret signals analogously to how a keyboard interprets certain keystrokes.
Tools:
* Just your keyboard!
### Test 3: Automated test
Run an automated testing tool on your application, analyse the output and address all major errors detected.
For everything that cannot be captured by tests 1 and 2, automated testing tools can provide some coverage. Of course, an automated tool is just a piece of software and cannot replace aware, focussed human attention. However, it can catch obvious errors that a human may miss, due to human error. It can also thoroughly cover many areas in a short space of time, where a human would take much longer.
Tools:
* [WAVE](https://wave.webaim.org/) by WebAIM (all major operating systems). This tool analyses any web page and provides a detailed report, covering the entire WCAG specification, and highlighting errors.
## Benefits of manual testing
You'll notice that two out of the three tests are entirely manual and don't rely on automated tools. While manual testing is harder than just running an automated tool, I think it offers two key advantages:
### 1. It uncovers errors that no automated tool can capture
By actually trying to use our interface, we get a rich, qualitative answer to the question: "how usable is this?". We can directly observe when the interface is difficult, cumbersome, unclear, or otherwise unusable. We can also directly observe when the interface works smoothly and is easy to use.
A web page might have perfectly structured content, proper usage of semantic HTML and alternative text on all non-textual content. **But what if a user has to listen through 3 minutes of audio, just to sign up for an email alert?**
This is just one example of errors in the interaction design and/or code, which are generally not picked up by automated testing tools.
By actually using an application the way a user would, we can directly identify issues that aren't clear-cut enough for an automated tool to detect.
Of course, manual testing the application ourselves won't give us as much information as observing other people try to use it. However, it will probably reveal the biggest and most obvious accessibility issues, giving us an opportunity to resolve them sooner.
### 2. It puts us in the shoes our users
Manual testing encourages us to empathise with our users. This mindset of empathy is a crucial component of good usability, as it affects how we build, what we build and what we prioritise.
## Play well with assistive technologies
One lesson I learned from observing a wide range of users during usability testing was that **users rely a lot on assistive technology, independent of particular applications**.
Many accessibility affordances, from navigating a form to interacting with navigation, are already built in to screen readers and input devices, which are constantly improving and innovating.
* Screen-readers get better at interpreting interfaces and text.
* Input devices are improved to offer more precise and easy-to-use affordances; new input devices come on the market.
* Browsers and operating systems are improve the integration of accessibility features into the user experience.
Rather than trying to anticipate and implement every conceivable accessibility feature directly into our applications, we should instead **focus on making sure our application plays well with assistive technologies**.
We should simply expose the right structures and data and let assistive technologies take it from there. For example, in a rich web application, this means using properly marked-up form elements to label fields and capture form inputs.


## Conclusion
Rather than getting overwhelmed and giving up on accessibility, might we serve our users better by spending some time on basic testing and letting assistive technologies do most of the heavy lifting? I think the answer is yes!
By means of simple but thorough testing, and making fixes as needed, we will be well our way to making accessible products that work for all of our users.
## Further reading
Boooks that inspired me:
- [_Engineering for Accessibility_](https://www.microsoft.com/en-au/download/details.aspx?id=19262) • Jason GRIEVES, Masahiko KANEKO
Towards zero bugs2026-02-18T00:00:00.000Ztowards-zero-bugs> Summary: Using a checklist, and a mindset of expecting and seeking out bugs, we can eliminate bugs from our code before going to production.
Software with zero bugs may seem like an ambitious goal. Over time, defects in software have increased and have become so normalised that some developers and users even expect them.
But while it's difficult to get to zero bugs, I think it's worth trying for. We shouldn't concede defeat and assume ahead-of-time that our products will be defective. Rather, we should do everything in our power to avoid inadvertently creating bugs in our software, where they could be avoided. The closer we get to zero , the better!
Over time, I have been building up a mental checklist of things to look out for, both in the code I write and in the running application that it generates, to identify potential bugs. I now run through this checklist whenever I am about to complete work on a change or a new feature. I have also been working on building a mindset that encourages discipline, rigour and attention to detail.
By running these checks and building this mindset, I aim to identify and fix bugs early, rather than having them show up in a testing environment, or worse still, in front of an end-user.
I would love to share this with other developers. Please have a read and let me know your thoughts in the comments!
## The checklist
Without further ado, here's my list:
**Typos, accidental keystrokes, debugging statements.** Every time you're about to commit, hold back for a moment and review the diff of changes going in. Make sure you're only committing what you fully intend to commit. Check for typos, accidental keystrokes, inadvertent capitalisation, etc. A compiler or linter can usually pick these up, but there are often cases that are missed, so it's still worth taking a few seconds to run your eyes over the diff. Also check for development-only code, such as logging or debugging statements, which pass compilation but shouldn't be checked in.
**Subtle logic errors.** Look for all those mistakes that _look_ like reasonable code, to both the first glance and the compiler, but are actually the wrong way round or otherwise incorrect.
For example:
- False-positives. For example: `if (!hidden) else `. Observe that `!hidden` is actually equivalent to being visible. So this code would actually execute `show()` when already visible and `hide()` when invisible! To correct this, we would want to remove the `!` and have something like this: `if (hidden) else `. It's important to keep an eye out for these kinds of subtle logic errors.
- Expressions being coerced to incorrect boolean values. For example, in Javascript, an `indexOf(x)` call without being compared to anything, when it should be compared it to a numeric value. A correct (and clearer) way to achieve this intent might be to call `includes(x)`, which _does_ return a boolean.
- Off-by-one errors. For example: `for (let i = 0; i <= 10; i++) `. This loop runs 11 iterations, where it was probably expected to run 10. It would be clearer to rewrite it as: `for (let i = 0; i < 10; i++) `.
- Filtering operations. You may perform a filtering function, but accidentally extract items from a list and return only those items, when your intent was to return the full list _including_ those items. Or your code might return everything except certain items, when the intent was to return nothing at all if those items exist. There are many other variations on this. In summary, carefully review complex filtering operations.
**Edge cases.** To find these, try to break your app.
- Click a lot of different parts of the UI in very quick succession.
- Test long sequences of actions and make sure the result at the end is exactly as expected. For example, test undo/redo thoroughly by performing an action, then undoing it, then redoing it, many times, then verifying the end result.
- Input values in unexpectedly large quantities, in an unexpected format or null/empty values.
- Test with correctly formatted but illogical values (e.g. a date that is the 32nd of the month).
- Add a larger than normal number of items to a list.
- Run multiple instances of the application at once and verify that it still works properly.
Basically do everything you can to break your application and ensure that it recovers gracefully in all circumstances. If you have a large number of possible combinations of inputs to test, unit tests can definitely be your friend!
**Values vs. references.** Do you expect a value to be set in one place and updated in many others? Or do you want to hold independent copies of that value in multiple places? Review your usages of references vs values and make sure they're correct for your use case.
**Memory leaks.** These can dramatically slow down an application and even cause it to crash, due to incorrect and unconstrained allocation of memory. These can manifest themselves in a variety of ways, depending on the language and environment you're developing for.
For example:
- In C# or Java, it may be an unmanaged resource that's not being cleaned up.
- In multithreaded applications, dead threads.
- In Javascript, Maps that reference DOM nodes that no longer exist.
- In RXJS, subscriptions to observables that you forgot to unsubscribe.
In addition to manually checking the code, practically every environment also has its own set of tools for diagnosing memory leaks. For example, for .NET, there is a memory profiler and for Javascript, Developer Tools in most browsers have a Memory tab or similar.
**Code executing too often.** Do you perform unnecessary operations within a for loop, a game loop, a template, a rendering cycle, or any other part of the code base that gets executed many times in succession? This could cause a slowdown to your app, which if it gets too bad, could be considered buggy behaviour. Code that might not need to run includes code that generates the same result on every iteration (in which case, some form of caching is your friend) or code that's only needed in certain states (where a simple `if` statement around that state could skip the code when it's not needed).
**Same same but different.** Be extra careful in situations where you have two things that look and behave very similarly, but are qualitatively different. An example of such a situation, which I encountered recently, was in building two tree views which depicted essentially the same data, but with subtly different visual markers on each. These visual markers highlighted opposite aspects of the same data. But, by mistake, I also coded one of the trees so that it reversed the order of its elements! This bug should have been obvious, but it escaped my notice. I was so focussed on getting the markers right (the difference) that I forgot to ensure that the ordering was right (the sameness). In retrospect, if I had pulled back and double-checked that the end-result had the _right_ difference and not the _wrong_ difference, I could have caught this early and fixed it.
**Null-checks.** Whenever two values are being compared, have you null-checked and undefined-checked both sides of the comparison if needed, and handle what to do if either/both are null? Add checks as needed. (Some languages offer conveniences / syntactical sugar for this. E.g. Javascript has the [optional-chaining operator](https://developer.mozilla.org/en-US/docs/Web/JavaScript/Reference/Operators/Optional_chaining): `?.`.)
**Async data dependencies.** Does your app depend on multiple sets of data, which may load at different times? What happens when not all of the data has loaded? Does the application crash and burn? Or does it handle the situation gracefully, perhaps waiting until all the data has loaded, and showing a 'loading' indicator in the meantime? You might simulate this state by temporarily adding a lag to one of your data sources, using your language's 'delay' mechanism. For example, calling Javascript's `setTimeout` method, RX's [Delay operator](http://reactivex.io/documentation/operators/delay.html) or .NET's `Thread.Sleep()`. Of course, take care to revert any testing code prior to check-in!
**Browser/OS upgrades.** Depending on the environment you're developing for, be aware of the potential for breaking changes to that environment, when a new version comes out. Upgrade whenever a new version ships and test your application in the new version, looking for bugs. I experienced the importance of this recently, with the [changes to Flexbox in Chrome 72](https://bugs.chromium.org/p/chromium/issues/detail?id=927066), which necessitated several CSS changes.
**Devices, screen sizes and zoom factors.** Test your app with multiple devices if needed – mobile, tablet and/or desktop. You may also need to check with multiple browsers on those devices as well as multiple versions and form-factors of the devices. Also, try increasing/decreasing the zoom level and ensure that the layouts, sizing, etc, are still proportional.
**Accessibility.** Bugginess or even absence of accessibility features is a major problem in the software application landscape. If your app will be used by a broad segment of the population, you probably should be ensuring that it is accessible. Ideally accessibility is "baked-in" from the beginning, but this doesn't nullify the need to regularly and rigorously test that accessibility features work. In my own accessibility auditing, I focus on three main areas: A) keyboard-only operation, B) non-visual operation, C) adherence to WCAG. A basic test of these three areas can be performed on any web page, by A) pushing the mouse away and attempting to use the application keyboard-free, B) looking away from the screen and attempting to use the application by means of only a screen-reader, C) running the [Wave](https://wave.webaim.org/extension/) automated testing tool and reviewing its output. Similar tests can be run on non-Web/native applications. I plan to write an entire article dedicated to this topic, as it is a large one. In the meantime, you can check out some excellent resources, such as [WAI](https://www.w3.org/WAI)'s [Easy Checks](https://www.w3.org/WAI/test-evaluate/preliminary/) page.
**Date and time handling and formatting.** Be extra careful to test code that does anything with dates or times. If the code is performing some kind of calculation on a date/time value, try to test it with a variety of inputs and ensure that it always produces a correct result date/time. Also, test that it works in a different time-zone. To do this locally, you can temporarily change your system time-zone, re-load your application and re-test the date/time feature.
**Numeric values, such as currency.** As with dates/times, thoroughly test any aspect of your application that operates on numbers, and especially locale-specific numbers such as currency values. Also check if you might receive a numeric value as a string and need to convert it to an appropriate numeric type before using it.
**Load testing.** Does the system break down when large number of items are passed through it? Substitute a fake data-source with thousands or even millions of records and see if the application can handle that load.
**Requirements vs solution.** Double-check the original requirements and see if you actually addressed them. There might have been a subtle indication in the language that you overlooked or some ambiguities that you didn't yet clear up. If you need to go back to the business to clarify these issues, do this as soon and early as possible, so that you have a better chance of fixing any bugs in the code before releasing it.
**Hit refresh.** Sometimes, for reasons that I don't entirely understand (and perhaps don't wish to) a running application will get out-of-sync with the code that generated it. Yes, this can happen even when automatic compilation tools are in use. In the case of web apps, caching of assets can play a role. For native apps, processes may remain open. I have sometimes spent half an hour or more trying to figure out why something wasn't working or why I couldn't reproduce a bug, only to find that the version I was using was stale. Long story short: when in doubt, hit restart and refresh.
**Multiple environments.** Most organisations have multiple environments into which software is deployed in a staged manner. There's the local developer machine, then a Development server, then Staging and/or QA, then Production/Release/Live. It's a good idea to run some tests on your application in every environment. This is especially important if your feature or change depends on environment-specific factors, such as configuration values, database schemas, data and other systems, services or resources. Anything might go wrong in a new environment, from a typo in a configuration value to a missing authorisation on a resource. You don't have to test everything in every environment, but it's probably a good idea to at least test the happy path.
**Find similar bugs and fix them (and generalise the fix!).** This came up recently, where a colleague discovered a bug in which the wrong property was being used to retrieve the error message from an HTTP response. Rather than merely fixing it for that one response, I tested all places in the codebase where an error message was being retrieved from an HTTP response and fixed them all where necessary. I then went a step further and generalised the fix, by extracting HTTP error handling to a common function. So not only were additional bugs eliminated, but similar bugs in the future were prevented, by improving the overall framework.
**Errors of addition.** When adding new code, be careful that it doesn't cause an error. For example, adding a field to a class, adding a value to an enum, etc might cause unexpected behaviour. This is especially important if you have code somewhere that dynamically reads the structure you're modifying, e.g. code that loops over the fields in a class using reflection. (Such "dynamic access" is usually not best practice, but unfortunately some code-bases use it, so we might need to check the code-base we're working on.)
**Errors of ommission.** When adding new code, be careful that we didn't *forget* to include something, which might cause an error. Say we create a new subtype of an inheritable class, we might need to include some field or value. This might not necessarily be indicated by the compiler if, e.g., our code-base has some dynamic code that loops over the fields in all subtypes of the class and expects certain fields to exist.
**Consuming a data source in a context where it is not available.** When we call a method or function from a component, we might verify that our code works by using that component and seeing that it works correctly. But will that call work in every possible context in which the component is used? What if there is a different way to access the same component, in which that call breaks? This could be very subtle and easy to miss, if we are not aware of the different contexts in which our component is used. For example, this happened to me once when working on a popup modal in React. The modal consumed a hook which depended on certain data being in the browser URL. But I was not aware that the modal could be accessed from a different page with a different URL which did not have that data. The different URL broke the hook and thus my modal component.
**Re-testing after merge.** After completing a change and pushing, you might need to resolve a merge conflict or rebase your change. Be careful to re-test your work following the merge! Even a successfully automated merge might still result in a subtle logic error that you missed. The same applies to any changes you make in response to pull-request comments, build errors, etc.
**Remote API calls.** Ensure all remote API calls your code depends on are fully working. E.g. HTTP requests, web-sockets connections, etc.
## The mindset
This checklist may seem daunting, especially when working under time constraints. However, you don't have to action all of these items for every change you make. I typically give this list a quick scan and pick out only the items that are relevant to the change I'm making. For example, a change to the logic for calculating a numeric value probably doesn't necessitate checking 'Devices, screen-sizes and zoom factors'. Likewise, for a change to the layout of a dialog box, I can probably skip 'Async data dependencies'.
The "old" mindset (that I have sometimes seen in the industry) is:
- I assume my code has no bugs by default.
- Good developers never write buggy code, so I shouldn't bother too much checking my code for bugs, otherwise I might discover that I'm a terrible developer!
- There's never enough time to check for bugs, so I have no choice but to ship buggy code.
- My code will naturally get more and more reliable as I gain experience.
- Testing and bug-fixing is boring, tedious and not fun.
- There's no reward to being thorough about testing for and fixing bugs.
- Software development is unimportant, menial "grunt work", so it doesn't matter if we get it wrong.
The "new" mindset that I aim to spread, which I think is more productive, is:
- My code is buggy unless proven otherwise.
- Part of being a good developer is having the discipline and patience to go through code that I wrote, which looks fine - even spectacular - and find and fix all the bugs that I know are probably lurking within it.
- There's almost always a little extra time to put in some honest effort to finding and fixing bugs.
- Putting in a regular, consistent effort to write reliable code will make my code more reliable.
- Testing and bug-fixing can be made fun, with a positive mindset and a little 'gamification'. I can enjoy the endorphin-rush of fixing a bug and knowing that I left the code better than I found it.
- The reward to testing for and fixing bugs is building the mental muscles (discipline, rigour, attention to detail, etc) that will result in more reliable software. Those muscles will move me forward in all aspects of problem-solving, not only bug-fixing. Also, I can build a reputation as someone who builds reliable software, which will probably be good for my career.
- Software development is a profession and a craft, and we should take pride in our work.
## Let a thousand checklists bloom!
Do you keep a checklist like this, either in written or mental form? Are there any other items you would add to such a checklist? And do you have anything to add about the mindset needed to write reliable, bug-free code?
Feel free to comment about your checklists and experiences or link to them in the comments. It would be great to share any ideas that we developers can use, in order to get closer to writing bug-free code.
Thanks for reading!
## Further reading
Boooks that inspired me:
- [_The Checklist Manifesto_](https://atulgawande.com/book/the-checklist-manifesto/) • Atul GAWANDE
- [_Code Complete_](https://archive.org/details/code-complete-2nd-edition/page/428/mode/2up) • Steve MCCONNELL
- [_The Pragmatic Programmer_](https://pragprog.com/titles/tpp20/the-pragmatic-programmer-20th-anniversary-edition/) • Andrew HUNT, David THOMAS
- [_Clean Code_](https://www.amazon.com/Clean-Code-Handbook-Software-Craftsmanship/dp/0132350882) • Bob MARTIN
Types vs assertions2026-02-18T00:00:00.000Ztypes-vs-assertionsWhat do we need assertions for? Doesn't the type system in Typescript already enforce our data types?
The answer is: yes, the type system protects us at compile type, **but not at runtime**.
Assertions can help us catch and handle *unexpected* bad data types.
Error messages from failed assertions can be better than the default type errors (from our framework, language run-time, etc) in two distinct ways:
1. More informative
2. More traceable
Suppose some runtime error, such as a bad server response or user input, generates a value which our code was not expecting. Our application might then fail and generate a cryptic exception message, say about some value not being a valid number, along with mile-long stack trace. Or, worse, it might fail silently and cause downstream data corruption or other issues. It's difficult and annoying to debug these errors and trace them to their origin.
For example:
```typescript
function getDepartmentCode(zoneCode: number)
// Returns: `10`
getDepartmentCode(10023);
// Returns: `NaN`
getDepartmentCode("10023b" as Number);
```
We need not write poorly typed code to generate this kind of error. It might be a result of bad user input or a bad server response.
Suppose we add an assertion to our function, which reports a more developer-friendly error message.
return Math.floor(zoneCode / 1000);
}
// Returns: \`10\`
getDepartmentCode("10023");
// Throws: Error: Department code should be numeric.
getDepartmentCode("10023b");`}
Now we can spot the error more clearly, because it throws an unambiguous exception.
Also, we can quickly and easily pinpoint where in the code this error happened. (For example, find-in-files for the error message will more quickly lead us to its origin.) We can then work out why it happened. For example, which server response or user input caused it.
In conclusion, while type safety is great at compile-time, run-time checks such as assertions are still valuable.
-----
Here's a utility function I wrote, to quickly generate informative assertions. Hope you find it useful!
```typescript
export function assert(
condition: unknown,
message?: string
): asserts condition
}
// assert(true, "Condition should be true") --> Does nothing.
// assert(false, "Condition should be true") --> Throws: AssertionViolationError: Condition should be true
export class AssertionViolationError extends Error
}
```
[Gist: `assert.ts`](https://gist.github.com/jonathanconway/d2578f0b37d72a5c14b6f03de51d671a)
Enum patterns for Typescript2026-02-18T00:00:00.000Ztypescript-enum-patterns> Summary: Typescript's built-in enum structure can be replaced with better patterns. These include an object constant pattern or a class-based pattern. The advantages of these patterns include flexibility over value types, IDE auto-suggest features and encapsulation of methods.
Typescript's built-in `enum` structure is woefully inadequate, to the point that even the Typescript team saw fit to [list pitfalls and alternatives](https://www.typescriptlang.org/docs/handbook/enums.html#const-enum-pitfalls) of `enum` in their documentation.
Two alternative patterns for enums in Typescript are:
- Object constant pattern
- Class with static methods pattern
In this article I will describe each pattern
## Object constant pattern
In this pattern, a `const` is declared, which holds the enum items as key-value pairs of an object. A type for the const is derived using type inference.
Here's the pattern:
```ts
const ≪Enums≫ = as const;
type ≪Enum≫ = TypeOfConst;
```
Note the `as const` on the `const` declaration. This tells Typescript to infer the type of `Enums` by its specific key/value entries, rather than as generic string dictionary. When the `Enum` type is inferred, it will be equivalent of the following:
```ts
interface Enum
```
The implementation of `TypeOfConst` is a very simple one-liner:
```ts
type TypeOfConst = Const[keyof Const];
```
I typically put it in a shared utils file and export it.
### Example
Here's an example for enumerating a few colors:
```ts
const Colors = as const;
type Color = TypeOfConst;
```
We can use the `Color` to access a type that can be one of the values and `Colors.` to access the values themselves.
For example, we can use `Color` as the type of a `backgroundColor` field on an interface definition:
```ts
interface ButtonProps
```
And then set its value using `Colors`:
```ts
const buttonProps: ButtonProps = ;
```
### Advantages
- Flexible values
- Auto-suggest on container and entries
- Easy "go to source" on entries
#### Flexible values
Unlike a simple union of values, with an object const, we can separate the name of each entry from its value. This allows us more flexibility with the values, which can be strings, numbers, objects or any other type that can be assigned.
#### Auto-suggest on container and entries
With an object const, we get nice auto-suggest when we enter dot (".") after the const name.
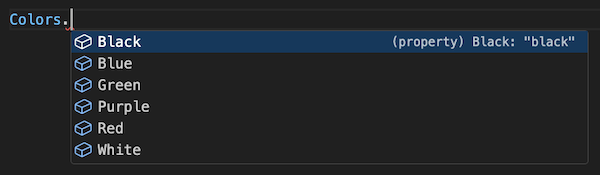
Even better, because the object const itself is named, we can use auto-suggest to find it and import it anywhere.
This wouldn't be possible with a simple union of values.
#### Easy "go to source" on entries
With an object const, we can use our IDE to quickly preview and/or navigate to the const source.
For example, in Visual Studio Code, we can Cmd+MouseOver the const name to see its source in a pop-up, and Cmd+Click to be taken to the source code.
### Disadvantages
- Takes more code to set up
- Functions must be declared outside the enum, and won't be suggested by the IDE
## Class with static fields pattern
In this pattern, a `class` is declared, which holds the enum items as static fields.
Here's the pattern:
```ts
export class ≪Enum≫
getValue()
toString()
}
```
Note that we can encapsulate a method within the enum, which we can call on any entry of that enum.
```ts
const entry1 = Enum.Entry1;
entry1.getValue();
// "value1"
```
### Example
I found a neat example in the [caplin/FlexLayout](https://github.com/caplin/FlexLayout/blob/master/src/Orientation.ts) library:
```ts
export class Orientation else
}
/** @internal */
private _name: string;
/** @internal */
private constructor(name: string)
getName()
toString()
}
```
This example also exploits `static` methods to provide a `flip` method which statelessly transforms one enum value to another.
### Advantages
- All advantages of the Object constant pattern, plus...
- Coupling of methods
- Encapsulation of methods
#### Encapsulation of methods
Methods can be defined on the enum, which have exclusive access to private fields on the enum.
#### Coupling of methods
Methods are strictly coupled to enum entries, rather than sitting outside as separate methods or being loosely defined on value objects. Consumers of the enum can simply type `.` after the enum item to reliably get a convenient list of available methods.

This is in contrast to having to guess or poke into the enum source files.
### Disadvantages
- Learning curve in understanding classes
#### Learning curve in understanding classes
Consumers need some basic knowledge of classes: encapsulation, static methods and private fields.
This might be more suitable for those who understand OO or have a background using classes in other object-oriented languages such as Java or C#.
## Conclusion
I think the ***Object const pattern*** provides a viable enumeration pattern for most use-cases in Typescript should be easy to pick up for a broad range of Typescript developers.
The ***Class with static fields pattern*** provides more advanced usability, such as strictly coupling methods to enum items, but comes at the cost of a small learning curve for developers less experienced in class-based programming.User flows2026-02-18T00:00:00.000Zuser-flows> Summary: User flows help digital teams get on the same page and view the user interface and interactions holistically. User flows are typically made up of screens and components, nodes and connectors and notes and links. Collaboration can take the form of comments and annotation sessions.
When building a digital product on a team of almost any size and composition, I've found it helpful to get a ***complete birds-eye view*** of the user's journey through the product. This kind of view is especially helpful during discussions between engineers, designers and product owners.
Everyone should be on the same page about ***how the how the user will interact*** with the product and ***how the product should behave***.
In this case, just having a collection of screen mockups doesn't quite do the job. We want to see the ***connections between screens*** and how they interact with the user.
In a previous article I discussed [interaction wireframes](/articles/interaction-wireframes) – wireframes that include additional details about parts of the interface (via markers) and connections between screens or parts of screens (via connecting arrow lines with labels).
Recently ***user flows***, a more advanced form of this, have come into vogue. In this article I'd like to describe what user flows are and their benefits.
## Ingredients of a user flow
Here's an outline of a user flow:
And an example – an emoji picker application:
Notice the following ingredients:
1. Screens and components
2. Nodes and connectors
3. Notes and links
Let's dive into each.
## Screens and Components
User flows are screen-centric. Everything revolves around whole screens that users see. We are really trying to see the product as it appears to the end-user.
Desktop and mobile screens might sit adjacent, if the experience is very similar. But in cases where the mobile experience differs significantly from desktop, it's probably better to use entirely separate flows for each.
Screens are high-fidelity mockups – they really look like the real thing. In the "bad old days", it might have been advisable to use lower-fidelity tools such as wireframes and even hand drawings. In some cases these are still useful.
User flows, in contrast, take advantage of more modern tools.
1. ***Design tools*** (such as [Figma](http://figma.com)), which make it easy to create high-fidelity components and quickly assemble them into full screens and
2. ***Collaborative whiteboard tools*** (such as [FigJam](https://www.figma.com/figjam/) and [Miro](https://miro.com)), which allow screens to be quickly assembled into flows, in a real-time collaborative visual space.
Designers can consume ***design systems*** or ***component libraries***, assembling pre-built components (either internal to the organisation or off-the-shelf) into full screens. For example Figma has [Figma components](https://help.figma.com/hc/en-us/articles/360038662654-Guide-to-components-in-Figma).
With component re-use, full fidelity mockups become more effective than wireframes. They look realistic and make it easy for engineers to implement the screens using the natural reusability of frameworks such as React, React Native or Angular.
Using a collaborative whiteboard, designers can more easily communicate designs to engineers, who can also participate in the design, by asking questions, attaching comments to specific parts of the flow and/or participating in annotation sessions.
## Nodes and connectors
Screens can be connected together using ***connectors*** – lines with directional arrows, indicating visually how the user "flows" through the application. Various kinds of ***nodes*** can be inserted between connected screens, to indicate user actions, system events and processes, conditionals and terminators.
### User actions
In the example, I use green circles or ovals for user actions.
The text should be very short, 1-3 words maximum. It should describe a specific user activity, such as "click", "hover", "submit form", etc.
### System events and processes
In the example, I use blue rectangles for system events and processes.
System events triggered by user interaction should be described in brief words or phrases and directly connected to the screen or another node.
Processes are second-order events that are triggered by events, not directly by interactions. I use blue rectangles for these also and connect them to the relevant event. If a process is long-running or a background process, relevant to the screen but not tied to a particular node, I just place it nearby.
### Conditionals and terminators
In the example, I use purple rhombuses for conditionals, such as "if foo then bar else baz".
Conditionals are especially helpful for engineers, who need to understand the pre-conditions for a screen or component to be shown to the end-user.
Terminators indicate the start or end of a flow. I like to use a "person" or "stick figure" symbol for the start, to orient the viewers to the fact that a real person will be going through this flow. I like to use a simple gray circle to mark the end of a flow, with perhaps a link to a subsequent flow or to the main screen.
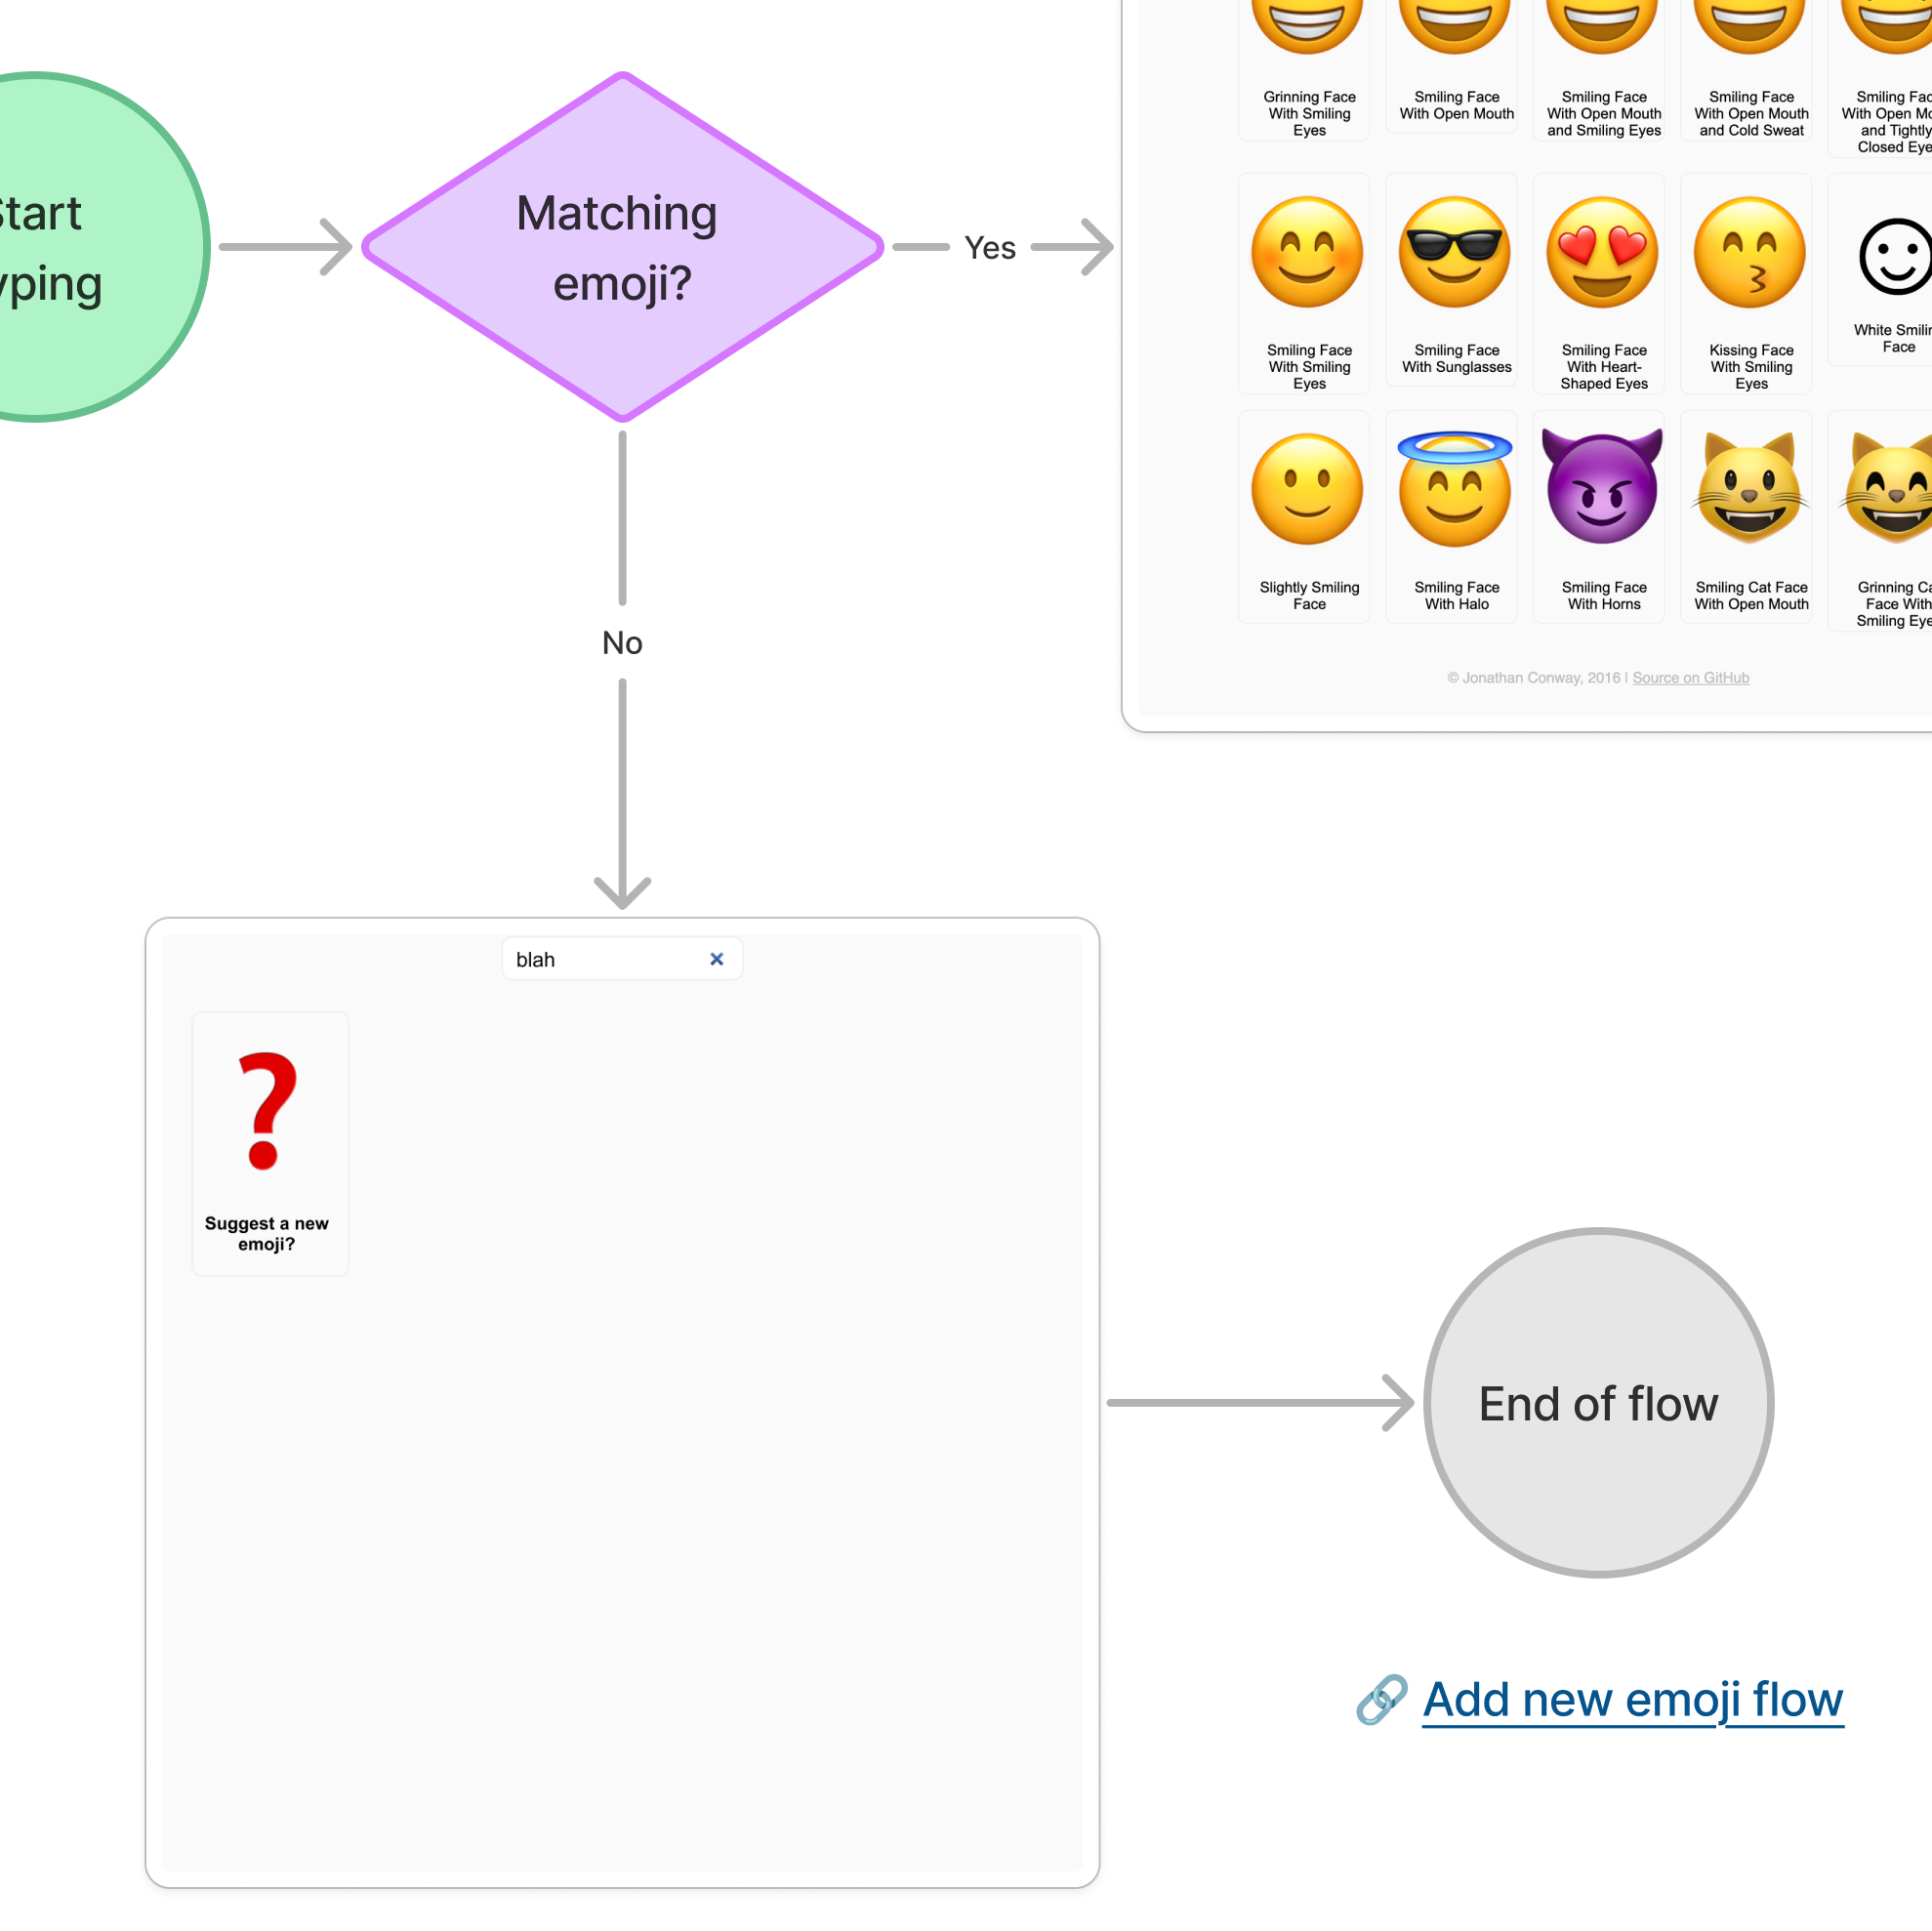
## Optional: Notes and links
Small ***notes*** can be added underneath screens and components to provide additional information such as intended user experience, edge cases and justifications. These might be simply pieces of text underneath a screen or they might be numbered or bulleted lists.
Helpful ***links*** can be added, pointing to resources such as documentation, tasks in the task tracker, other user flows, chat discussions or anything else that's relevant to the screen.
> Aside: I marked Notes and links as "Optional" because it adds some clutter to the whiteboard, which you might prefer to avoid.
## Collaboration with comments and annotations
Team members can add ***comments*** to specific elements in the flow using, say, the [Comment tool in FigJam](https://help.figma.com/hc/en-us/articles/1500004290941-Comments-in-FigJam).
Also the team might run ***annotation sessions***. These are online meetings in which team members take some time to add online sticky notes to parts of the flow, communicating questions, accessibility issues, engineering issues or anything other relevant communication.
## Further reading
- [User flows - Interaction Design Foundation](https://www.interaction-design.org/literature/topics/user-flows)
Visualising execution flows2026-02-18T00:00:00.000Zvisualising-execution-flows> Summary: To understand how a code-base is connected and functions at runtime, we can use execution flows. These map the paths through the code as it executes the code in real life. A rigorous format can map directly to the code-base, enabling an accurate depiction. An appropriate format can be fed into a tool such as Mermaid, to generate a visual flowchart.
Anyone who has spent some time developing software knows writing new code is but a small part of the job. At least as big, perhaps bigger, is **understanding the existing code**. And that includes understanding the **runtime behaviour** of that code!
I often found myself having to understand a complex cluster of code modules, entailing many function calls being made and many data types being passed and returned.
To properly understand the behaviour of the code, I needed to see a whole flow together at once so I could reason about it. I needed to somehow visualise it, e.g. by listing out the function calls in a text editor or maybe drawing a diagram on a piece of paper or in a diagramming application.
After doing this quite a few times, I have started to evolve a more consistent and powerful format, one which is text-based (and so, easy to work on in a standard text editor) but can also be converted to a visual flowchart using a tool called Mermaid.
In this article I want to describe this format and the reasoning behind it.
Execution flow notations can be useful in understanding an existing code-base, troubleshooting bugs, communicating with other team members and for solution design.
But first some background...
## What is an execution flow?
It's helpful to define the concept of "execution flow".
I'm referring to the path that the runtime will take through the code as it executes the code during a real-life use case.
You should not confuse this with a more specific term: **_call stack_**. Since a flow can include multiple function calls in sequence, each producing its own distinct call stack, a flow can include multiple call stacks. Much of the complexity of an execution flow is precisely that calling of multiple functions and the passing of data to them and returning of data from them. So "call stack" is too narrow a term to cover what I'm trying to describe.
On the other hand, you should also not confuse this with a more general term such as **_abstract syntax tree_** or "code structure". We are not describing the code as a whole, but just one path of possible execution of the code. Any piece of code that has one or more conditionals (e.g. `if` or `switch` statement, etc.) will execute differently depending on how those conditionals evaluate. For the same code, different lines might execute depending on the situation (e.g. depending on external state of some kind such as a database, web-service, system clock, etc.). Thus one code base can support multiple execution flows.
## Example of an execution flow
Let's use a hypothetical example – handling a user login on a Java backend.
```java
class LoginResource else
}
}
```
Can you spot the two execution flows in this code?
### Flow 1 - Logging in successfully
First, we have flow when the user's credentials are valid.
Here's that code example again, with the relevant lines highlighted:
else
}
}
`}
1. Inside `login()`, the `if` condition calls `UserAuthProvider::checkUserCredentials`, passing user credentials.
2. `UserAuthProvider::checkUserCredentials` returns `true`.
3. Execution proceeds into the `then` block.
4. We call `SessionProvider::setCurrentUser`, passing user credentials.
5. We return `Response`, passing success parameters.
Notice that this isn't just a single call-stack, as there are actually two method calls in this flow, each of which will generate its own call stack.
1. `UserAuthProvider::checkUserCredentials`
2. `SessionProvider::setCurrentUser`
### Flow 2 - Failure to log in
What if the user credentials are _not_ valid and `isValidUser` returns `false`?
That would be a separate execution flow.
Here's the code example once more, with the relevant lines highlighted:
else
}
}
`}
1. Inside `login()`, the `if` condition calls `UserAuthProvider::checkUserCredentials`, passing user credentials.
2. `UserAuthProvider::checkUserCredentials` returns `false`.
3. Execution proceeds into the `else` block.
4. We return `Response`, passing failure parameters.
## Tools for finding execution flow
So how to we figure out how our code flows in the first place?
We can, of course, just read the code, open various files as needed, and try to follow along in our head.
Thankfully we also have automated tools to help reduce some of the tedium. You'll likely be familiar with these:
- **_Go to definition_** - we can select a reference (function, class, variable, etc) and be taken to its original definition
- **_Find references_** - we can select a definition (function, class, variable, etc) and pull up a list of all points in the codebase which reference the definition
Different IDEs name these differently, but most mainstream IDEs have them in one form or another, including IntelliJ IDEA, VSCode, Visual Studio and xCode.
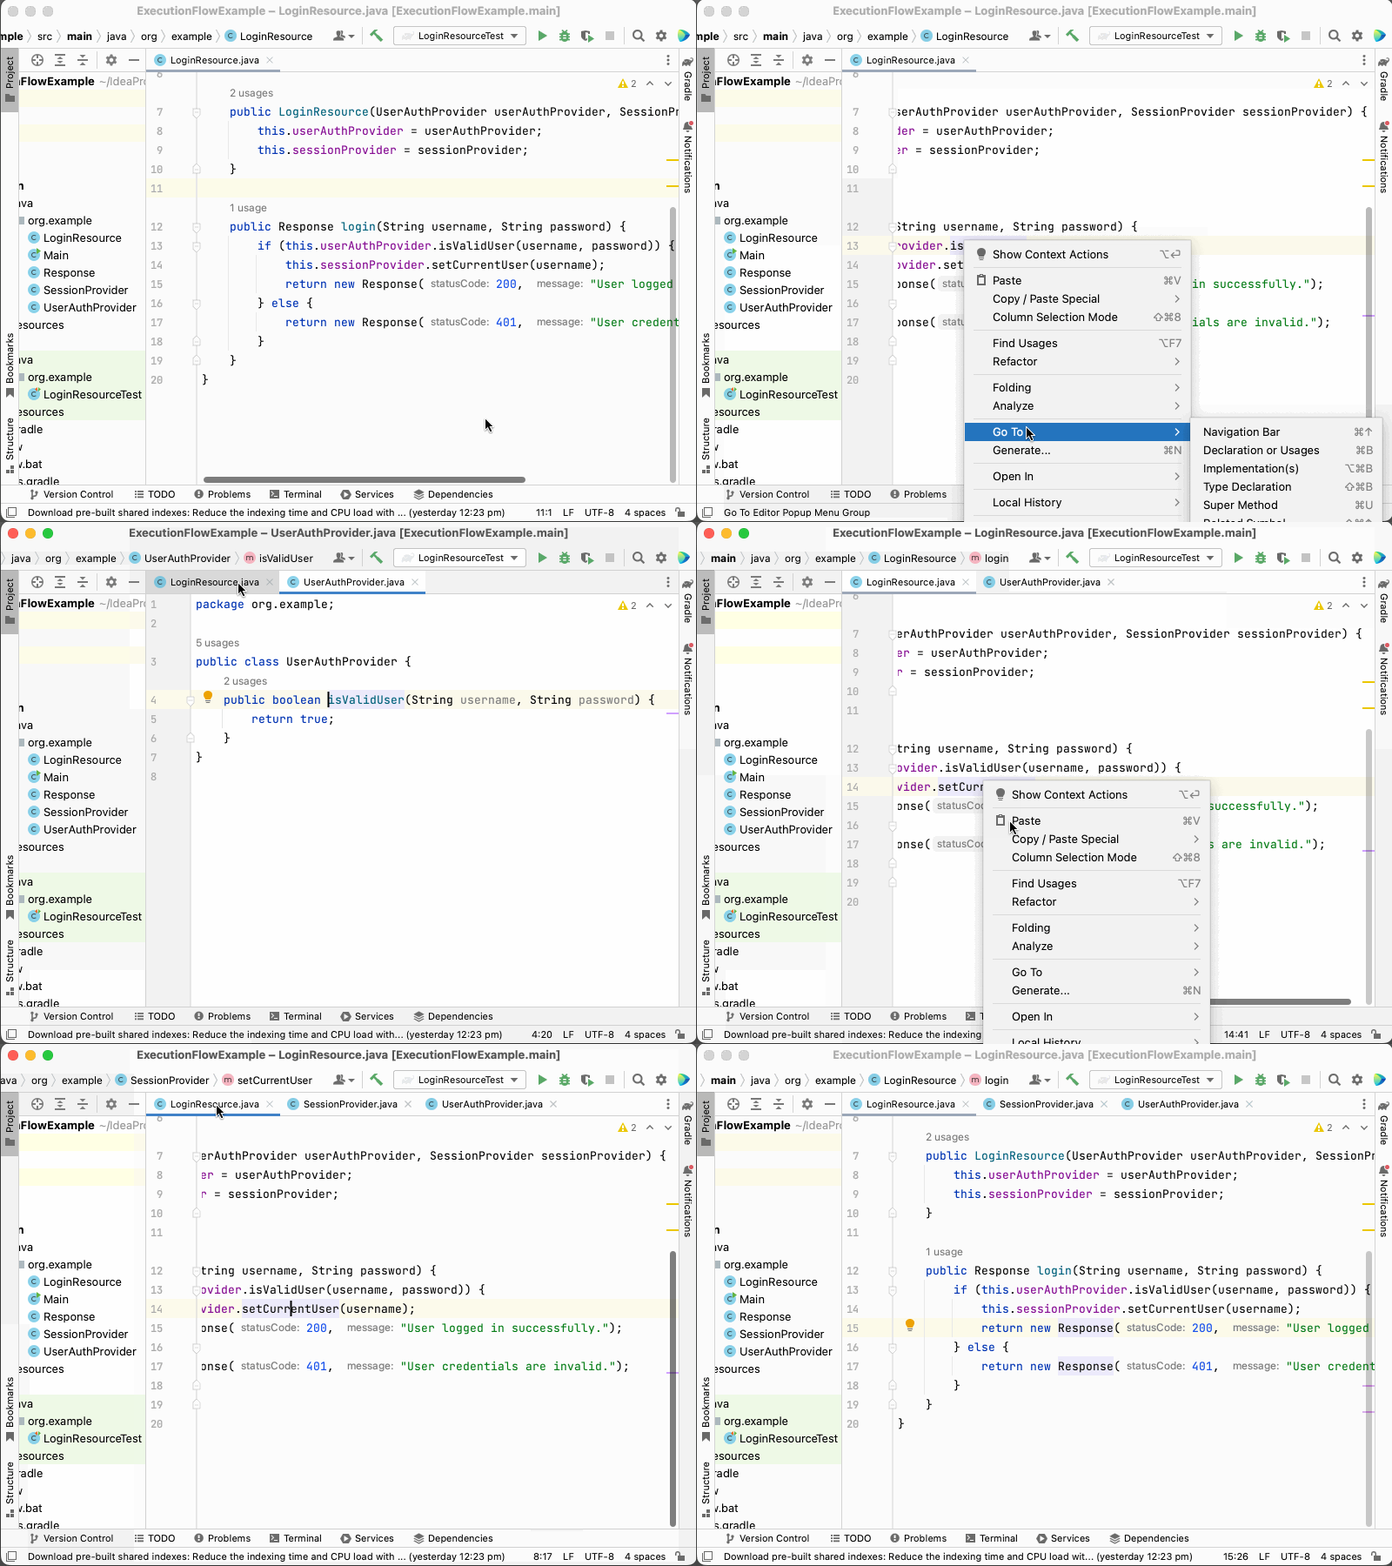
For example, in the code sample given previously, we might use _Go to definition_ to locate the class whose `login` method is being called.
1. Go to the `LoginResource` class and its `login` method.
2. Right-click the `isValidUser` call and select "Go to definition".
3. Observe that it is defined in the `UserAuthProvider` class and its `isValidUser` method.
4. Go back the `LoginResource` class and its `login` method.
5. Right-click the `setCurrentUser` call and select "Go to definition".
6. Observe that it is defined in the `SessionProvider` class and its `setCurrentUser` method.
7. Go back the `LoginResource` class and its `login` method.
8. Observe that a new `Response` object is constructed.
We might want to find out where else the `UserAuthProvider::isValidUser` method is called.
Supposing there was a `RegisterResource` class having a `register` method, as shown below:
else
}
}
`}
Then we might locate this piece of code by using the _Find references_ tool:
1. Go to the `UserAuthProvider` class and its `isValidUser` method.
2. Right-click the `login` method and select "Find usages".
3. Observe that it is called in the `LoginResource` class, in its `login` method.
4. Observe that it is also called in the `LoginResource` class, in its `register` method.
5. Observe that a new `Response` object is constructed.
## Describing with text
Suppose we wanted to make some notes of the execution flows we discovered. Maybe there are too many for us to easily memorise. Perhaps we want to see them all in one view rather than scattered among many files.
Let's start with the first flow – successful login:
```mermaid
flowchart
LoginResource::login
--->|userName,password| UserAuthProvider::isValidUser
---|true| LoginResource::login
--->|userName,password| SessionProvider::setCurrentUser
--- LoginResource::login
--->|200,'Login succeeded.'| Response::constructor
```
Then the second flow – successful login:
```mermaid
flowchart
LoginResource::login
--->|userName,password| UserAuthProvider::isValidUser
---|false| LoginResource::login
--->|401,'Login failed. Invalid credentials.'| Response::constructor
```
And the final flow – register:
```mermaid
flowchart
LoginResource::register
--->|userName,password| UserAuthProvider::isValidUser
---|true| LoginResource::register
--->|200,'Login succeeded.'| Response::constructor
```
Now we can step back and look at all these flows together and see the bigger picture, e.g. how login and register both check user validity using `UserAuthProvider`, and how both instantiate the Response class with various constructor parameters.
> ### Aside: Sketching execution flows
>
> Observe that we don't have to cover the flows exhaustively, nor do we have to limit our coverage. We can cover just the parts of code that we are concerned with, based on our current goal, e.g. to solve the current bug or to learn more about a specific part of the code-base. We can make a kind of "partial sketch" of the parts of the execution flows that interest us.
> For example, we don't cover how login and register are called, and we don't cover which further calls are made by UserAuthProvider, SessionProvider or Response, if those parts of the code don't interest us.
> And if we are dealing with a bug in which isValidUser incorrectly returns false, we can focus more on isValidUser and which methods it calls.
## Notation
Did you notice the textual format used in the previous section to notate the execution flows?
Let's deep-dive into that.
```mermaid
flowchart
Class::methodCalling
--->|parameters| Class::methodBeingCalled
---|return values| Class::methodCalling
```
- `Class::methodCalling` - the caller
- `--->|parameters|` - execution flowing from caller to callee, with the parameters being passed in the call
- `Class::methodBeingCalled` - the callee
- `---|return values|` - execution flowing from callee back to caller, the value returned from the callee
- `Class::methodCalling` - the caller (again)
We can chain these together to notate a sequence of consecutive calls.
For example:
```mermaid
flowchart
Class1::method
--->|parameters| Class2::method
--->|parameters| Class3::method
---|return values| Class2::method
---|return values| Class1::method
```
## Closures and indirection
Thusfar we've use the `Class::method` format to reference the callers and callees. This should work reasonably well for classical OO code-bases written in Java, C#, Swift etc.
But what if we want to reference code in other ways, such as named closures, for languages written in Javascript, Typescript, etc.?
Here are some notations that could allow such structures to be referenced:
### Nested closure
foo/bar - Reference a closure witin another closure.
### Indirect call
-.-> - References an indirect method call - a call which our code doesn't make directly, but causes to be made, such as calling `setTimeout` on a function in Javascript. It looks like a dotted line.
### Example in Javascript
Let's use an example – a recursive Javascript function – to put all these ideas together.
```javascript
function retry(action, times, count = 1)
}, timeout);
}
```
`retry` is a recursive function, which calls `setTimeout`, passing a closure. That closure executes. Depending on the number of times `retry` has called itself already (`time`), it may call `retry` again or simply do nothing, halting the recursion.
We can notate this execution flow, including the closure, using the nested closure, multiple calls, row/column and indirect call notations given above, in the following manner:
```mermaid
flowchart
retry
-.->|action, times=3| retry/handleTimeout
---> action
---|false| retry/handleTimeout
--->|action, times=3, 2| retry
-.->|action, times=3, count=2| retry/handleTimeout
---> action
---|true| retry/handleTimeout
---retry
```
## Visualising with Mermaid
Now the juicy part – lets look at how this format can be instantly converted into a visual flowchat using Mermaid!
[Mermaid](https://mermaid.js.org/) is a free, open-source tool, which takes code written in a specific syntax and converts it into a diagram.
You can run Mermaid in the browser using [Mermaid Live](https://mermaid.live/), or if you prefer, you can download and run it locally using the instructions on the [mermaid-live-editor](https://github.com/mermaid-js/mermaid-live-editor) GitHub profile.
We'll need to add the keyword graph to the top of the text.
Also, in these examples, we add numbered circular nodes (e.g. ---n1((1))) to indicate the order of execution.
The following is how our two earlier Java examples – login success and login failure – render in Mermaid:
```mermaid--svg
%% @description Login success flow example rendered by Mermaid
graph
LoginResource::login
---n1((1))
--->|userName,password| UserAuthProvider::isValidUser
---n2((2))
--->|false| LoginResource::login
---n3((3))
--->|401,'Login failed. Invalid credentials.'| Response::constructor
---n4((4))
---LoginResource::login
```
```mermaid--svg
%% @description Login failure flow example rendered by Mermaid
graph
LoginResource::login
---n1((1))
--->|userName,password| UserAuthProvider::isValidUser
---n2((2))
--->|false| LoginResource::login
---n3((3))
--->|401,'Login failed. Invalid credentials.'| Response::constructor
---n4((4))
---LoginResource::login
```
And here's the Javascript example:
```mermaid--svg
%% @description Javascript recursive function example rendered by Mermaid
graph
retry
---n1((1))
-.->|action, times=3| retry/handleTimeout
---n2((2))
---> action
---n3((3))
---|false| retry/handleTimeout
---n4((4))
--->|action, times=3, 2| retry
---n5((5))
-.->|action, times=3, count=2| retry/handleTimeout
---n6((6))
---> action
---n7((7))
---|true| retry/handleTimeout
---n8((8))
---retry
```
Notice that we've added small numbered circles, indicating the order in which the calls occur. This makes the flow a bit easier to navigate.
Imagine this appearing in a Slack conversation:
It could potentially be easier to read and follow an execution flow diagram than to read paragraphs of text trying to describe in plain language the complex sequence of calls.
> ### Aside: Asynchronicity and concurrency
>
> Though we touched on async in the Javascript example with the setTimeout call, we haven't fully addressed the issue of describing asynchronicity or concurrency in execution flows.
> This is probably a fairly deep topic that deserves a dedicated article. However I have no doubt it can be represented diagrammatically, as long as a strict convention is adhered to.
## Isn't this just a flowchart?
Yes, but it's a **_specialised_** form of flowchart, focussed on representing execution flow.
The flowchart directly maps to the code it represents, so it accurately and unambiguously conveys information about that code. At the same time, because it's not actually code, but a diagram, it allows us to more easily view and reason about the code in terms of execution flows specifically. We don't have to jump around between files, scroll up and down, etc. but can see a whole execution flow in one screen.
Also by establishing and adhering to a convention in how we represent callers, callees, parameters and return values, etc. this flowchart technique is re-usable across programming languages, codebases, business domains, etc. A similar versatility is found in UML, sequence diagrams and other kinds of specialised diagram formats.
## Sequence diagrams
You might have seen diagrams similar to those described here, but laid out as sequence diagrams. Execution flows can certainly be visualised as sequence diagrams. A sequence diagram is arranged as a set of vertical columns connected by arrows, where each column represents a method and each arrow represents a call.
There are weaknesses of sequence diagrams, however.
- They present each method in a column, so we may soon run out of horizontal space, whereas flowcharts can flow **_down and across_**. Also, even for lengthy flowcharts, scrolling up and down is easier on most devices than scrolling side-ways.
- They may position the caller and the callee very far apart, so that the eye has to scan back and forth over a large distance to see the call, whereas flowcharts can more position the caller and callee closer together, making scanning easier.
For these reasons, I find the flowchart format more appealing.
## Automatic generation
Surprisingly, not really.
For dependency visualisation, I found a [few](https://marketplace.visualstudio.com/items?itemName=sz-p.dependencygraph) [interesting](https://marketplace.visualstudio.com/items?itemName=lilinhao.vscode-pylonn) [plugins](https://marketplace.visualstudio.com/items?itemName=CodeLogic.vscodecape) for VSCode, and also experimented with [IDEA's dependencies analysis](https://www.jetbrains.com/help/idea/dependencies-analysis.html) tool.
However, all of these tools are focused on reporting **_compile-time dependencies_**, which are a different kind of thing to **_execution flows_**.
Dependency graphs of course help us to understand how code is structured, but they don't give us the full picture of which parts of that code execute in which order at runtime. For that, we really need execution flows.
Theoretically any tool that could automatically report execution flows would need to be able to analyse the code in terms of its expected execution at runtime. The tool might, like a debugger, execute the code, in order to determine the flow of control, e.g. where the flow of control depends on some state which can only be discovered at runtime. Or it could statically analyse the code to determine all possible flows and generate a report of all of them.
It's beyond the scope of this article to look into how such a tool could be developed, but it's something I'm interested in looking into and perhaps even undertaking myself.
> ### Aside: Use of ChatGPT
>
> My experimentation with ChatGPT yielded promising results.
> The LLM (Large Language Model) tool was able to generate a flowchart with labels in plain-English in both ASCII and Mermaid formats.
> The flowchart did accurately follow the flow of the code. However, it did not use the format I described above, which is intended to directly map to elements in the code (function names, variable names, etc).
> With some more training of ChatGPT, more detailed prompts or a more customised LLM tool than ChatGPT, perhaps it will be possible in the near future for a chat-bot to generate execution flows automatically. That would be cool!
## Conclusion
This article has outlined a format for describing execution flow, which can be used to visualise and understand how parts of a codebase execute at runtime (and generate diagrams).
This understanding can help to diagnose bugs/errors, determine the best points at which to change the code, estimate how long changes might take, and no doubt many other use cases.
I hope you find it useful!
## Further reading
These books inspired this article:
- [_The Pocket Guide to Debugging_](https://jvns.ca/blog/2022/12/21/new-zine--the-pocket-guide-to-debugging/) • Julia EVANS
- [_UML Distilled_](https://www.martinfowler.com/books/uml.html) • Martin FOWLER
Why write?2026-02-18T00:00:00.000Zwhy-write> Pull-quote: “Writing is God's way of telling you you don't know what you're talking about.”
>
> – Paul JOHNSON • [Interview at Fordham Investments Club](https://www.youtube.com/watch?v=9-NcaJdC1TQ)
> Pull-quote: “If nobody read my blog post, I'm still Ok with that, because I got something out of this: an understanding.”
>
> – Aswath DAMODARAN • [Interview on Personable](https://www.youtube.com/watch?v=8Q2Am37pagk)
Why do I write [articles](/articles), [micros](/micros), [commentaries](/commentaries), etc.?
Why do anything – the first reason is **for fun**!
I don't have a massive audience, so my writing is mostly for myself, though I hope others will find it useful.
It's definitely helpful for learning and understanding concepts. [Studies on learning](https://www.frontiersin.org/journals/education/articles/10.3389/feduc.2021.581216/full) show that **Elaborative Interrogation** (generating an explanation of a fact or concept) and **Self-Explanation** (where the student explains how new information is related to already-known information) help moderately with learning. Writing triggers me to perform both kinds of activities.
Additionally I sometimes share pieces of what I've written with others, to get their critical viewpoint. These critiques help me correct errors in my own knowledge or thought process.
Why do you write? Tell me in the comments!
## Further reading
- [Blog: Blogging myths you should care about • Anton ZHIYANOV](https://antonz.org/blogging-myths/)